• HOME
  • RELATIONSHIPS
  • HOLIDAYS
  • WELLNESS
  • CAREER & FINANCE
  • FASHION
  • BEAUTY
  • LIVING

Advice From Nobody

You are here: Home / Archives for AdviceFromNobody

Self Tanning Aftercare: Best Moisturizer to Use After a Spray Tan

Filed Under: Body //

best lotion to use after spray tan

Why Moisturize After Tanning?

Moisturizing after a spray tan is essential to keeping your bronzed glow.

It extends the duration of your tan, keeping your natural-looking tan for longer.

Foregoing the lotion after tanning causes faster fading and uneven patchiness, undermining the effort you put into achieving that perfect tan.

This basic aftercare step not only seals the deal on your self-tan but also hydrates your dry skin, nurturing its overall health and texture.

  • What’s The Best Time To Tan Before or After My Workout?
  • Will Spray Tanning Protect You From a Sunburn?
  • Does Self-Tanning Lotion Expire? +How To Make It Last Long

Ingredients to Look For and Avoid

Finding the best lotion after tanning relies on understanding the key ingredients that nurture your skin.

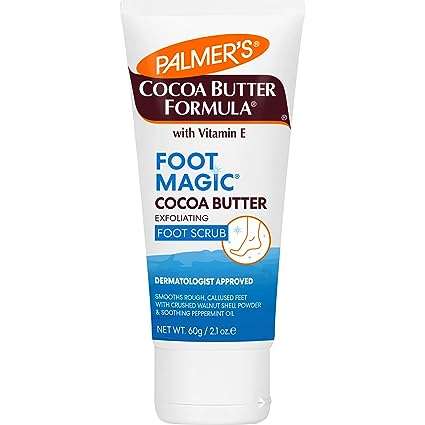
Shea, vitamins, cocoa, and aloe vera stand out for their hydrating powers. They ensure your skin remains supple, enhancing the tan’s longevity.

However, steer clear of lotions with exfoliating agents and mineral oil. These ingredients might affect your tan by peeling away the self tanner prematurely.

Emphasizing hydration without stripping the skin is essential for the best moisturizer for after tanning, ensuring a radiant, lasting tan.

  • Should You Shave Before Or After You Fake Tan
  • What to Wear During & After a Spray Tan
  • Can You Use Indoor Tanning Lotion Outside?

Top Recommended Moisturizers

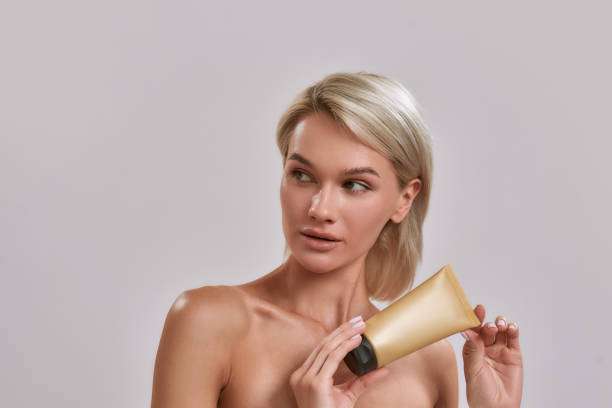
After getting in a spray tan, picking the best moisturizer for after tanning becomes paramount.

This choice ensures the longevity of your sun-kissed glow.

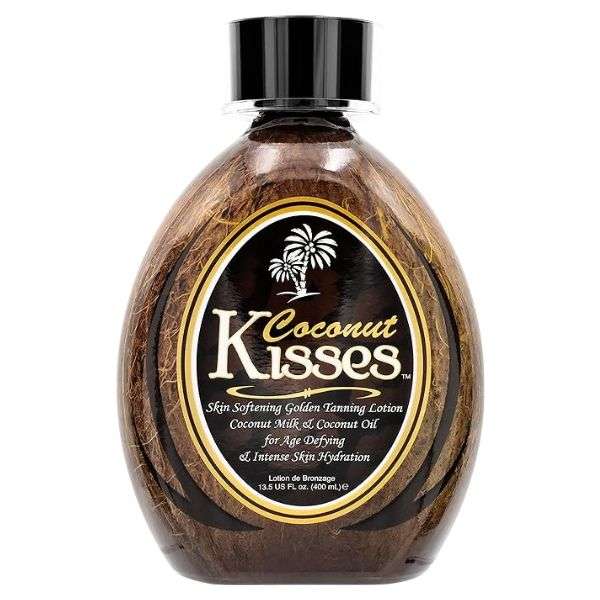
Among the best lotions to use after a spray tan, Hempz Original Herbal Body Moisturizer, and Aveeno Active Naturals Daily Moisturizing Lotion stand out for their hydrating ingredients.

Vaseline Intensive Care Body Lotion and SheaMoisture Coconut & Hibiscus Deep Moisturizing Lotion also make the list.

Each product, rich in essential nutrients like shea, vitamins, cocoa, and aloe vera, promises to nurture your skin without compromising your tan.

Remember, these are not tan extenders but the best moisturizers for spray tan care.

  • Everything You Need To Know About Tanning & Laser Hair Removal
  • Self-Tanning Lotion Vs. Sunless Spray Tan: Which Is Best?
  • The Best Way to Tan Legs in a Tanning Bed or Sun Fast

How To Extend Your Self-Tan

Choosing the best lotion after tanning isn’t just a step; it’s important to how long your spray tan will last. The right moisturizer for spray tan acts like a sealant, locking in the color and preventing premature fading.

Your skin, now bright with color, deserves the best moisturizer for self-tanning, something designed to work with your tan, not strip away your new color.

Keeping your skin moisturized is super important for locking that spray tan in.

Pin For Later!

[jetpack-related-posts]

Can You Use Indoor Tanning Lotion Outside?

Filed Under: Body //

can you use tanning bed lotion outside

When looking for that perfect tan results many of us have had the idea of using indoor tanning lotions outside.

It might seem like a great tan is just a bottle away, whether you’re stepping into a tanning salon or lounging by the pool.

However, not all self-tanning lotions are made equal, and those designed to work outside, do not work well in direct sunlight.

In this blog post we aim to answer that very question, Can you use tanning bed lotion outside?

What Is Indoor Tanning Lotion Used For?

Indoor tanning lotions, or indoor lotions, are made to be used in a controlled environment.

Designed to intensify the effects of UV light, these lotions stimulate melanin production, giving you a deeper tan.

Unlike their outdoor self-tanning lotion, which works to protect the skin, indoor tanning solutions enhance your body’s natural tanning process.

They often contain ingredients like coconut oil, vitamin E, and aloe vera to nourish the skin, but notably lack sun protection factors, making them unsuitable for direct sunlight exposure. 

  • What to Wear During & After a Spray Tan
  • Everything You Need To Know About Tanning & Laser Hair Removal
  • Does Self-Tanning Lotion Expire? +How To Make It Last Long

What Is The Difference Between Indoor And Outdoor Tanning Lotion?

The differences between indoor tanning lotions and their outdoor counterparts are very obvious. 

Indoor lotions are made to be used in controlled environments, focusing on melanin production and often lacking in sun protection factors.

They work wonders in a tanning salon under UV light but fall short in direct sunlight.

On the other hand, outdoor lotions are equipped with broad-spectrum sunscreen, offering protection against both UVA and UVB rays, essential for safeguarding your skin from harmful UV rays.

This difference is important in choosing the right tanning lotions to avoid too much or not enough UV exposure.

  • Self-Tanning Lotion Vs. Sunless Spray Tan: Which Is Best?
  • Should You Shave Before Or After You Fake Tan

Does Sunbed Tanning Lotion Work In The Sun?

Wearing indoor tanning lotions before stepping under the sun may seem like a great idea, but that could cause you more harm than good.

Most tanning products meant for a UV bed do not have SPF protection, leaving your skin defenseless against direct sunlight’s harsh beams.

These lotions won’t do much without a tanning bed.

They’re crafted to accelerate melanin production under controlled UVA rays, not the unpredictable UV spectrum outdoors.

Using them under the sun is a dangerous gamble with your skin’s health, ramping up the risks for burns and long-term damage.

Mixing the lack of sun protection of indoor lotions with the hot steaming sun is just a no-no! 

  • Self Tanning Aftercare: Best Moisturizer to Use After a Spray Tan
  • The Best Way to Tan Legs in a Tanning Bed or Sun Fast

Is There Sun Protection In Tanning Bed Lotions?

Most indoor tanning bed lotions are sunless tanners, which means they do not have any SPF protection.

These lotions are made to be used in a controlled environment, using UV light to give you a darker tan, not to ward off the sun’s rays.

The absence of broad-spectrum sunscreen exposes your skin to potential risks, including the acceleration of skin damage and an increased likelihood of skin cancer.

So no, there is no sun protection in tanning bed lotions, they are meant to be used as sunless tanners.

  • What’s The Best Time To Tan Before or After My Workout?
  • Will Spray Tanning Protect You From a Sunburn?

Are There Any Benefits To Indoor Tanning?

Indoor tanning has its upsides. It allows for melanin production, leading to a desired golden glow without having to rely on the unpredictability of the sun.

This method often includes products like tanning intensifiers and accelerator lotions designed specifically for UV beds.

These aim not only for a darker tan but also to condition the skin, thanks to ingredients such as aloe vera and coconut oil.

It’s important to remember that indoor lotions should pair with sunscreen lotion when stepping outdoors to protect you against sun damage. 

  • How to Apply Self-Tanner Properly: 12 Sunless Tanning Tips

What Is The Best Tanning Lotion For Sunbeds?

Finding the best tanning lotion for sunbeds might have seemed like a hard task.

From tingle lotions promising a deep, sun-kissed glow to those with natural ingredients like aloe vera and coconut oil.

Over time as I tried many different tanning lotions, Devoted Creations stood out as one of the best outdoor tanning lotions for its blend of tanning accelerators and bronzers, plus its skin-nourishing vitamin E and glycol stearate SE.

This lotion, ideal for a range of skin types, helped many achieve their desired golden glow without risking skin damage. A second contender for me is the coconut kisses golden tanning lotion. Either one of these indoor tanning lotions will give you that perfect natural-looking tan.

Can You Use Indoor Tanning Lotion Outside?

How Best To Use An Indoor Tanning Lotion Outdoors

can you use tanning bed lotion outside

Using an indoor tanning lotion outside is an absolute no, these lotions lack SPF protection that’s important for screening out the sun’s harmful UVA and UVB rays.

Now, should you find yourself without any outdoor tanning lotion and you’re going out by the pool, there’s a workaround.

Combine your indoor lotion with a broad-spectrum sunscreen. This duo will ensure your skin gets a golden glow while protecting it against direct sunlight and UV radiation.

It’s not perfect, but it’s a stopgap for maintaining that beautiful tan without risking sun damage or skin cancer. 

The Risks of Misusing Tanning Lotions

There is a great risk when switching out your indoor tanners for the outdoors, which is the increased risk of skin cancer and premature aging. 

Dry skin needs to stay hydrated, yet, when exposed to direct sunlight with only an indoor lotion, your skin gets further dried out.

These products do not contain any SPF protection required to protect against harmful UVA and UVB rays, thereby increasing the chances of skin damage.

So, this one mistake that you thought would give you a deeper tan, might just accelerate aging,  causing wrinkles and fine lines far sooner than you would like. 

How To Tan Safely

Self-tanners are by far the safest way to tan, offering an amazing color without UV warfare.

If these are not your speed, broad-spectrum sunscreen is for you, coupled with sun tanning this is another great option. It’s a winning combo for your skin. 

Can I Mix Indoor And Outdoor Tanning Lotion?

Can you mix indoor and outdoor tanning lotion? It may seem like a good idea at first.

After all, combining the deep hydrating properties of indoor lotions with the sun protection factors of outdoor lotions might offer the best of both worlds.

Each type of lotion serves a specific purpose, designed for specific uses. Indoor tanning lotions, rich in ingredients like aloe vera and coconut oil, focus on melanin production under UV light in a controlled environment.

They lack water-resistant sunscreen, which is essential for outdoor activities.

While, outdoor tanning lotions block harmful UV rays, often containing broad-spectrum SPF protection to shield your skin from premature aging and skin damage.

Combining these lotions won’t guarantee better protection; you might end up minimizing the effectiveness of both. For that beautiful tan without the negative effects, choosing the right product is important. 

Choosing The Right Product For Outdoor Tanning

Finding the perfect product for sun tanning involves steering clear of indoor tanning lotions.

These are not equipped with SPF protection, leaving your skin vulnerable to harmful UV rays.

Devoted Creations may promise a sun-kissed glow or a deeper tan, but without SPF, you’re exposing yourself to potential risks like skin cancer and premature aging. 

Outdoor lotions, however, are made with sun protection in mind.

They often contain ingredients like aloe vera, vitamin E, and coconut oil, which not only protect but nourish your skin.

Whether you go for a broad-spectrum sunscreen or a specific outdoor tanning lotion, ensure it offers protection against UVA and UVB rays.

This is crucial for preventing skin damage while achieving that beautiful tan. 

The best option for outdoor activities is always a water-resistant sunscreen with an appropriate SPF level. It’s the best way to enjoy the sun safely.

Keep this in mind: a golden glow should never come at the expense of your health. Choose wisely, and you can have both a beautiful tan and healthy skin. 

My favorite outdoor tanning lotions are the Australian Gold Bronzer Accelerator and the Maui babe Browning Lotion. They both offer great tanning power while protecting your skin from the sun.

can you use tanning bed lotion outside

Pin For Later!

[jetpack-related-posts]

The Best Way to Tan Legs in a Tanning Bed or Sun Fast

Filed Under: Body //

how to tan legs in tanning bed

Achieving that perfect, fake tan can be a hard task, especially when it comes to our legs.

For many of us, they just seem to resist the tanning process, stubbornly remaining paler than the rest of our body.

This has led to countless hours in the tanning salon, under UV rays, or basking in natural sunlight, all in pursuit of even, flawless tan legs.

But, there’s hope. With the right approach, you can get the best tan for your lower legs, that complements the rest of your body perfectly. 

Understanding the unique challenges your legs face during the tanning session is important for getting that great tan.

They have less melanin, making them harder to tan. Dry skin and the buildup of dead skin cells can make it even harder on the tanning process.

By mastering the art of tanning your legs, you can get a better tan whether you use sun beds or tanning lotions in the sun. 

Why Don’t Legs Tan As Much As The Rest Of My Body?

Have you ever wondered why, after a tanning session, your legs don’t seem to match the rest of the body?

This leads many to the tanning salon, seeking the best results from their UV light therapy or spray tan. This is caused by the natural composition and behavior of skin on different parts of the body.

Legs, especially, have less melanin production compared to other areas which makes the tanning process for them unique. 

Dry skin is more prevalent on the lower legs, making it harder for them to retain the kind of tan you might achieve on your upper body.

This is further compounded if you have fair skin, where the base tan is already lighter, requiring more careful management of tan lines and evenness.

Plus, dead skin cells can build up, providing yet another barrier to those UVB rays we sometimes rely on. Yet, understanding these challenges allows us to change our approach.

With a focus on removing dead cells through proper exfoliation and moisturizing the skin, we can enhance blood flow, improve melanin production, and therefore, absorb more of the tanning energy we so need. 

So, next time you prep for a sunbed session or decide to go sun tanning, remember to prep your legs. With dedicated care, achieving that glowing, even, and healthy tan will be so much easier. 

How To Tan Legs In Tanning Bed

Preparing your legs for a tanning session demands attention to detail.

First, you need to get rid of dead skin cells using a high-quality exfoliator. This not only gives you a clear canvas for UV rays to work their magic but also promotes blood flow, enhancing the production of melanin.

Following this, make sure to hydrate your skin. A moisturizer rich in Vitamin E helps in maintaining soft skin, ensuring the UV light penetrates evenly and deeply. 

Correctly positioning your legs in a tanning bed is also important. You must aim for a posture that exposes all parts of your legs equally to the UVB rays.

Occasionally adjusting your position makes sure no tan lines form, giving you a flawless tan. It’s also wise to employ tanning accelerator creams, designed specifically for leg tan.

These products amplify UV absorption, securing a rich, golden tan. 

When looking to get that natural-looking tan for sexy legs, you should gradually increase how long your tan as well as how often.

Start with short, and far between tanning bed sessions, and watch how your legs react. This gives you a healthy tan without risking skin damage or burns.

  • What to Wear During & After a Spray Tan
  • Everything You Need To Know About Tanning & Laser Hair Removal
  • Does Self-Tanning Lotion Expire? +How To Make It Last Long

Common Tanning Bed Mistakes to Avoid

When tanning beds are not used right, the skin of the legs tends to suffer more than the rest of the body.

Overlooking the importance of even coverage from UV light exposure often leads to tan lines or uneven shades.

You might think spending long hours under UV rays guarantees better tanning results. It doesn’t. It only boosts the risk of skin cancer and causes premature aging. 

Skipping exfoliation is another mistake you’ll want to avoid. Dead skin cells can block UV radiation, leading to patchy tans, did anyone say leopard print?

Make sure you’ve exfoliated, especially on parts of your body like the lower legs that have thicker skin, to prepare you for an even tan. 

And one of the most important things to consider is proper hydration. Dry skin reflects UV light and does not absorb it.

Applying a high-quality indoor tanning lotion can make all the difference. It keeps your skin soft and ready to soak up all that tanning energy. 

  • Self-Tanning Lotion Vs. Sunless Spray Tan: Which Is Best?
  • Should You Shave Before Or After You Fake Tan

The Best Tanning Lotion For Legs

Achieving that sun-kissed glow on your legs requires more than just spending time under UV rays or in a tanning bed. It demands the right tanning product to speed up the tanning process.

We’ve gathered the best lotion types designed for leg tanning to ensure maximum absorption of UV light and promote even melanin production. 

A tan accelerator is highly recommended.

These lotions are infused with ingredients that stimulate your skin’s melanin production, allowing for a deeper tan with less UV exposure. 

Carrot Sun is a favorite among tanning experts, packed with natural ingredients that not only boost melanin but also nourish the skin.

Another key product to include in your tanning routine is a gradual tanning lotion.

Ideal for fair skin or parts of the body like the legs that may tan more slowly, these lotions build a base tan over time, reducing the contrast between tanned and untanned areas. 

 When it comes to sunbed sessions, opt for a high-quality indoor tanning lotion.

These products, rich in moisturizers and vitamins like Vitamin E, prepare your dry skin for UV light exposure, increasing blood flow to deliver essential nutrients and oxygen to the skin of the legs. A tan extender should follow up every tanning session.

These lotions maintain hydrated soft skin, extending the life of your golden tan. 

How Can I Tan My Legs Fast In The Sun Naturally?

how to tan legs in tanning bed

Tanning your legs fast under the sun’s natural glow is an easy task. First off, clearing away dead skin cells is important.

A good exfoliation session before sun tanning rids layers of dry skin that obscure fair skin from the kiss of UV rays. 

Next, increase the blood flow to your legs, activities like a brief walk or light jog get the blood pumping, enhancing the tanning skin response to sunlight. It’s fascinating how increased circulation can pave the way for a more even tan. 

Once you’ve prepped, finding the perfect spot under the natural sunlight is your next step. Make sure the sun’s beams graze your legs directly.

Here, the angle of your body and parts of your body receiving sunlight matters. Switch positions every 20-30 minutes to prevent tan lines and achieve an all-around golden tan. 

Post-sunbathing, moisturizing is just as important as the tanning itself. Make sure to coat your skin with Vitamin E and natural ingredients to soothe and hydrate your skin.

This will not only preserve your lovely tan but also promote healthy, soft skin. 

  • Self Tanning Aftercare: Best Moisturizer to Use After a Spray Tan
  • Can You Use Indoor Tanning Lotion Outside?

How To Make Your Tan Last Longer

After hours spent under UV rays, either in a high-pressure tanning bed or tanning under the sun, proper aftercare is important to lock in that sexy tan and ensure your skin remains healthy. 

First off, moisturizing should be the first thing you do. UV exposure can leave your skin dry.

Choose a moisturizer rich in natural ingredients, like Vitamin E, which not only nourishes the skin but also helps in maintaining a long-lasting tan.

Hydrated skin retains tans better and for longer, transforming your efforts into a stunning, even tan across every part of your body. 

Next, consider investing in a quality tan extender. These specially formulated lotions work by providing gradual tanning lotion benefits, slowly deepening your natural tan while keeping the skin soft. For best results, apply after every shower. 

By following these aftercare tips, rest assured, your efforts will result in a healthy, gorgeous tan that stands the test of time. 

  • What’s The Best Time To Tan Before or After My Workout?
  • Will Spray Tanning Protect You From a Sunburn?

FAQ on Tanning Your Legs

Frequently asked questions around the topic of achieving that perfect leg tan, whether it’s within the controlled environment of a tanning bed or under the golden rays of natural sunlight.

The allure of bronzed legs can tempt anyone into a tanning salon, but a few questions often stand out. 

  • How long does a leg tan last? Generally, a tan on the legs lasts for about 7 to 10 days. However, this can extend if you practice proper aftercare. Make sure your skin remains hydrated and nourished to prolong the effects of your tanning session.
  • How can I tan my legs naturally? For those longing for a natural tan, while avoiding stepping foot in a tanning salon, the sun’s ultraviolet rays serve as a natural tan accelerator. Start with early spring sessions, progressively extending your sun exposure to develop a base tan. Tips for the best results include using sunscreens to protect your skin while enhancing its natural tanning capacity. Additionally, engaging in exfoliation sessions removes dead skin cells, which can otherwise block the sun’s tanning energy. This makes way for an even tone throughout. 
  • Why are legs the hardest to tan? The skin on your legs lacks as much melanin production capacity as the rest of your body, making them less responsive to UV rays from the sun or a tanning bed. Moreover, tighter clothing and frequent hair removal sessions can decrease blood flow to the area, resulting in less melanin. Overcoming this hurdle demands a tailored strategy during your tanning process, prioritizing hydration, and possibly enlisting the assistance of tan accelerators designed specifically for these stubborn areas. 
[jetpack-related-posts]

When Can You Shower After Laser Hair Removal?

Filed Under: Body //

can you shower after laser hair removal

Can You Shower After Laser Hair Removal?

Laser hair removal is always a good idea if you want silky smooth, hair-free skin.

This advanced technology targets hair follicles with laser light, disrupting future hair growth.

Once you’ve had your first laser hair removal session, a common question arises: can you shower after your laser hair removal appointment?

Showering post-laser hair removal might not cross your mind in the beginning.

Yet, it plays an important role in your skin’s healing process and the effectiveness of your laser hair removal treatments. 

After your laser hair removal procedure, and you’re finally rid of unwanted body hair, the treated area becomes quite sensitive.

The urge to hop into a hot shower or bath might seem tempting.

However, taking a cool shower with lukewarm water instead of hot baths or showers can prevent additional skin irritation, but even that has its disadvantages.

This simple aftercare step ensures the treated area heals properly, safeguarding the investment you’ve made in your quest for hair-free skin. 

  • Shower Routine: Steps and Products For Healthy Skin
  • The Best After-Shower Body Care Routine For Glowing Skin
  • Elevate Your Shower Routine: The Top 8 Must-Have Bath Products

How Soon Can You Shower After Laser Hair Removal?

After your laser hair removal appointment, you need to be patient before taking that shower.

The advised waiting period before taking a shower can be between just a few hours to an entire day or two. 

You can take a shower after laser hair removal, but we recommend using cool water for the first few days after your laser hair removal procedure.

It is best to avoid hot water, hot tubs, and saunas for at least 2 days after the treatment.

You should wait at least 6-8 hours after the session before taking a shower.

Following the laser session, the skin starts its healing process and needs a certain amount of time to ensure skin health.

Therefore, splashing it with water too soon can interrupt this delicate phase. 

Avoiding hot showers is important. Hot water can irritate sensitive skin and intensify any discomfort.

For those of us who need a hot, steamy shower to unwind, this might sound disheartening. Minding the temperature of the water is super important.

Lukewarm or cold water, although not as comforting, will keep your skin safe and on the right track towards full recovery. 

As much as we like quick results and hate downtime, laser hair removal demands a little time from us.

Adhering to aftercare instructions will not only amplify the effectiveness of your laser treatments but also secure optimal results. 

  • 8 Mistakes You Might Be Making When You Shower
  • 10 3-Ingredient DIY Aromatherapy Body Washes For Luxurious Self-Care
  • The Ultimate Guide To The Best Body Washes For All Skin Types

Can You Take a Hot Shower After Laser Hair Removal?

can you shower after laser hair removal

After laser hair removal, the treatment area feels sensitive and hot water is far from the best way to care for your skin, especially when it comes to showering. 

Indulging in hot showers, steam rooms, saunas, or hot tubs might not be the best idea following your laser session.

These can cause skin irritation and slow down the healing process in the treated area, turning your eagerly awaited hair-free skin outcome into a less pleasant experience. 

Engaging in such activities invites many side effects, not the least of which includes exacerbating sensitive skin conditions or even causing unwelcome skin irritation.

Laser-treated skin is, after all, sensitive and undergoing its recovery to bring you the silky smooth skin you desire. 

Instead, take lukewarm or cool showers. These alternatives significantly reduce the chances of disrupting the healing process, ensuring your skin recovers as intended.

By avoiding hot water, you’ll not only support your skin’s health journey but also safeguard the integrity of the recently treated areas. 

  • The Optimal Shower Temperature For Healthy Skin
  • Soothing Oatmeal Shower Gel Recipe for Eczema-Prone Skin

Dos and Don’ts of Laser Hair Removal Aftercare

To ensure optimal results and avoid the common side effects of this procedure, it’s crucial to follow a set of aftercare instructions.

These guidelines support the healing process and protect the treated area from unwanted irritation or possible skin complications. 

First, let’s tackle the key question: can you shower after laser hair removal?

Well, the answer isn’t straightforward.

While a shower isn’t entirely off-limits, avoiding hot water is necessary.

This means trading those steamy hot showers or hot tub indulgences for cooler alternatives.

Hot water can heighten skin irritation, making your treated area feel worse and potentially stalling the healing process.

Opt for lukewarm water instead, ensuring the temperature of the water doesn’t provoke extra heat on your sensitive skin. 

Other Dos And Don’ts Of Laser Hair Removal:

Avoid direct sun exposure.  The UV rays could harm laser-treated skin, increasing the risk of sun damage. Structure your outdoor activities wisely, only getting sun exposure for a short time, and choosing protective clothing or a wide-brimmed hat for any necessary outings. 

Embrace the soothing touch of aloe vera.  This wonder plant can significantly reduce skin irritation in sensitive areas like your bikini line or upper lip. Its cooling effect helps calm the skin, promoting a faster recovery. 

Choose your skincare products wisely.  Fragrance-free cleansers and unscented body washes should become your new best friends. Avoid any beauty products that may contain irritating substances or could clog your hair follicles, hampering the healing process. 

Wear loose-fitting clothes.  Aerated, light fabrics aid in the skin’s recovery by minimizing friction on the treatment areas, roughly translating to less chance of inducing skin irritation or even ingrown hairs. 

Use unscented body wash. Using fragrance-free soap for at least 2 days after your laser hair removal process keeps your skin from getting irritated or inflamed.

Use cold compresses to reduce inflammation. Shortly after your treatment, you can reduce any swelling, redness, or irritation by icing the affected area with an ice pack or cold compress.

Avoid using self-tanning products. The skin that was treated will be sensitive after treatment, so we advise you to wait at least four to five days to apply any self-tanner or spray tan on the targeted area.

Sticking to these aftercare tips not only secures your investment in laser hair removal technology but also paves the way to achieving that dream of permanent, hair-free skin.

From cool compresses to avoiding fragrance-free soaps, every little action contributes to the effectiveness of your laser hair removal treatments.

As your skin undergoes this transformation, remember that consistency in aftercare rituals will lead you to the ultimate goal: a lifetime of smooth, flawless skin. 

  • Top Benefits Of Waxing (Why Waxing Is Better Than Shaving)
  • Waxing Or Laser, Which Hair Removal Method Is Better
  • Can I Shave, Wax, or Tweeze The Day of Laser Hair Removal?

FAQ About Laser Hair Removal And Showering

can you shower after laser hair removal

Q: How long after laser hair removal can I shower?

It is generally recommended to wait at least 24 hours before taking a shower after a laser hair removal session to allow the treated area to heal.

Q: What not to do after laser hair removal?

Avoid hot showers, hot tubs, steam rooms, and direct sun exposure for the first 24-48 hours post-treatment to prevent skin irritation and optimize the healing process.

Q: Can I wash my hair after laser treatment?

Yes, you can wash your hair after laser treatment, but it’s important to use lukewarm water and gentle, fragrance-free cleansers to prevent any irritation in the treated areas.

Q: How long after laser hair removal can I put on deodorant?

Wait at least 24 hours before applying deodorant to the treated area after laser hair removal to avoid irritation and ensure the best possible results.

Q: Can I shower 2 hours after laser hair removal?

It’s advisable to wait at least 24 hours before showering after a laser hair removal session to promote optimal results and minimize the risk of skin irritation.

Q: What are the rules after laser hair removal?

After laser hair removal, avoid hot baths, hot tubs, and exposure to direct sunlight for the first 24-48 hours.

Use tepid water for showers, wear loose-fitting clothes, and follow any specific aftercare instructions provided by your laser hair removal specialist to ensure the best outcomes.

Q: What should I do immediately after laser?

After laser hair removal, apply aloe vera or a fragrance-free moisturizer to soothe the treated area. Avoid hot showers, hot tubs, and direct sunlight for the first 24-48 hours to minimize skin irritation.

Q: Can you use at-home laser hair removal on pubic hair?

While some at-home laser hair removal devices are designed for body use, it’s essential to check the specific product guidelines.

Generally, at-home devices may be suitable for pubic hair removal, but professional treatments are often recommended for more effective and safer results in sensitive areas.

Q: How can I speed up shedding after laser hair removal?

To accelerate shedding after laser hair removal, exfoliate the treated area gently during the first week.

Additionally, maintaining good hydration and following post-laser care instructions can help promote faster shedding of treated hair.

Q: How do you get the best results from laser hair removal?

To achieve optimal results with laser hair removal, follow pre-treatment guidelines, ensure the treated area is clean and free of lotions or makeup, and attend all scheduled sessions.

Avoid sun exposure, adhere to aftercare instructions, and consult with a laser hair removal specialist for personalized advice on your specific skin type and hair removal needs.

Remember to always consult with your laser hair removal specialist for personalized advice based on your skin type and the specifics of your treatment.

  • Everything You Need To Know About Tanning & Laser Hair Removal
  • 12 Benefits of Sugar Waxing (Advantages Of Sugaring Vs Wax)
  • Can You Get Laser Hair Removal Over A Tattoo?
[jetpack-related-posts]

Can You Get Laser Hair Removal Over A Tattoo?

Filed Under: Body //

can you get laser hair removal on a tattoo

Understanding Laser Hair Removal and Tattoos

Embarking on the journey of laser hair removal treatment brings a host of benefits.

Especially if you find traditional methods cumbersome. But, what about those of us adorned with body art?

A collision between lasers and tattoos unfolds a tricky terrain.

The concentrated beam of light, designed to target dark pigment, doesn’t discern between the dark hair and the ink particles sitting proudly beneath your skin.

Therein lies the crux; the potential for severe skin damage and the distortion of your beloved body art looms large. 

Yet, it’s crucial to draw a line between laser hair removal and laser tattoo removal — they’re siblings, not twins in the realm of laser technology.

Where one leverages light energy to halt future hair growth, the other focuses its might on breaking down ink pigments into particles small enough for the body to absorb.

Hence, understanding this distinction is key to navigating the procedures safely around your tattoos.

Pre-Treatment Considerations

Before you consider laser hair removal on tattooed skin, a consultation with expert laser technicians is crucial.

They assess key aspects like your skin type, the pigment of your tattoo, and the color of your hair.

These elements play a pivotal role in determining if you’re a good candidate for this procedure. Safety and efficacy hinge on these assessments.

For those with darker skin tones or tattoos with certain ink colors, the type of laser and treatment plan must be carefully chosen.

Professional guidance ensures the best laser for your situation is used, reducing the risk of permanent damage or distortion of your body art.

Making informed decisions starts here, with expert advice steering you toward the best option for hair-free, unblemished skin. 

  • Top Benefits Of Waxing (Why Waxing Is Better Than Shaving)
  • Waxing Or Laser, Which Hair Removal Method Is Better
  • Can I Shave, Wax, or Tweeze The Day of Laser Hair Removal?

Safe Practices Around Tattoos

You’ve pondered whether to kiss goodbye to unwanted body hair for good.

Laser hair removal seemed like the best option. Then, you remembered the ink adorning your skin.

Frustration might have set in, thinking these two choices—maintaining your body art intact and achieving that smooth, hair-free skin—were at odds.

Fear not. To dodge damaging your cherished tattoos during laser treatment, the use of templates comes into play. These act as precision-guided shields, keeping your artwork safe from the concentrated beam of light aimed at those pesky hair follicles.

Equally crucial is timing. Opting for a treatment plan involving laser beams before etching new tattoos in those areas assures your body art won’t suffer from untimely distortions or fading due to severe skin damage.

Let this strategy be your guide, navigating the laser precision path with care. 

  • Everything You Need To Know About Tanning & Laser Hair Removal
  • 12 Benefits of Sugar Waxing (Advantages Of Sugaring Vs Wax)
  • When Can You Shower After Laser Hair Removal?

Pros and Cons

Deciding to undergo laser hair removal when you have tattoos presents a mixed bag of outcomes. 

For those yearning for hair-free skin, this method stands as a popular choice. It eradicates unwanted body hair, curbing future hair growth with a precision that outmatches other hair removal options.

Nevertheless, the process is not without its cons, especially for the inked. 

Dark hair and light skin have often been deemed the ideal pairing for these treatments, primarily due to the laser’s affinity for dark pigment.

However, this same principle complicates matters for tattooed areas. The risk of severe skin damage or a distorted body of artwork looms large.

Alternative methods, such as electrolysis treatments, may offer a safer route, sparing the ink under your skin from unwanted alterations.

Therefore, prudent discussions with an expert team, considering your specific skin type, hair color, and tattoo placement, become indispensable. 

Alternatives and Recommendations

You might have etched your skin with ink, conjuring a masterpiece that tells your world in vibrant hues.

But now, you’re pondering hair removal, and lasers spell trouble for your treasured art. Fear not, for alternatives abound, paving the way to smoothness without risking your ink. 

  • Electrolysis treatments have emerged as a beacon for those adorned with body art. This medical procedure targets each hair root with precision, leaving tattoos unscathed. It promises a path to hair-free skin, though patience is key, as sessions tally up over time. 
  • Shaving and waxing, while not permanent, offer quick fixes. They’ve stood the test of time, catering to urgent needs or a change in aesthetic desires. These methods respect your ink, steering clear of the severe skin damage laser options might provoke. 

For patches of skin untouched by ink, lasers stand as a steadfast option, marrying efficiency with enduring results.

However, selecting the right type of laser and experienced hands make all the difference. In areas where the skin remains a canvas yet to be painted, this might just be the best option. 

Final Thoughts on Laser Precision

In the quest for hair-free skin, laser hair removal has shone as a beacon of hope.

Yet, for those adorned with body art, the journey seemed fraught with perils. The laser technology, a marvel tailored for zapping away unwelcome strands, held the unnerving potential to warp or fade the cherished ink that marks your skin.

This guide aimed to demystify the convergence where laser hair removal technology meets tattooed terrain.

By now, you’ve grasped that while lasers offer a path to smooth skin, the type of laser and how it’s used matters greatly when tattoos are part of the equation. 

Diligent consultations with seasoned laser technicians emerged as crucial.

These expert team members excel in navigating the intricate dance between light energy and ink particles, ensuring your tattooed skin remains unscathed.

We urged considering alternative hair removal methods, like electrolysis treatments, especially for etched areas.

The ultimate takeaway? The importance of bespoke treatment plans.

Each tattoo pigment, skin type, and hair color beckons for a tailored approach, ensuring the laser’s energy targets only the unwanted hair and spares the art that tells your story. 

[jetpack-related-posts]

My Super Simple, 4 Ingredient DIY Body Butter Recipe!

Filed Under: DIY Beauty, Body //

homemade body butter

I have been using this DIY Homemade Body Butter Recipe for the last couple of years! It’s the only lotion that I ever use when I’m not using this whipped body butter that I love for winter!

It is perfect for dry and sensitive skin, and it only uses 4 ingredients!

This Body Butter is easy to make and it lasts for a long time. Plus, you can grab all of the ingredients on Amazon so that you don’t even have to leave your house to find everything!

If you have sensitive skin, you can try out my Colloidal Oatmeal Whipped Body Butter Recipe that soothes itchy skin and eases inflammation.

What Is Body Butter?

You’re in for a surprise if you’ve never used body butter!

It is similar to butter for your skin, well it’s exactly butter for your skin. Anyone can easily make their own body butter at home.

It’s so easy; all you have to do is combine your favorite oils by melting and whipping them together and you’ll have a lovely body butter.

You can choose to experiment with some of your favorite plant-based butters because we all need a decent moisturizer that isn’t overly oily and creates a lovely body butter recipe.

This recipe is incredibly nourishing and will make your skin feel incredibly smooth.

You can leave it as it is or add essential oils to create a great-smelling body butter for yourself or as a gift. Plus, it’s really great if you have sensitive skin.

Why This Recipe Is So Great!

  • It uses simple ingredients without any chemicals or artificial fragrances
  • It is easy to make and the perfect for all skin types
  • Makes great gifts
  • Very customizable by using your favorite essential oils

What You Need For Homemade Body Butter

  • A double boiler – you can always use a large heat-safe bowl on top of a pan with a little water in it.
  • Hand mixer – after your body butter cools a little you will want to beat your body butter to make it smooth. 
  • Time – while this only uses a few ingredients this isn’t a quick recipe, but it’s pretty hands-off so you can make it while you’re getting other things done. The mixture will need to be heated on the stove for about 45 minutes to 1 hour. 

Ingredients For Making DIY Body Butter

  • Coconut Oil
  • Shea Butter
  • Beeswax
  • Vitamin E
  • Essential Oils (optional)

Use this body butter in the winter or summer.

It is perfect all year long for all skin types! I love the way it keeps my skin so soft and silky all day long. Plus, it even smells great, with or without the essential oils!

I also love that these are pure, organic, and natural ingredients. You know exactly what you are putting on your skin.

DIY Homemade Body Butter Recipe

Ingredients You Will Need:

-1 Cup Coconut Oil

-1/2 cup Beeswax

–1 1/2 Cup Shea Butter

–1/4 Cup Vitamin E Oil

Directions To Follow:

-Melt all ingredients, except Vitamin E oil, in a double boiler. (I have found the longer you heat the mixture after it is melted helps keep the lotion from getting grainy over time. I like to heat mine for about 30 minutes after all the beeswax is melted.)

-Remove from heat, add Vitamin E Oil, and stir.

-Let cool for 15 minutes.

-Use a hand mixer to mix the lotion at a low speed.

-Pour into desired containers and let them sit overnight to cool completely.

Keep in mind that this recipe makes about 3 cups of Body Butter, but you can always cut the recipe in half or double the recipe to stock up or to give some as gifts! 

How To Best Use This Body Butter

homemade body butter
  • Every day all year for the entire body. 
  • Face Cream (add frankincense essential oil for extra skin support – optional)
  • Diaper Cream (add gentle baby or lavender essential oil – optional)
  • Chest Rub (add eucalyptus and peppermint essential oil)
  • Muscle Rub (add peppermint or cypress essential oil) 

How To Store Homemade Whipped Body Butter

The oils and butter in this body butter could melt if kept in a warm environment because they are natural and oily in nature.

This body butter should therefore be stored in a cold, dry environment. Then, if the oils begin to melt by accident, you can refrigerate the butter and re-whip it.

If stored in an air-tight jar in a cool dark place, this body butter will keep for up to 6 months.

If you would like to keep it for longer, you could add preservatives to it.

Although I have not directly added a preservative to this whipped body butter, I would choose Geogard ECT (Preservative ECO, Plantaserv M).

In the mixture, this preservative should make up 0.6% to 1%.

I recommend opting for natural preservatives like vitamin E oil (which is already included) or rosemary extract if you intend to store the body butter for an extended period.

These natural preservatives can help prolong the shelf life of your homemade product without introducing harsh chemicals.

Another option to consider for extending the shelf life is to store the body butter in smaller containers.

This reduces the exposure to air and contaminants each time you open a jar, helping to maintain the freshness of the product for a longer duration.

Additionally, it’s essential to keep your body butter away from direct sunlight and high temperatures, as these can accelerate the breakdown of the natural ingredients and cause the product to spoil more quickly.

For those who enjoy experimenting with different scents and textures, you can customize this recipe further by incorporating different essential oils or botanical extracts.

Lavender, chamomile, or rosemary essential oils are popular choices for their soothing properties, while citrus oils like lemon or orange can lend a refreshing scent.

You could also try adding a tablespoon of aloe vera gel to the mixture for added hydration and soothing benefits, especially beneficial for sun-exposed or irritated skin.

Furthermore, if you prefer a firmer body butter, you can adjust the ratio of oils and butters in the recipe.

Increasing the amount of cocoa butter or beeswax will result in a firmer consistency while adding more liquid oils will make the body butter softer and more spreadable.

Experimenting with different combinations of oils and butters can lead to unique textures and scents that cater to your specific skincare needs and preferences.

Have fun exploring and creating your signature homemade body butter recipe!

Pin For Later!

4 ingredient body butter that is non-greasy
super simple body butter that is great for summer!
4 ingredient body butter for sensitive skin
[jetpack-related-posts]

21 Soothing DIY Bath Salt Recipes With Essential Oils For Every Mood

Filed Under: Body, DIY Beauty, Self Care //

best bath soak recipes

Bath salts have been cherished for centuries for their therapeutic properties.

When combined with the power of essential oils, they create an indulgent and relaxing bath experience that can cater to your specific needs.

Whether you’re seeking relaxation, rejuvenation, or relief, these 21 DIY bath salt recipes infused with essential oils have got you covered.

There’s nothing quite like a soothing bath to wash away the stresses of the day and rejuvenate your body and mind.

Elevate your bath routine experience with these delightful bath salt recipes infused with the power of essential oils. From relaxation to revitalization, these DIY bath salts are easy to make, customizable, and perfect for various occasions:

THE BEST BATH SALT RECIPES WITH ESSENTIAL OILS

LAVENDER BEDTIME BATH SOAK

lavender chamomile bath soak recipe

Indulge in a calming lavender-infused bath to unwind after a long day. Lavender’s soothing aroma promotes relaxation and tranquility.

Unwind and let go with this calming bath salt blend, designed to melt away tension and promote relaxation.

INGREDIENTS:

  • 1 Cup Epsom salt
  • ¼ Cup baking soda
  • 10 Drops of lavender essential oil
  • 5 Drops chamomile essential oil

DIRECTIONS:

  1. Mix Epsom salt and baking soda in a bowl.
  2. Add the lavender and chamomile essential oils.
  3. Stir well and store in a glass jar.

BEST TIME TO USE: Before bedtime to ensure a peaceful sleep.

CITRUS BURST UPLIFT

citrus bath soak recipe

Revitalize your senses with this invigorating citrus blend. It’s perfect for a morning pick-me-up.

Start your day off right with this refreshing bath salt recipe that awakens your senses and energizes your body.

INGREDIENTS:

  • 1 Cup sea salt
  • ¼ cup Coconut oil (melted)
  • 10 Drops of grapefruit essential oil
  • 5 Drops of lemon essential oil

DIRECTIONS:

  1. Combine sea salt and melted coconut oil.
  2. Add the grapefruit and lemon essential oils.
  3. Mix thoroughly and store in an airtight container.

BEST TIME TO USE: In the morning for a refreshing boost and some energy.

EUCALYPTUS RESPIRATORY RELIEF BATH SOAK

eucalyptus bath soak recipe

Clear your airways and refresh your mind with the cooling sensation of eucalyptus and peppermint. Breathe easy with this eucalyptus-infused bath salt that offers respiratory relief.

INGREDIENTS:

  • 1 cup sea salt
  • ¼ cup dried eucalyptus leaves
  • 10 drops of eucalyptus essential oil

DIRECTIONS:

  1. Combine sea salt and dried eucalyptus leaves.
  2. Add eucalyptus essential oil.
  3. Mix thoroughly and store in an airtight container.

BEST TIME TO USE: When feeling congested or during the flu season.

ROSE PETAL BATH SOAK

rose petal ylang-ylang bath salt recipe

Create a romantic ambiance with the delicate scent of roses and ylang-ylang, perfect for a luxurious self-care evening. Create a romantic atmosphere and pamper yourself with the luxurious scent of roses.

INGREDIENTS:

  • 1 Cup Dead Sea salt
  • ¼ Cup dried rose petals
  • 10 Drops of rose essential oil
  • 5 Drops ylang-ylang essential oil

DIRECTIONS:

  1. Mix Dead Sea salt and dried rose petals in a bowl.
  2. Add the rose and ylang-ylang essential oils.
  3. Combine gently and store in a decorative jar.

BEST TIME TO USE: For a special date night or self-care night routine.

CHAMOMILE LAVENDER BATH SOAK

lavender chamomile bath salt recipe

Soothe both your body and mind with the gentle properties of chamomile and the uplifting notes of cedarwood. Drift into tranquility with this calming blend of chamomile and lavender.

INGREDIENTS:

  • 1 Cup sea salt
  • ¼ Cup dried chamomile flowers
  • 10 Drops of lavender essential oil
  • 5 Drops of cedarwood essential oil

DIRECTIONS:

  1. Mix sea salt and dried chamomile flowers in a bowl.
  2. Add the lavender and cedarwood essential oils.
  3. Blend well and store in a dry container.

BEST TIME TO USE: When seeking a moment of inner peace

VANILLA BLISS BATH SOAK

vanilla bath soak recipe

Indulge your senses with the warm and comforting aroma of vanilla and sandalwood for a blissful and relaxing bath.

INGREDIENTS:

  • 1 Cup Dead Sea salt
  • ¼ Cup baking soda
  • 10 Drops vanilla essential oil

DIRECTIONS:

  1. Mix Dead Sea salt and baking soda.
  2. Add vanilla essential oil.
  3. Mix well and store in a decorative jar.

BEST TIME TO USE: Anytime you need a comforting and relaxing soak.

PEPPERMINT ENERGETIC SOAK

peppermint bath soak recipe

Kickstart your energy levels with the refreshing and invigorating scent of peppermint and spearmint. Invigorate your senses with the minty freshness of peppermint for an energetic bath.

INGREDIENTS:

  • 1 cup Epsom salt
  • ¼ cup dried peppermint leaves
  • 10 drops peppermint essential oil

DIRECTIONS:

  1. Combine Epsom salt and dried peppermint leaves.
  2. Add peppermint essential oil.
  3. Stir and store in a dry container.

BEST TIME TO USE: In the morning to awaken your mind.

FRANKINCENSE SOAK

frankincense bath salt recipe

Enhance your meditation practice with the grounding scents of frankincense.

INGREDIENTS:

  • 1 cup sea salt
  • ¼ cup dried frankincense resin
  • 10 drops of frankincense essential oil

DIRECTIONS:

  1. Mix sea salt and dried frankincense resin.
  2. Add frankincense essential oil.
  3. Mix thoroughly and store in an airtight container.

BEST TIME TO USE: Before meditation or moments of reflection. I like to meditate in the bath as well.

LEMON DETOX SOAK

lemon detox bath salt recipe

Detoxify your body and rejuvenate your mind with the zesty blend of lemon and Himalayan pink salt. Refresh and detoxify your body with the zesty scent of lemon.

INGREDIENTS:

  • 1 Cup Himalayan pink salt
  • ¼ Cup dried lemon peel
  • 10 Drops lemon essential oil

DIRECTIONS:

  1. Combine Himalayan pink salt and dried lemon peel.
  2. Add lemon essential oil.
  3. Mix well and store in a glass jar.

BEST TIME TO USE: When you want to cleanse your body or have a detox bath.

COCONUT SOAK

coconut tropical bath salt recipe

Transport yourself to a tropical paradise with the exotic combination of coconut and jasmine.

INGREDIENTS:

  • 1 Cup Dead Sea salt
  • ¼ Cup coconut oil (melted)
  • 10 Drops of coconut essential oil

DIRECTIONS:

  1. Mix Dead Sea salt and melted coconut oil.
  2. Add coconut essential oil.
  3. Stir and store in a container with a lid.

BEST TIME TO USE: Anytime you crave a mini vacation, or just want to relax and unwind.

CEDARWOOD BATH SALT

cedarwood bath soak recipe

Find balance and grounding with the earthy and woody scents of cedarwood and vetiver.

INGREDIENTS:

  • 1 Cup Epsom salt
  • ¼ Cup dried cedarwood chips
  • 10 Drops cedarwood essential oil

DIRECTIONS:

  1. Combine Epsom salt and dried cedar wood chips.
  2. Add cedarwood essential oil.
  3. Mix thoroughly and store in a dry container.

BEST TIME TO USE: When you need to reconnect with yourself.

PATCHOULI BATH SALT

patchouli bath salt recipe

Achieve inner harmony and relaxation with the rich, earthy notes of patchouli and the calming effects of lavender.

INGREDIENTS:

  • 1 Cup sea salt
  • ¼ Cup dried patchouli leaves
  • 10 Drops patchouli essential oil

DIRECTIONS:

  1. Mix sea salt and dried patchouli leaves.
  2. Add patchouli essential oil.
  3. Mix well and store in an airtight container.

BEST TIME TO USE: During moments of self-reflection.

GERANIUM BATH SOAK

geranium bath salt recipe

Escape to a blooming garden with the floral and herbaceous blend of geranium and rosemary.

INGREDIENTS:

  • 1 Cup Epsom salt
  • ¼ Cup dried rose petals
  • 10 Drops geranium essential oil
  • 5 Drops of rosemary essential oil

DIRECTIONS:

  1. Combine Epsom salt and dried rose petals.
  2. Add geranium essential oil.
  3. Stir and store in a glass jar.

BEST TIME TO USE: When you seek a fragrant escape.

STRESS RELIEF LAVENDER BATH SOAK

bergamot lavender bath soak

Ease away stress and tension with the soothing combination of lavender and bergamot. Melt away stress and tension with the timeless relaxation of lavender.

INGREDIENTS:

  • 1 Cup sea salt
  • ¼ Cup dried lavender buds
  • 10 Drops of lavender essential oil
  • 10 Drops of bergamot essence

DIRECTIONS:

  1. Mix sea salt and dried lavender buds.
  2. Add lavender essential oil.
  3. Mix thoroughly and store in a sealed container.

BEST TIME TO USE: After a long and demanding day.

JUNIPER BERRY BATH SOAK

juniper bath salt recipe

Indulge in a rejuvenating bath experience with the invigorating blend of juniper berry and eucalyptus. This bath soak will refresh your senses, clear your mind, and leave you feeling revitalized.

INGREDIENTS:

  • 1 Cup Epsom salt
  • ¼ Cup dried juniper berries
  • 10 Drops of juniper berry essential oil
  • ¼ cup dried eucalyptus leaves
  • 10 drops eucalyptus essential oil

DIRECTIONS:

  1. In a bowl, mix Epsom salt, dried juniper berries, and dried eucalyptus leaves.
  2. Add juniper berry and eucalyptus essential oils to the mixture.
  3. Stir well to distribute the oils evenly and ensure they infuse the salts and botanicals.
  4. Transfer the blend to a clean, airtight container or jar.

BEST TIME TO USE: During a cold, eucalyptus can help ease congestion, making this bath perfect for when you’re feeling under the weather.

YLANG-YLANG BATH SOAK

ylang-ylang bath salt recipe

Ignite your senses with the sensual and exotic blend of ylang-ylang and jasmine.

INGREDIENTS:

  • 1 Cup Dead Sea salt
  • ¼ Cup dried rose petals
  • 10 Drops ylang-ylang essential oil

DIRECTIONS:

  1. Mix Dead Sea salt and dried rose petals.
  2. Add ylang-ylang essential oil.
  3. Blend gently and store in a decorative jar.

BEST TIME TO USE: For a romantic and indulgent bath.

GRAPEFRUIT BATH SOAK

grapefruit peppermint bath salt recipes

Invigorate your senses and boost your mood with the zesty and refreshing scent of grapefruit and peppermint.

INGREDIENTS:

  • 1 Cup sea salt
  • ¼ Cup dried grapefruit peel
  • 10 Drops of grapefruit essential oil
  • 10 Drops of peppermint essential oil

DIRECTIONS:

  1. Combine sea salt and dried grapefruit peel.
  2. Add grapefruit and peppermint essential oil.
  3. Stir and store.

BEST TIME TO USE: In the morning to start your day with positivity.

LAVENDER MINT BATH SOAK

Sink into relaxation mode with the calming combination of lavender and spearmint.

INGREDIENTS:

  • 1 Cup Himalayan pink salt
  • ¼ Cup Epsom salt
  • 10 Drops of lavender essential oil
  • 5 Drops peppermint essential oil

DIRECTIONS:

  1. Combine Himalayan pink salt and Epsom salt.
  2. Add the lavender and peppermint essential oils.
  3. Mix well and store in a container with a lid.

BEST TIME TO USE: Whenever you need to de-stress and unwind.

BERGAMOT JOY BATH SOAK

Infuse your bath with happiness and joy using the uplifting scents of bergamot and orange.

Immerse yourself in a fragrant oasis of relaxation with this rejuvenating Bergamot and Orange Bliss Bath Soak. The harmonious blend of citrusy bergamot and uplifting orange essential oils will envelop you in a sense of tranquility and joy.

INGREDIENTS:

  • 1 cup Epsom salt
  • ¼ cup dried orange peel
  • 10 drops bergamot essential oil
  • 5 drops sweet orange essential oil

DIRECTIONS:

  1. In a mixing bowl, combine the Epsom salt and dried orange peel. The dried orange peel will release its natural citrus fragrance into the bath soak.
  2. Add 10 drops of bergamot essential oil and 5 drops of sweet orange essential oil to the mixture. These essential oils will enhance the aroma and therapeutic benefits of the bath soak.
  3. Stir the ingredients thoroughly to evenly distribute the oils and incorporate the dried orange peel.
  4. Transfer the blend to a clean, airtight container for storage. Make sure the container is tightly sealed to preserve the scent and prevent moisture from affecting the mixture.

BEST TIME TO USE: This Bergamot and Orange Bliss Bath Soak is perfect for those times when you need a mood boost, relaxation, or a little bit of both.

CLARY SAGE TRANQUIL BATH SOAK

Immerse yourself in a serene bath experience with the calming blend of clary sage and cedarwood essential oils. This soothing bath soak is designed to melt away stress, promote relaxation, and envelop you in a sense of tranquility.

INGREDIENTS:

  • 1 cup Epsom salt
  • ¼ cup dried clary sage leaves
  • ¼ cup dried cedarwood chips
  • 10 drops clary sage essential oil
  • 10 drops cedarwood essential oil

DIRECTIONS:

  1. In a mixing bowl, combine the Epsom salt, dried clary sage leaves, and dried cedar wood chips. Mix well to evenly distribute the ingredients.
  2. Add the clary sage and cedarwood essential oils to the mixture. Stir thoroughly to ensure that the essential oils are well incorporated.
  3. Transfer the blend to an airtight container or a glass jar with a lid, preserving the aromatic potency of the essential oils.
  4. When you’re ready to use the bath soak, add about ½ to 1 cup of the mixture to a warm bath as the tub is filling. Swirl the water to help the salts dissolve.

BEST TIME TO USE: This Clary Sage and Cedarwood Tranquility Bath Soak is ideal for moments when you need to unwind, destress, and find a moment of calm in your day. It’s perfect for evenings, allowing you to transition into a peaceful night’s sleep.

Whether you’ve had a long day or simply want to treat yourself to a serene escape, this bath soak will transport you to a realm of tranquility.

TEA TREE BATH SOAK

Indulge in the ultimate relaxation experience with this soothing bath soak infused with the powerful trio of tea tree, eucalyptus, and lavender. Let the harmonious blend of these essential oils calm your mind, invigorate your senses, and rejuvenate your body.

INGREDIENTS:

  • 1 cup Epsom salt
  • ¼ cup dried lavender buds
  • 10 drops tea tree essential oil
  • 5 drops eucalyptus essential oil
  • 5 drops lavender essential oil

DIRECTIONS:

  1. In a mixing bowl, combine the Epsom salt and dried lavender buds.
  2. Add the tea tree, eucalyptus, and lavender essential oils to the mixture.
  3. Gently stir the ingredients until the oils are evenly distributed and the fragrance is infused into the salts.
  4. Carefully transfer the blend into an airtight container or glass jar for storage.’

BEST TIME TO USE: This bath soak is versatile and can be enjoyed at different times for various benefits.

Conclusion: Elevate your bath time into a luxurious ritual by creating these homemade bath salts infused with the magic of essential oils. Whether you’re seeking relaxation, energy, detoxification, or simply a delightful aroma, these DIY bath salt recipes offer a natural and personalized solution for every mood. Treat yourself to the soothing embrace of aromatherapy and self-care, and transform your bath into a haven of well-being.

Elevate your self-care routine by indulging in the luxury of these homemade bath salt recipes infused with essential oils. Whether you’re looking to relax, rejuvenate, or simply treat yourself to a fragrant soak, these bath salts are versatile and tailored to your needs. Create your oasis of tranquility and pampering with these easy-to-make recipes, transforming your bath into a haven of relaxation and rejuvenation.

[jetpack-related-posts]

Your Must-Have Pedicure Kit For The Perfect At-Home Pedicure

Filed Under: Self Care, BEAUTY //

An at-home pedicure is a wonderful way to treat yourself to some well-deserved self-care and relaxation.

With the right tools and techniques, you can achieve salon-quality results without leaving the comfort of your home.

Must-Have Essentials For An At-Home Pedicure:

Foot Soak or Basin

Begin your pedicure with a relaxing foot soak. Choose a foot soak solution or add Epsom salts to warm water in a basin to soften your skin and prepare your feet for exfoliation.

1

HoMedics Bubble Mate Foot Spa

$30 AT AMAZON

The HoMedics Bubble Mate Foot Spa is your go-to solution for an invigorating and revitalizing foot bath.

This toe-touch-controlled foot bath is designed to provide an indulgent experience with its invigorating bubbles and raised massage nodes. The splash-proof feature ensures a mess-free session, while the removable pumice stone offers an additional level of convenience.

Immerse your feet in a sea of bubbles, let the massage nodes work their magic, and relish the delightful sensation that leaves your feet refreshed and your spirits lifted.

The HoMedics Bubble Mate Foot Spa transforms a simple pedicure into a spa-worthy treat right at your fingertips.

2

Collapsible Foot Bath Basin for Soaking Feet

$20 AT AMAZON

Experience the advantages of portability with the Collapsible Foot Bath Basin.

Crafted for both functionality and space-saving design, this foot soak tub offers a generous 15L/4 gallons capacity while being collapsible for easy storage. Its sturdy and durable plastic construction ensures longevity, while the built-in massage nodes elevate your pedicure experience.

The portable foot tub comes complete with a convenient handle, making it a perfect companion for those seeking a foot soak on-the-go.

Whether you’re unwinding at home or embarking on a weekend getaway, this collapsible foot bath basin provides the ultimate relaxation for your feet, allowing you to enjoy the benefits of a pedicure soak wherever you are.

3

RIGHTMELL Foot Spa Bath Massager

$60 AT AMAZON

This innovative pedicure foot soaker offers a trifecta of soothing elements – heat, bubbles, and vibration.

With a digital temperature control feature, you can tailor the water temperature to your preference, creating the ideal spa-like environment.

Whether you’re seeking relief from a long day or preparing for a pedicure, this foot spa massager helps soothe, relax, and invigorate your feet, ensuring you step out feeling rejuvenated and ready to take on the world.

Nail Polish Remover & Cotton Pads

If you have existing nail polish, make sure to remove it using acetone-free nail polish remover and lint-free cotton pads. If you have a manicure with gel or acrylic, I recommend using an electric nail file to help this process along.

Nail Clippers

Trim your nails to your desired length, cutting straight across to prevent ingrown nails.

Nail File

Shape your nails gently using a nail file. Opt for a glass or crystal nail file for smoother edges.

Cuticle Pusher & Nippers

Gently push back your cuticles using a cuticle pusher, and trim any excess skin with nippers.

Moisturizing Lotion or Cream

Hydrate your skin with a rich foot cream or lotion to lock in moisture and keep your feet soft.

Exfoliating Scrub

Use an exfoliating scrub to remove dead skin cells and reveal softer feet. Pay special attention to rough areas like heels and the balls of your feet.

Base Coat, Nail Polish, & Top Coat

Choose your favorite nail polish colors and ensure you have a base coat and top coat for a polished finish.

Toe Separators

Use toe separators to prevent smudging while painting your nails.

Nail Polish Corrector Pen

A nail polish corrector pen can help clean up any mistakes around your nails for a professional look. I also like to use a toothpick for this, just in case you don’t have a pen on you.

Pumice Stone or Foot File

For extra smoothness, use a pumice stone or foot file to gently remove calluses and rough skin.

Quick Guide To An At-Home Pedicure:

  1. Prepare Your Space: Set up a comfortable area with all your pedicure essentials. Make sure you have a cozy seat, good lighting, and relaxing music.
  2. Soak Your Feet: Fill a basin with warm water and add your chosen foot soak solution. Soak your feet for about 10-15 minutes to soften the skin.
  3. Exfoliate: Gently scrub your feet with an exfoliating scrub, paying attention to areas with rough skin. Rinse and pat dry.
  4. Nail Care: Trim and shape your nails, then gently push back your cuticles. Use a nail brush to clean under your nails.
  5. Moisturize: Apply a generous amount of moisturizing lotion or cream to your feet and lower legs, massaging in circular motions.
  6. Paint Your Nails: Apply a base coat, followed by your chosen nail polish color. Use thin coats for even application and allow each layer to dry before applying the next. Finish with a top coat for shine and longevity.
  7. Finishing Touches: Once your nails are dry, use a nail polish corrector pen to clean up any smudges or mistakes.
  8. Relax and Enjoy: Sit back, relax, and let your nails dry completely. Enjoy the feeling of your refreshed and pampered feet.

Related Post: The Step-By-Step Guide On The Perfect At-Home Pedicure

With these must-have essentials and a step-by-step guide, you’re well-equipped to create a spa-worthy pedicure experience in the comfort of your own home. Treat yourself to the luxury of a well-deserved pedicure, and revel in the results of your beautifully polished and pampered toes.

[jetpack-related-posts]

You Should Be Taking Cold Showers, Here Are 8 Reasons Why

Filed Under: Healthy Living //

Many people are afraid of taking a cold shower. Even though taking a cold shower would use less water and fuel to heat the water, we let the water run to avoid any icy temperatures.

But my argument for cold showers goes beyond conserving the planet’s resources.

By biting the bullet and entering the shower without turning on the hot water, you can actually improve your health.

However, you may ease into it by starting with lukewarm water and then gradually increasing it to colder and colder water. This is best when it is completely frigid. Here are some justifications for your potential interest.

What Is Cold Therapy

Cryotherapy, commonly known as cold therapy, involves exposure to extremely cold temperatures to therapeutically cool human tissues.

There are various ways to use cold treatment, such as: When taking a cold shower, the water is cooled down below 60 degrees for two to three minutes at a time, a tiny region is numbed with a cold spray, immersion in cold water, taking ice baths, or submerging all but your head and neck in the water are all options.

Why Cold Showers Are Good For You

There is currently insufficient conclusive evidence on cold therapy, and cold showers are not the primary treatment for any illnesses. However, using a brief burst of cold water to relieve symptoms can be helpful.

Improves Blood Circulation

Taking cold showers can have a remarkable impact on blood circulation.

When exposed to cold water, your blood vessels constrict as a natural response to preserve heat and maintain body temperature. This constriction is followed by vasodilation, where the blood vessels expand once you warm up post-shower.

This alternating process of vasoconstriction and vasodilation serves as a kind of workout for your blood vessels, promoting improved circulation over time.

The cold water immersion prompts blood to move more efficiently throughout your body, delivering oxygen and nutrients to tissues and organs while aiding in the removal of waste products.

As a result, regular cold showers can contribute to better overall blood flow, potentially enhancing cardiovascular health and promoting a more invigorated and energized feeling.

As your body responds to the cold by sending blood to surround your internal organs, submerging yourself in cold water is an excellent technique to increase blood flow.

This is advantageous for general wellness in addition to providing improved energy and a number of other specific health advantages.

Increases Your Alertness

If you’ve ever had a cold shower in the morning, you undoubtedly already know how much it can boost your alertness.

Undoubtedly, the event made you more vigilant even if you also considered it to be scary. When you take a cold shower, your body receives a mild shock, which makes it especially helpful in the mornings when you are already feeling more exhausted than usual.

Not feeling like taking a shower? The same advantages can be obtained by simply sprinkling cold water on your face.

Alleviates Depression

Taking cold showers has been shown to have potential benefits for alleviating symptoms of depression.

Cold exposure triggers a physiological response that involves the release of endorphins, which are natural mood enhancers. These endorphins help create a sense of euphoria and relaxation, contributing to an overall improvement in mood.

Additionally, cold showers stimulate the sympathetic nervous system, boosting alertness and energy levels, which can counteract the lethargy often associated with depression.

The shock of cold water also leads to increased oxygen intake, invigorating the body and mind. While cold showers may not replace traditional treatments for depression, they can be a complementary practice that offers a temporary uplift in mood and an alternative way to manage depressive symptoms.

As with any therapeutic approach, individuals should consult with their healthcare provider before incorporating cold showers into their routine, especially if they have pre-existing health conditions.

Stimulates Weight Loss

Did you know that taking cold showers might encourage weight reduction as well?

This is due to a variety of factors, including its capacity to burn fat as well as the fact that it gives you more energy, which enables you to complete daytime workouts.

After a hard workout, it might hasten your muscles’ recovery.

Taking cold showers can help to stimulate the body’s fat-burning processes. Numerous studies have examined the overall health advantages of taking cold showers, including how they might support your efforts to lose weight.

Improves The Health Of Hair And Skin

Your skin and hair may become dry from hot water.

Your skin and hair may appear and feel healthier after using cold water. Your pores may close as a result of the cold water, which will enhance the general condition and appearance of your skin.

Additionally, using cold water can assist in giving your hair more moisture, which enhances its radiance and vitality.

Improves Your Immune System

Studies on the immune system have also examined the advantages of using cold water and taking cold showers.

It can strengthen a variety of defense mechanisms in your body, including your immune system and how it works.

When exposed to the elements, we frequently develop a resistance to them. Leukocytes, which aid in the body’s defense against infection, are stimulated by the shock of cold water entering the bloodstream.

Thus, ice-cold showers can increase your body’s resistance to common infections. This is beneficial to general health.

Increases Metabolism

In a chilly shower, your body works hard to stay warm.

There may be a slight boost in metabolism and calorie burn as a result. However, before you abandon your workout and healthy eating routine, keep in mind that there hasn’t been much research on this advantage.

Reduces Inflammation And Eases Sore Muscles

Your blood vessels contract (vasoconstriction) when it’s cold outside. Blood then flows to your body’s center and key organs when that occurs.

During the process, the blood naturally becomes nutrient- and oxygen-rich. The blood arteries widen (vasodilate) as your body begins to heat up once more, returning that oxygenated blood to your tissues.

It helps to flush away inflammation as it comes back, which can be the source of delayed-onset muscle soreness, which can happen a few days after activity. Pain is reduced by cold therapy via lowering inflammation.

However, it also affects how your brain interprets pain. If you’ve ever received cold spray before to an injection, you are familiar with how it reduces the speed at which pain signals move through your nervous system. It makes the nerve signals going to your brain less sharp.

How To Use Your Shower As Cold Therapy

No research has been done to determine how frequently someone should take a cold shower. After your workouts, I advise using cold treatment; if you exercise every day, it’s okay to take a cold shower every day.

My advice for taking a cold shower is as follows: Maintain a 60°F water temperature minimum. Set the temperature of a normal residential shower as low as it will go.

Move slowly, cold water for 30 seconds should be used first.

Work your way up to a minute before taking a two- to three-minute cold shower.

Switch between hot and cold, this entails three minutes of hot shower time, followed by one minute of cold water. Three times through the sequence, always ending with the cold water.

8 ways cold showers will change your life
8 reasons you should be taking cold showers
[jetpack-related-posts]

Unwind and Indulge: A Guide to Hosting the Perfect Spa Day Party

Filed Under: Self Care //

How to throw a spa part at home

Gather your friends and transform your space into a haven of relaxation and pampering with an at-home spa day party. 

Whether you’re celebrating a special occasion like a bachelorette or simply looking for a luxurious way to spend quality time together, a spa day party is a great way to have a relaxing spa day in the comfort of your own home. 

Now let’s dive into the steps to create a memorable and rejuvenating day spa experience for you and your guests.

How To Create Your Own Spa Day Party At Home

Step 1: Set the Scene for Your Pamper Day

how to throw a spa party on a budget

Invitations: Send out stylish invitations to invite your friends to the perfect spa day. You can opt for elegant paper invites or go digital for convenience.

Decor: Create a tranquil atmosphere with calming colors, soft lighting, and soothing décor elements like candles, fairy lights, and plush cushions, which make it feel like a luxurious spa.

Ambiance: Play soothing classical music or nature sounds to enhance the home spa session for you and your friends. Consider diffusing essential oils for a soothing smell.

Creating the perfect spa-like atmosphere is crucial for setting the scene for a relaxing at-home spa experience. These home spa day ideas can transform your space into a tranquil oasis that will transport your guests to a world of serenity:

Choose the Right Space: Select a comfortable and spacious area for your spa day party. It could be your living room, outdoor patio, or a dedicated room. Ensure there’s enough room for treatment stations, lounging, and socializing, consider using a different room for this.

Calming Color Palette: Opt for soft, calming colors such as pastels, neutrals, and muted tones. These hues promote relaxation and create a serene ambiance.

Aromatherapy: Infuse the air with calming scents by using an essential oil diffuser or scented candles. Choose aromas like lavender, chamomile, eucalyptus, or citrus to enhance relaxation.

Comfortable Seating: Provide plush cushions, throw pillows, and cozy blankets to create comfortable seating areas where guests can relax and chat.

Natural Elements: Incorporate elements of nature, such as potted plants, flowers, or even a small indoor fountain, to bring a sense of tranquility to the space.

Towels and Robes: Set out fluffy towels and comfortable robes for your guests to use during treatments and to create a spa-like feel.

DiY Spa Treatments: Designate different areas for facial treatments like DIY face masks and the use of facial steamers, manicures, pedicures, and foot massages. Arrange each station with the necessary supplies, products, and comfortable seating.

Beverage Station: Create a hydration station with infused water, herbal teas, and refreshing mocktails. Provide elegant glassware or mugs for guests to enjoy their drinks. Also consider putting out healthy snacks.

Related Post: Why You Should Start Your Day With A Glass Of Lemon Water

Personalized Details: Add personal touches like name tags, seating arrangements, or welcome signs to make your guests feel special and appreciated.

Unplugged Environment: Encourage guests to disconnect from their devices and fully immerse themselves in the spa experience. Provide a basket where they can temporarily store their phones.

Remember, the goal is to create an environment that promotes relaxation and indulgence. By combining calming aesthetics, sensory elements, and thoughtful details, you’ll set the scene for a spa day party that your guests will remember and cherish.

Step 2: Create a Spa Menu

Creating a well-rounded and enticing spa menu is essential for offering a variety of treatments and experiences to your guests. Here’s a selection of treatments and services you can consider adding to your spa menu:

Facial Treatments:

Classic Facial: A thorough cleansing, exfoliation, and moisturizing treatment customized to each guest’s skin type.

Related Post: At-Home Steam Facial On A Budget

Hydrating Mask: Deeply moisturizing mask to replenish and hydrate the skin, leaving it soft and supple, add an eye mask to this to really get the full results of hydration.

Detoxifying Mask: A clay-based mask to draw out impurities and detoxify the skin, giving you a clean face and promoting a clearer complexion.

Anti-Aging Facial: Targeted treatment with serums and creams to reduce fine lines, improve elasticity, and enhance skin tone.

Brightening Facial: Utilizing products with vitamin C and other brightening agents to achieve a radiant and even complexion.

Related Post: DIY Natural Face Masks For Glowing Skin In No Time

Body Treatments:

Body Scrub: Exfoliating body scrub treatment using a brown sugar or salt scrub to remove dead skin cells and reveal smoother skin.

Body Wrap: Nourishing wrap with natural ingredients like seaweed or mud to detoxify, hydrate, and revitalize the skin.

Massage Therapy: Offer various massage options, such as Swedish, deep tissue, foot massage, or hot stone, to relax muscles and reduce tension. If you have the budget, you could spring to get a professional massage added to the menu.

Aromatherapy: Incorporate essential oils into massage or diffusers to enhance relaxation and well-being.

  • The Best Body Scrubs And Exfoliators
  • DIY Colloidal Oatmeal Body Scrub Recipe
  • How To Make Coconut Lime Body Scrub For Silky-Soft Skin

Nail & Hand Treatments:

Manicure: Nail shaping, cuticle care, hand massage, and nail polish application.

Pedicure: Similar to a manicure, but focused on foot care, including a foot soak and exfoliation.

Nail Art: Creative nail art designs and patterns for those looking for a unique and artistic touch.

Gel or Shellac Manicure/Pedicure: Longer-lasting nail polish options for a polished look that lasts weeks.

  • How To Nail Your French Manicure At Home Every Time
  • Herbal DIY Nail Soak Recipe To Strengthen Your Nails
  • How To At-Home Pedicure That’s Salon-Worthy

Hair Treatments:

Hair Mask: Deep conditioning treatment to nourish and revitalize hair, leaving it soft and manageable.

Scalp Massage: A relaxing scalp massage focused on the scalp to relieve tension and promote relaxation.

Styling: Offer simple hairstyling, such as braids, updos, or curls, for a polished finish.

Remember to offer options for various treatment durations and packages, allowing guests to choose what best suits their preferences and needs. 

Providing a range of services ensures that your spa menu caters to different desires and helps create a truly personalized spa experience for each guest.

Step 3: Fun and Games

Incorporating fun and engaging games into your spa day party can add an extra element of enjoyment and interaction for your guests. 

Here are some relaxing and spa-themed games that you can consider playing at your spa day party:

Guess the Aroma: Set up a table with a variety of scented essential oils or candles. Blindfold each guest and have them try to identify different scents. Provide small prizes for those who guess correctly.

DIY Sugar Scrub Contest: Provide different natural ingredients like coffee, white sugar, essential oils, Epsom salt, and scents, and challenge your guests to create their own customized sugar scrubs or coffee scrubs. Have a judging session and award prizes for the most creative or best-smelling exfoliating body scrub.

Relaxation Yoga Session: Invite a yoga instructor or use instructional videos to guide a relaxing and gentle yoga session. It’s a wonderful way to promote mindfulness and relaxation.

Nail Polish Spin Wheel: Create a spinning wheel with various nail polish colors. Guests take turns spinning the wheel to determine the color they’ll use for their manicure or pedicure.

Spa Trivia: Prepare a list of spa and wellness-related trivia questions. Divide your guests into teams and host a trivia game. The team with the most correct answers wins a prize.

Towel Folding Challenge: Provide guests with clean towels and demonstrate how to fold them into creative shapes or animals. Have a friendly competition to see who can create the most impressive towel creation.

Spa Bingo: Create bingo cards with spa-related words or images. As guests enjoy their spa treatments, they can mark off items on their bingo cards. The first person to complete a line or pattern wins a prize.

Guided Meditation: Play a recorded guided meditation or lead a session yourself. This game promotes relaxation and mindfulness, enhancing the spa experience.

Name that Mask: Prepare different facial masks and label them with creative names. Have guests apply the masks and try to match the mask with its correct name. Provide a small prize for those who guess the most correctly.

Spa-Themed Charades: Write down spa-related activities or treatments on slips of paper and place them in a bowl. Guests take turns drawing a slip and acting out the activity without speaking, while others guess what it is.

Pamper Pictionary: Set up a game of Pictionary using spa-related words or phrases. Divide guests into teams and have them take turns drawing and guessing.

Remember, the goal is to keep the atmosphere relaxed and enjoyable, so choose games that encourage laughter, interaction, and a sense of camaraderie among your guests. These spa-themed games will add a delightful touch to your spa day party and ensure a memorable and fun-filled experience for everyone involved.

Step 4: Party Favors

Sending your guests home with thoughtful and spa-inspired party favors is a wonderful way to extend the relaxation and pampering experience. 

Here are some creative and luxurious party favor ideas for your spa day party:

Mini Bath Salt Jars: Fill small glass jars with homemade or store-bought bath salts in calming scents. Tie a ribbon and a personalized tag around the jar for a stylish touch. 

Scented Candles: Give each guest a mini-scented candle with a relaxing aroma, like lavender, chamomile, or vanilla.

Miniature Essential Oils: Provide small bottles of essential oils that guests can use for aromatherapy at home. Include a card with suggestions for different uses.

Lip Balm Set: Gift a set of natural or tinted lip balms for soft and moisturized lips.

Nail Polish: Choose a selection of nail polish colors and give each guest a bottle to add a pop of color to their nails.

Silk Sleep Mask: Provide silky and comfortable sleep masks for a peaceful night’s sleep.

Herbal Tea Blend: Create personalized herbal tea blends or include pre-packaged calming tea bags.

DIY Sugar Scrub Kits: Assemble small kits with natural ingredients for a DIY sugar scrub, including sugar, oil, and essential oils.

Hair Accessories: Include hair ties, clips, or headbands for a stylish and practical party favor.

Miniature Skin Care Products: Offer travel-sized moisturizers, cleansers, or serums for guests to continue their skincare routine at home.

Relaxation Journal: Provide small notebooks where guests can jot down their thoughts, self-care routines, or gratitude reflections.

Plant or Succulent: Gift a small potted plant or succulent for a touch of nature and greenery.

Soothing Eye Masks: Provide gel or fabric eye masks that can be chilled and used to relieve tired eyes.

Aromatherapy Rollerballs: Create rollerballs with calming essential oil blends for stress relief on the go.

Customized Tote Bags: Design tote bags with a spa-themed motif, and fill them with a selection of party favors.

Don’t forget to add a personalized thank-you note or tag to each party favor to express your appreciation for your guests’ attendance. 

These party favors will not only be a delightful memento of the spa day party but also a reminder of the relaxation and self-care they enjoyed during the event.

Step 5: Capture the Memories

Designate a photo corner with spa-themed props for fun photo opportunities. Encourage guests to capture their relaxing moments and memories from the spa day party.

Remember, the most important aspect of your spa day party is to relax, unwind, and enjoy the company of your friends. Embrace the tranquility and pampering, and let the stresses of everyday life melt away as you bond over a shared experience of indulgence.

PIN FOR LATER!

How to throw a spa part at home
[jetpack-related-posts]
  • « Previous Page
  • 1
  • …
  • 31
  • 32
  • 33
  • 34
  • 35
  • …
  • 48
  • Next Page »

Copyright © 2026 · Theme by Marketing Templates Co.

We use cookies on our website to give you the most relevant experience by remembering your preferences and repeat visits.Read More By clicking “Accept All”, you consent to the use of ALL the cookies. However, you may visit "Cookie Settings" to provide a controlled consent.
Cookie SettingsAccept All
Manage consent

Privacy Overview

This website uses cookies to improve your experience while you navigate through the website. Out of these, the cookies that are categorized as necessary are stored on your browser as they are essential for the working of basic functionalities of the website. We also use third-party cookies that help us analyze and understand how you use this website. These cookies will be stored in your browser only with your consent. You also have the option to opt-out of these cookies. But opting out of some of these cookies may affect your browsing experience.
Necessary
Always Enabled
Necessary cookies are absolutely essential for the website to function properly. These cookies ensure basic functionalities and security features of the website, anonymously.
CookieDurationDescription
cookielawinfo-checkbox-analytics11 monthsThis cookie is set by GDPR Cookie Consent plugin. The cookie is used to store the user consent for the cookies in the category "Analytics".
cookielawinfo-checkbox-functional11 monthsThe cookie is set by GDPR cookie consent to record the user consent for the cookies in the category "Functional".
cookielawinfo-checkbox-necessary11 monthsThis cookie is set by GDPR Cookie Consent plugin. The cookies is used to store the user consent for the cookies in the category "Necessary".
cookielawinfo-checkbox-others11 monthsThis cookie is set by GDPR Cookie Consent plugin. The cookie is used to store the user consent for the cookies in the category "Other.
cookielawinfo-checkbox-performance11 monthsThis cookie is set by GDPR Cookie Consent plugin. The cookie is used to store the user consent for the cookies in the category "Performance".
viewed_cookie_policy11 monthsThe cookie is set by the GDPR Cookie Consent plugin and is used to store whether or not user has consented to the use of cookies. It does not store any personal data.
Functional
Functional cookies help to perform certain functionalities like sharing the content of the website on social media platforms, collect feedbacks, and other third-party features.
Performance
Performance cookies are used to understand and analyze the key performance indexes of the website which helps in delivering a better user experience for the visitors.
Analytics
Analytical cookies are used to understand how visitors interact with the website. These cookies help provide information on metrics the number of visitors, bounce rate, traffic source, etc.
Advertisement
Advertisement cookies are used to provide visitors with relevant ads and marketing campaigns. These cookies track visitors across websites and collect information to provide customized ads.
Others
Other uncategorized cookies are those that are being analyzed and have not been classified into a category as yet.
SAVE & ACCEPT