• HOME
  • RELATIONSHIPS
  • HOLIDAYS
  • WELLNESS
  • CAREER & FINANCE
  • FASHION
  • BEAUTY
  • LIVING

Advice From Nobody

You are here: Home / Archives for BEAUTY / DIY Beauty

The Ultimate Guide To Making Luxurious Body Butter: Do’s and Don’ts, Plus 10 Great Body Butter Recipes

Filed Under: Body, DIY Beauty // 07/24/2024

The Do's And Don't Of Making Body Butter

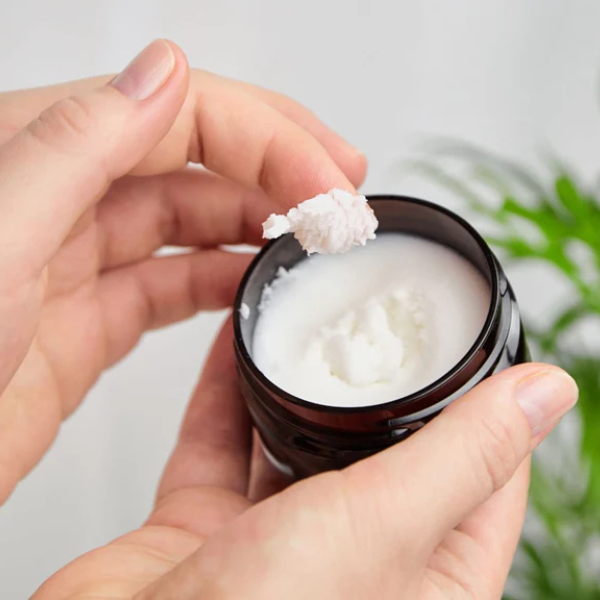
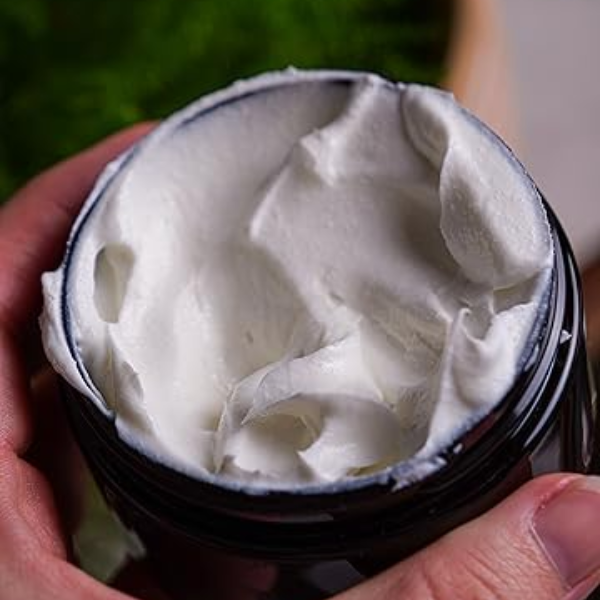
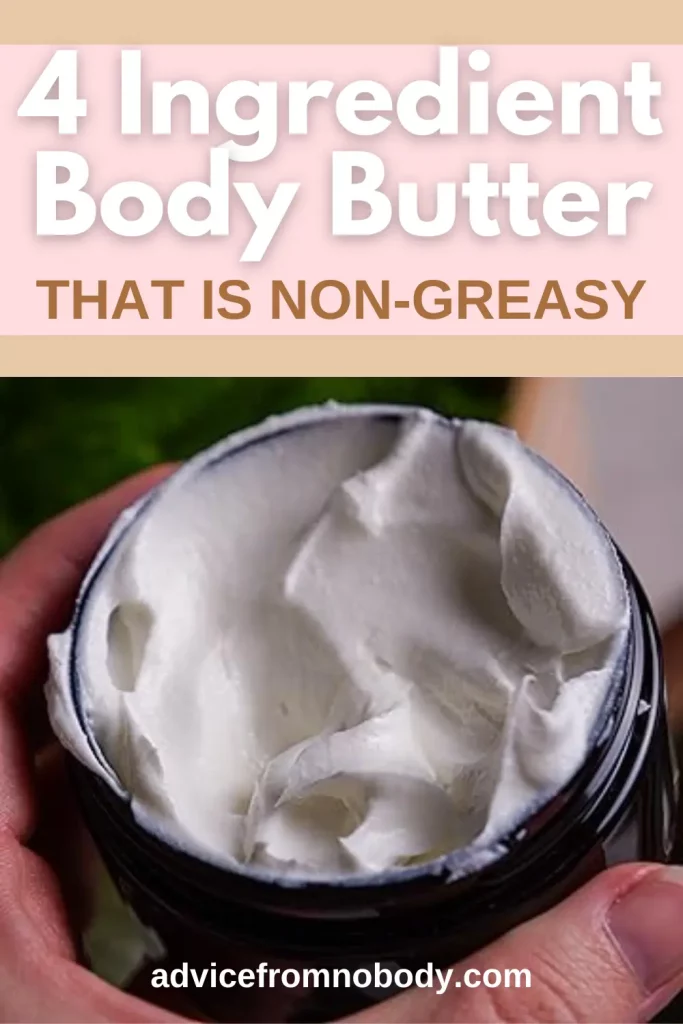
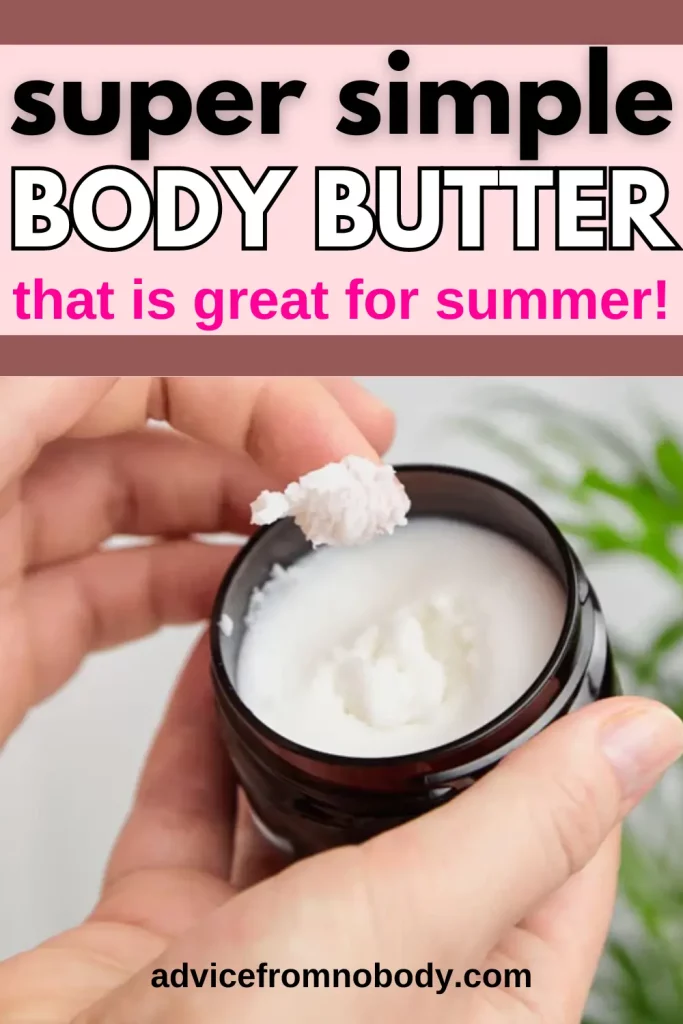
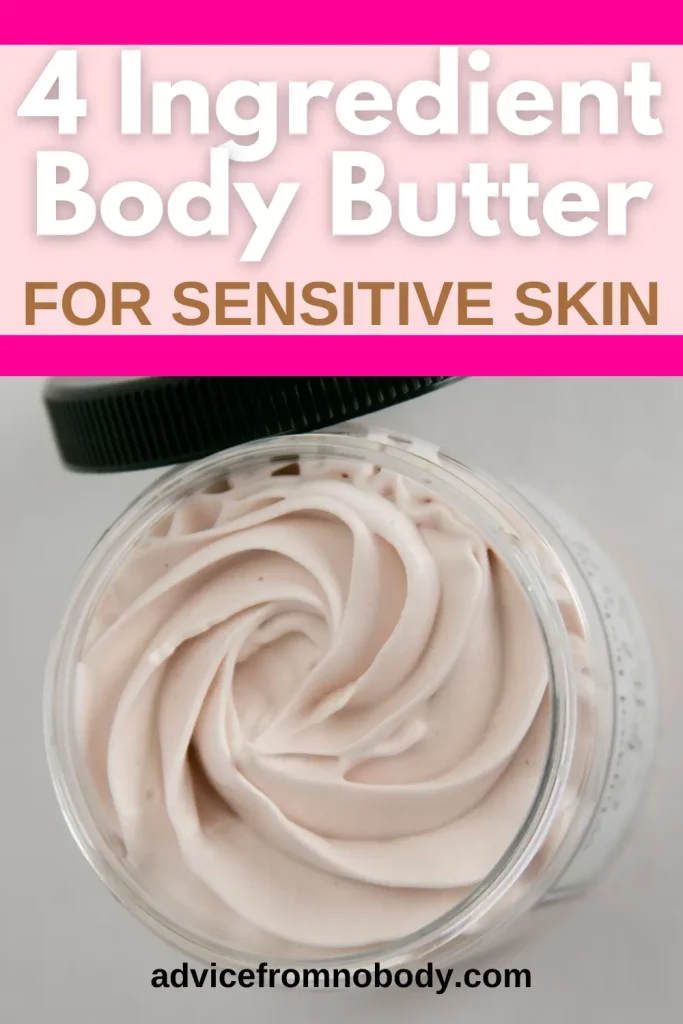
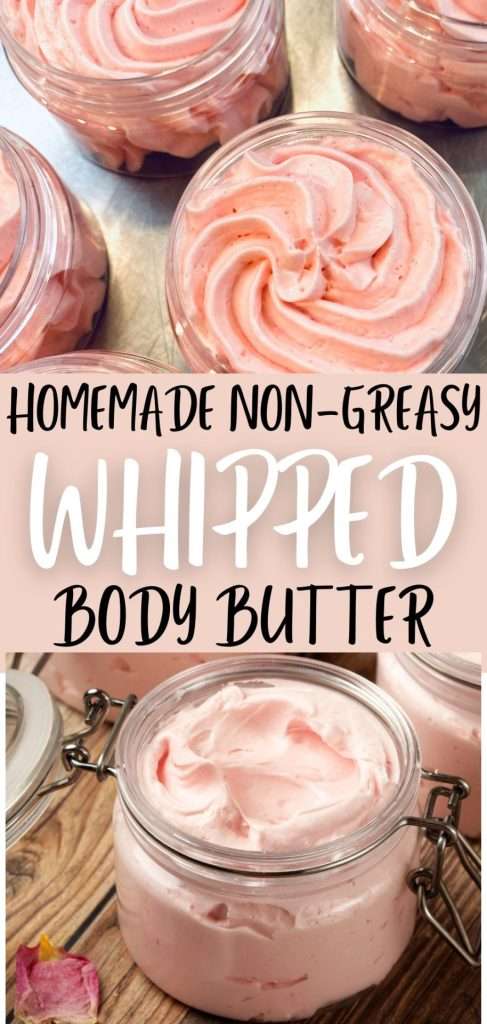
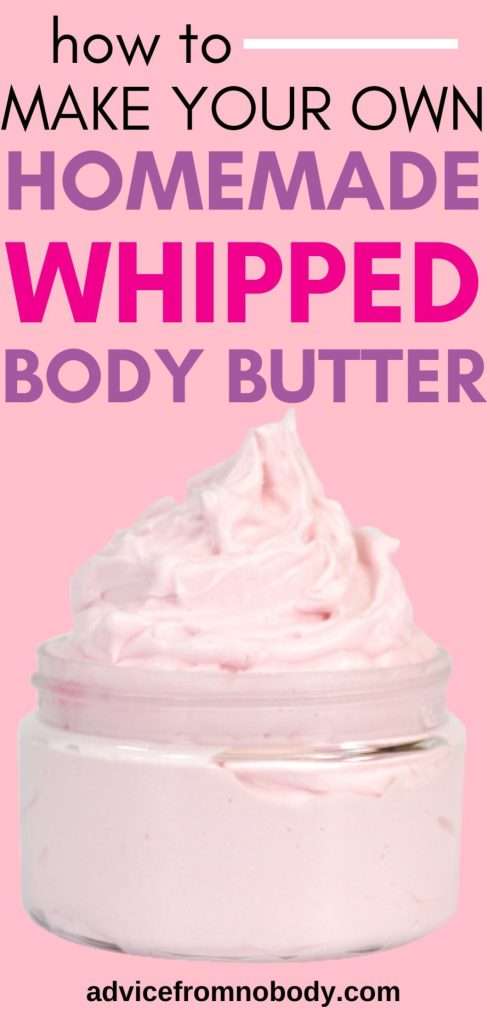
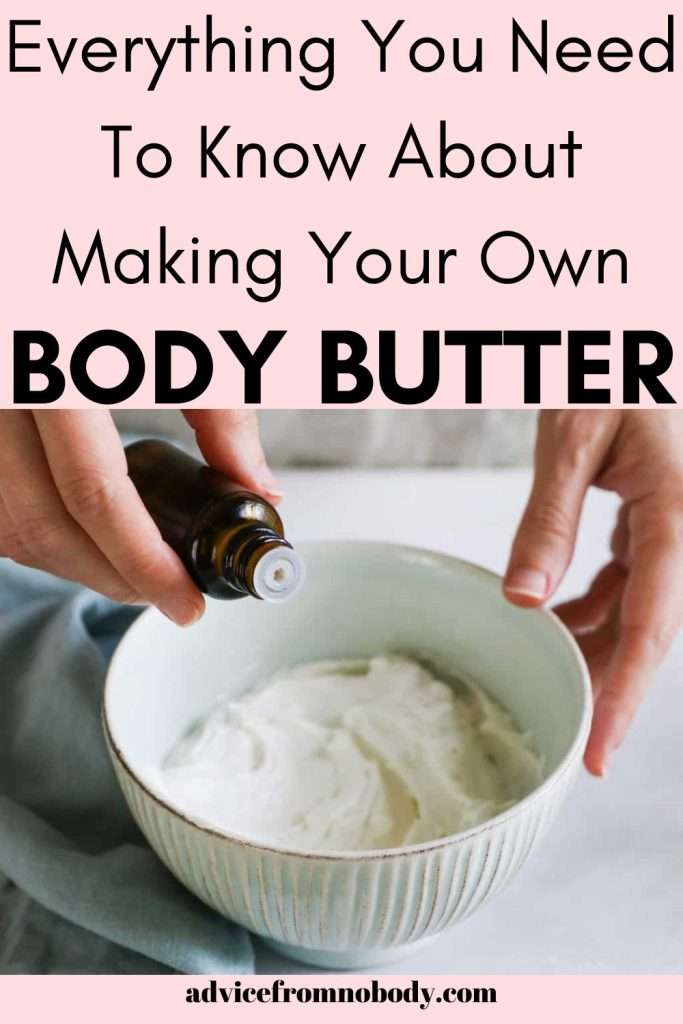
When it comes to body care, few things are as indulgent and nourishing as body butter.

The rich, creamy texture and intense hydration make it a staple in many people’s body care routines. What’s more exciting is that you can create your own customized body butters right at home with only a few ingredients.

However, there are certain do’s and don’ts to keep in mind to ensure you achieve the best results. We’ll tell you everything you need to know about making body butter, along with ten tempting recipes to inspire your creativity.

The Benefits Of Making Your Own Body Butter

Making body butter at home offers a multitude of benefits that cater to your skin’s health, your creativity, and your overall well-being. Let’s explore some of the remarkable advantages of crafting your own body butter:

1. Control Over Ingredients:

When you create body butter at home, you have full control over the quality of the ingredients you use. You can choose organic, natural, and unrefined oils and butters, ensuring that your skin receives the most beneficial nutrients without the presence of harmful chemicals or synthetic additives.

2. Customization for Your Skin Type:

Everyone’s skin is unique, and store-bought products may not always address your specific needs. By making your own body butter, you can tailor the ingredients to suit your skin type, whether it’s dry, sensitive, oily, or a combination. This customization ensures that your skin gets the care it truly requires.

3. Enhanced Nutrient Content:

Homemade body butter can contain a higher concentration of skin-loving nutrients. You can choose carrier oils and butters rich in vitamins, antioxidants, and essential fatty acids that nourish, repair, and rejuvenate your skin. This can result in improved skin texture, tone, and overall radiance.

4. Avoid Harmful Chemicals:

Many commercial skincare products contain synthetic fragrances, preservatives, and other potentially harmful chemicals that can lead to skin irritation, allergies, or other adverse reactions. By making your own body butter, you eliminate the risk of exposing your skin to such chemicals.

5. Cost-Effectiveness:

While high-quality ingredients can have an upfront cost, making body butter at home can ultimately be cost-effective in the long run. The initial investment in ingredients often yields multiple batches, which can last for an extended period, reducing the need for frequent store-bought purchases.

6. Eco-Friendly Approach:

Crafting your own body butter supports an eco-friendly lifestyle. You can choose sustainably sourced ingredients and reduce plastic waste by using reusable containers. Additionally, the absence of packaging and transportation associated with store-bought products contributes to a smaller environmental footprint.

7. Therapeutic Aromatherapy:

Homemade body butter allows you to incorporate essential oils with therapeutic properties. You can choose scents that uplift your mood, promote relaxation, or even help with specific skin concerns.

Aromatherapy through your skincare routine enhances the overall sensory experience and contributes to your well-being.

8. Makes A Great Gift:

Creating body butter can become a fun and engaging activity to share with friends, family, or even children. It’s a chance to bond over a shared interest in skincare and DIY projects.

Moreover, homemade body butter makes for thoughtful and personalized gifts, showcasing your care and effort.

In essence, making body butter at home is a holistic experience that goes beyond skincare. It empowers you to make conscious choices about what you put on your skin, promotes self-care, and lets you create a product that aligns with your values and needs.

Whether you’re seeking natural nourishment, therapeutic benefits, or a creative outlet, homemade body butter has something special to offer.

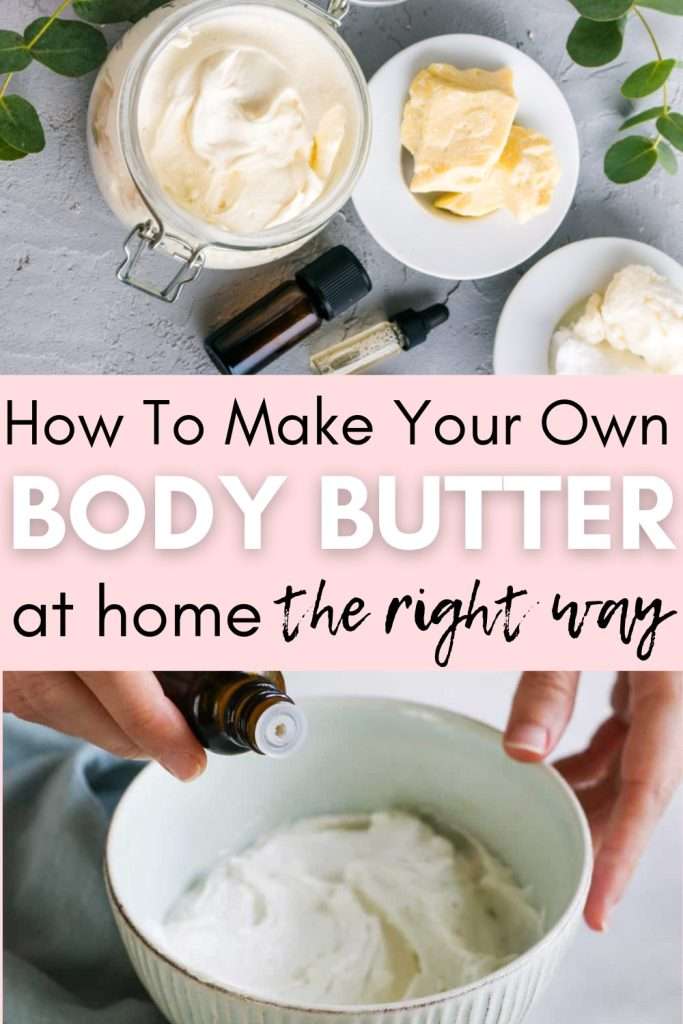
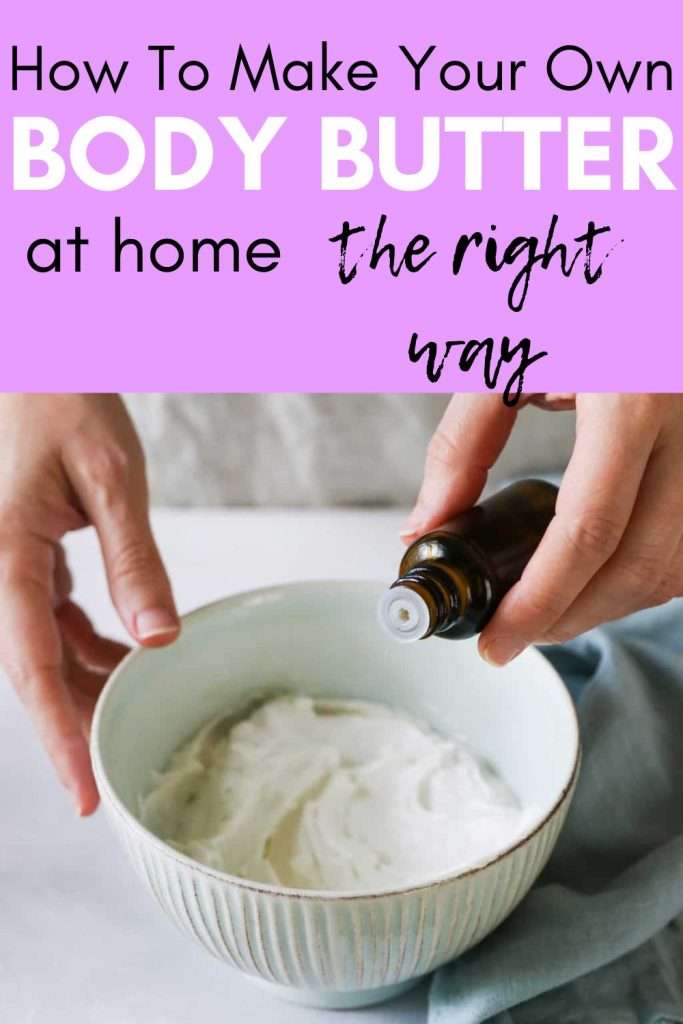
What To Do When Making Body Butter:

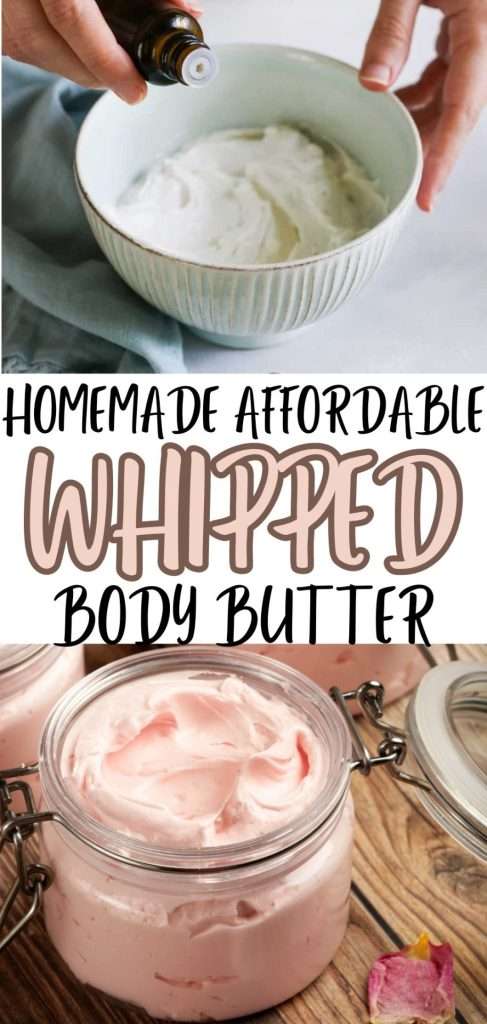
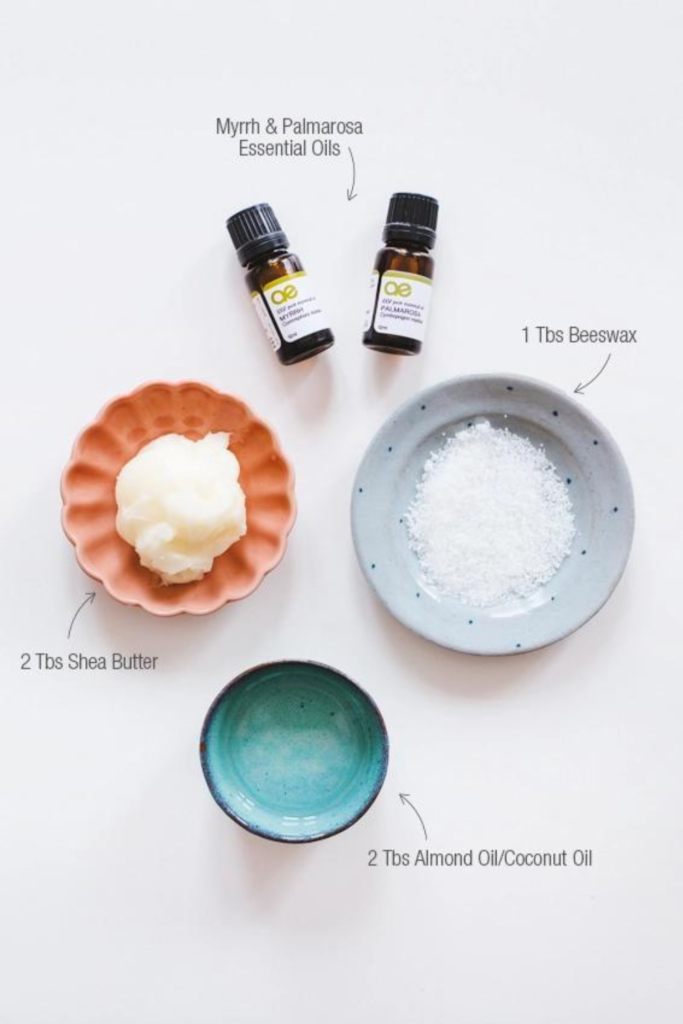
Choose Quality Ingredients: The foundation of any great body butter is high-quality ingredients. Opt for organic, unrefined, and cold-pressed carrier oils, butters, and essential oils. This ensures you’re providing your skin with the best possible nourishment.

Sanitize Equipment: Before you begin, make sure all your utensils, containers, and equipment are thoroughly cleaned and sanitized. This helps prevent contamination and extends the shelf life of your body butter.

Experiment with Ingredients: Feel free to experiment with different carrier oils, butters, and essential oils to find the combination that suits your skin type and preferences. Each ingredient offers unique benefits, so don’t be afraid to get creative.

Emulsifying Agents: If you’re looking for a more stable body butter, consider adding natural emulsifiers like beeswax or lecithin. These help bind water and oil phases together, preventing separation.

Use a Preservative: If your body butter contains water-based ingredients or if you’re planning to use it over an extended period, consider adding a natural preservative to prevent microbial growth and spoilage.

Label and Date: Once your body butter is ready, label the containers with the ingredients used and the date of preparation. This will help you keep track of the shelf life and ingredients for future reference.

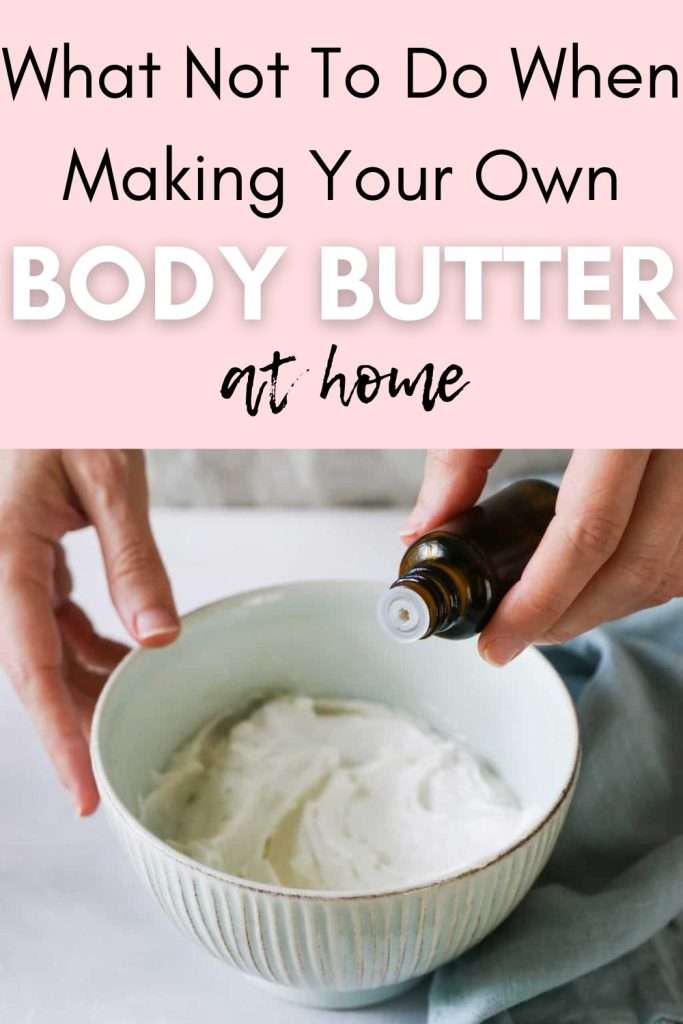
What Not To Do When Making Body Butter:

Avoid Synthetic Fragrances and Dyes: Synthetic fragrances and dyes can irritate the skin and even cause allergic reactions. Opt for natural essential oils and botanicals to add a pleasing scent and color.

Don’t Overheat Ingredients: While melting oils and butters, avoid overheating them. Use a gentle heat source and stir constantly to prevent burning or scorching, which can alter the properties of your ingredients.

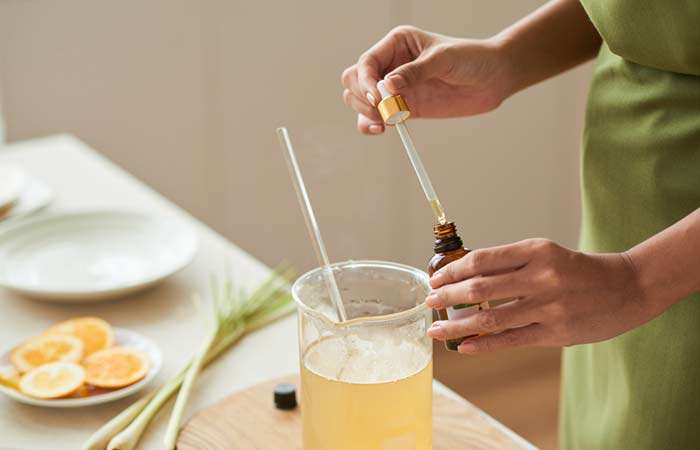
Avoid Excessive Essential Oils: Essential oils are potent and should be used sparingly. Overuse can lead to skin sensitivity and irritation. Follow recommended dilution guidelines for safe usage.

Don’t Rush the Cooling Process: Allow your body butter to cool gradually. Rapid cooling can result in uneven texture and consistency.

Avoid Contamination: Keep your hands and any water out of the body butter containers to prevent bacterial growth. Use clean utensils or spatulas to scoop out the product.

Don’t Skip Patch Testing: Before applying your homemade body butter all over, do a patch test on a small area of skin to ensure you don’t experience any adverse reactions.

10 Amazing Body Butter Recipes:

1. Shea Lavender Dream:

Ingredients:

  • ½ cup shea butter
  • ¼ cup coconut oil
  • 2 tablespoons jojoba oil
  • 15-20 drops lavender essential oil

Instructions:

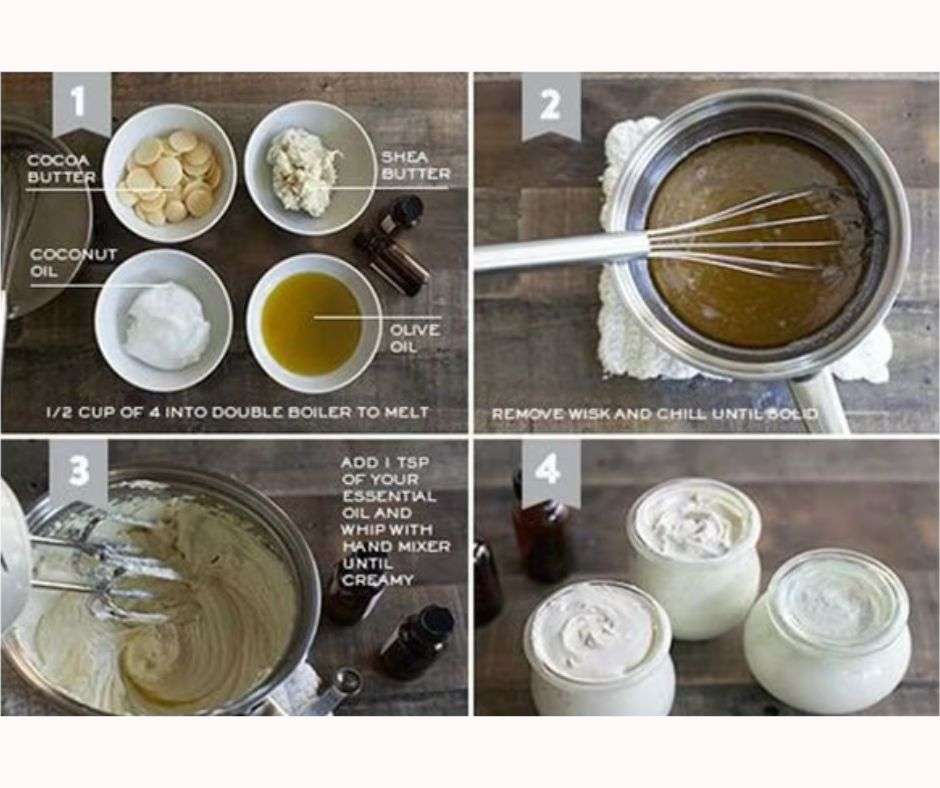
  1. Melt shea butter and coconut oil in a double boiler.
  2. Remove from heat and stir in jojoba oil.
  3. Allow the mixture to cool for a few minutes.
  4. Add lavender essential oil and stir well.
  5. Whip the mixture until creamy using a hand mixer.
  6. Transfer to containers and let it cool and solidify.

2. Cocoa Vanilla Delight:

Ingredients:

  • ½ cup cocoa butter
  • ¼ cup sweet almond oil
  • 2 tablespoons avocado oil
  • 1 teaspoon vanilla extract

Instructions:

  1. Melt cocoa butter in a double boiler.
  2. Stir in sweet almond oil and avocado oil.
  3. Let the mixture cool slightly.
  4. Add vanilla extract and mix thoroughly.
  5. Whip the mixture until it’s light and fluffy.
  6. Transfer to containers and let it set.

For the remaining recipes, follow a similar process:

3. Mango Citrus Bliss:

Ingredients:

  • ½ cup mango butter
  • ¼ cup grapeseed oil
  • 2 tablespoons apricot kernel oil
  • 10 drops orange essential oil
  • 5 drops lemon essential oil

Instructions:

  1. Melt the butters and oils in a double boiler.
  2. Let the mixture cool slightly.
  3. Add essential oils, extracts, or other additives as mentioned in the recipe.
  4. Whip the mixture using a hand mixer until fluffy.
  5. Transfer to containers and allow it to set.

Remember to store your homemade body butters in a cool, dry place and enjoy the luxurious, personalized skincare you’ve created!

4. Coconut Rose Infusion:

Ingredients:

  • ½ cup coconut oil
  • ¼ cup rosehip oil
  • 2 tablespoons shea butter
  • 10 drops rose essential oil

Instructions:

  1. Melt the butters and oils in a double boiler.
  2. Let the mixture cool slightly.
  3. Add essential oils, extracts, or other additives as mentioned in the recipe.
  4. Whip the mixture using a hand mixer until fluffy.
  5. Transfer to containers and allow it to set.

5. Avocado Eucalyptus Revive:

Ingredients:

  • ½ cup avocado butter
  • ¼ cup jojoba oil
  • 2 tablespoons argan oil
  • 10 drops eucalyptus essential oil

Instructions:

  1. Melt the butters and oils in a double boiler.
  2. Let the mixture cool slightly.
  3. Add essential oils, extracts, or other additives as mentioned in the recipe.
  4. Whip the mixture using a hand mixer until fluffy.
  5. Transfer to containers and allow it to set.

6. Almond Chamomile Soothe:

Ingredients:

  • ½ cup almond butter
  • ¼ cup calendula-infused oil
  • 2 tablespoons chamomile-infused oil
  • 5 drops lavender essential oil
  • 5 drops chamomile essential oil

Instructions:

  1. Melt the butters and oils in a double boiler.
  2. Let the mixture cool slightly.
  3. Add essential oils, extracts, or other additives as mentioned in the recipe.
  4. Whip the mixture using a hand mixer until fluffy.
  5. Transfer to containers and allow it to set.

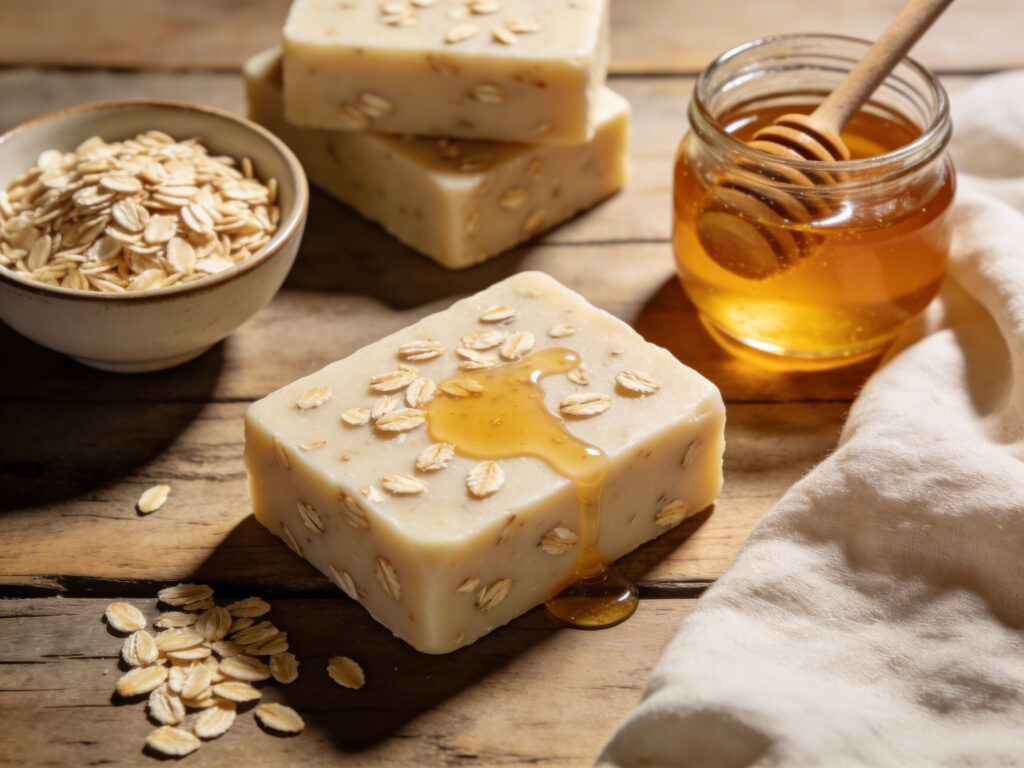
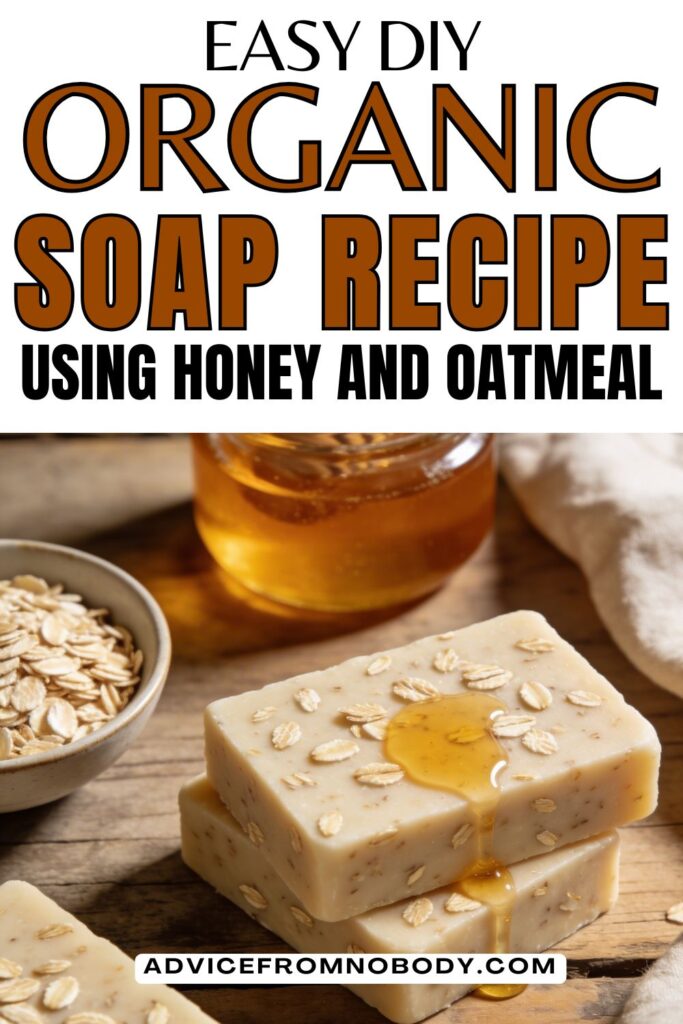
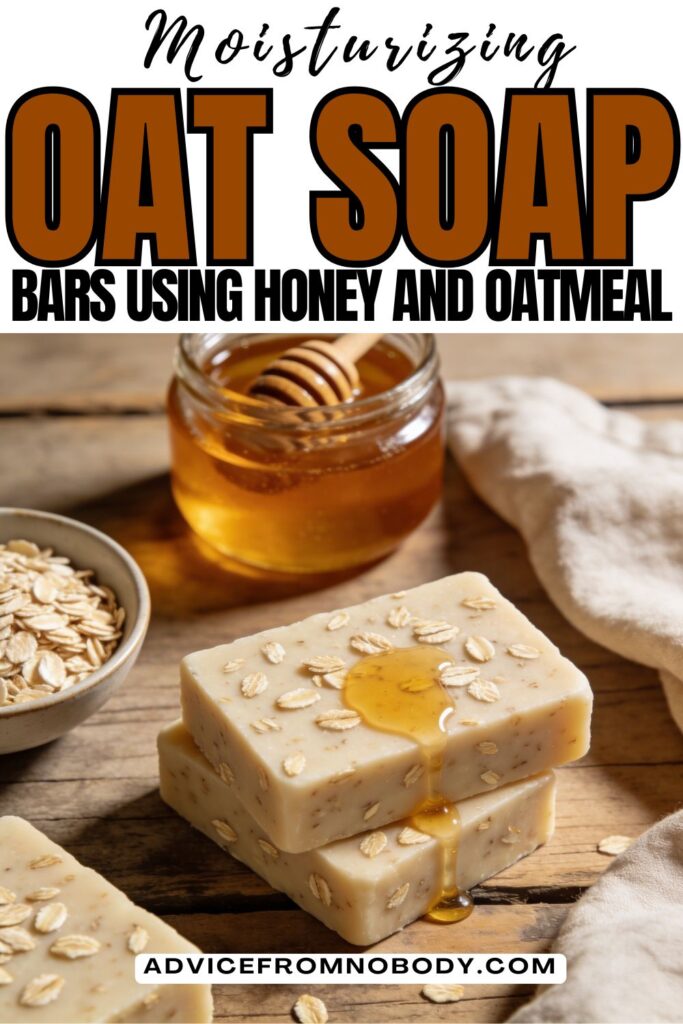
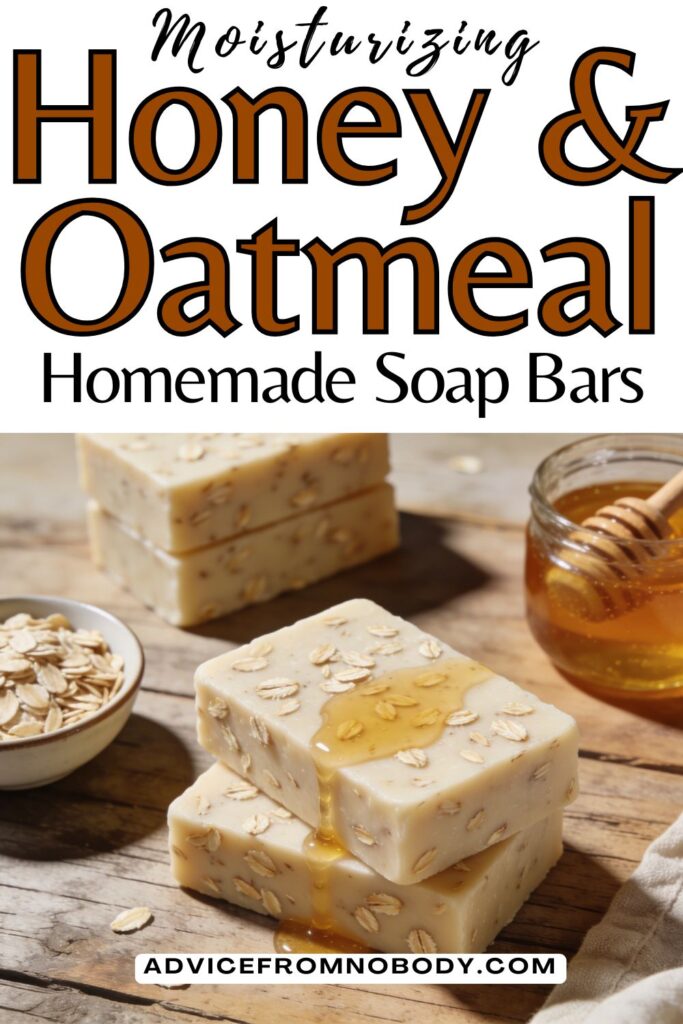
7. Oatmeal Honey Comfort:

Ingredients:

  • ½ cup shea butter
  • ¼ cup oat oil
  • 2 tablespoons honey
  • 1 tablespoon colloidal oatmeal

Instructions:

  1. Melt the butters and oils in a double boiler.
  2. Let the mixture cool slightly.
  3. Add essential oils, extracts, or other additives as mentioned in the recipe.
  4. Whip the mixture using a hand mixer until fluffy.
  5. Transfer to containers and allow it to set.

8. Gentle Green Tea Elixir:

Ingredients:

  • ½ cup matcha-infused coconut oil
  • ¼ cup avocado oil
  • 2 tablespoons green tea butter

Instructions:

  1. Melt the butters and oils in a double boiler.
  2. Let the mixture cool slightly.
  3. Add essential oils, extracts, or other additives as mentioned in the recipe.
  4. Whip the mixture using a hand mixer until fluffy.
  5. Transfer to containers and allow it to set.

Remember to store your homemade body butters in a cool, dry place and enjoy the luxurious, personalized skincare you’ve created!

Making your own luxurious body butter is a rewarding and personalized way to care for your skin.

By following the do’s and don’ts of body butter creation, you can ensure a safe and enjoyable experience. Experiment with different ingredients to discover your favorite combinations and scents. With the eight delectable recipes provided, you’re well on your way to crafting sumptuous body butters that cater to your skin’s unique needs.

So go ahead, embrace the art of body butter making and indulge in the ultimate self-care treat. Your skin will thank you for it!

[jetpack-related-posts]

10 3-Ingredient DIY Aromatherapy Body Washes For Luxurious Self-Care

Filed Under: Body, DIY Beauty // 07/24/2024

In our fast-paced lives, finding moments of relaxation and self-care is essential.

One simple yet effective way to indulge in self-pampering is by creating your own DIY body washes. These customizable shower gels not only allow you to tailor your shower experience but also promote well-being through aromatherapy.

I love all these recipes, and today you’ll learn the benefits of making your own body wash at home.

I’ll provide you with 10 delightful aromatherapy body wash recipes, using only 3 ingredients each, natural ingredients.

Why Make Your Own Body Wash At Home?

  1. Natural Ingredients: Commercial body washes often contain synthetic fragrances and harsh chemicals. By making your own, you control the ingredients, ensuring a natural and gentle product for your skin.
  2. Customizable: Crafting your body washes allows you to experiment with various essential oils, creating blends that suit your mood and preferences. The aromas can uplift, relax, or invigorate your senses.
  3. Cost-Effective: DIY body washes can be more budget-friendly than high-end store-bought options. Plus, you can make larger batches for extended use. And with our recipes, you only need 3 ingredients per body wash.
  4. Eco-Friendly: By using reusable containers, you reduce plastic waste from commercial packaging.

Benefits Of Creating Your Own Shower Gel At Home

  1. Tailored Aromatherapy: Enjoy the benefits of personalized aromatherapy to suit your mood and needs.
  2. Gentle on Skin: Avoid harsh chemicals and synthetic fragrances, especially if you have sensitive skin. Like our colloidal oatmeal shower gel which is perfect for eczema-prone skin.
  3. Eco-Conscious: Reduce plastic waste and opt for eco-friendly packaging.
  4. Cost-Effective: Save money by making larger batches that last.
  5. Creative Outlet: Channel your creativity into crafting unique blends.

10 Aromatherapy Body Washes

1. Calming Lavender Vanilla Homemade Body Wash:

Lavender Vanilla Body Wash Ingredients:

  • 1 cup liquid castile soap
  • 15 drops of lavender essential oil
  • 1 teaspoon vanilla extract

How to Make The Lavender Vanilla DIY Body Wash:

  • Combine the liquid castile soap and lavender essential oil in a mixing bowl.
  • Add the vanilla extract and stir well to blend all the ingredients.
  • Pour the mixture into a suitable bottle for storage.

2. Energizing Citrus Mint DIY Shower Gel:

Citrus Mint DIY Shower Gel Ingredients:

  • 1 cup liquid castile soap
  • 10 drops of sweet orange essential oil
  • 5 drops peppermint essential oil

How to Make Citrus Mint Homemade Shower Gel:

  • Mix the liquid castile soap with the sweet orange and peppermint essential oils in a container.
  • Stir gently to ensure an even distribution of the oils.
  • Transfer the mixture to a bottle for use.

3. Soothing Chamomile Honey DIY Body Wash:

Ingredients For Chamomile Honey DIY Body Wash:

  • 1 cup liquid castile soap
  • 10 drops of chamomile essential oil
  • 1 tablespoon raw honey

How to Make Chamomile Honey Homemade Shower Gel:

  • Combine the liquid castile soap and chamomile essential oil in a bowl.
  • Add the raw honey and mix thoroughly until the honey is well incorporated.
  • Store the mixture in a bottle.

4. Refreshing Eucalyptus Tea Tree Body Wash:

Ingredients For Eucalyptus Tea Tree DIY Body Wash:

  • 1 cup liquid castile soap
  • 10 drops eucalyptus essential oil
  • 5 drops of tea tree essential oil

How to Make Eucalyptus Tea Tree Homemade Body Wash:

  • Mix the liquid castile soap, eucalyptus essential oil, and tea tree essential oil together.
  • Stir gently to ensure proper blending.
  • Transfer the mixture to a bottle for storage.

5. Romantic Rose Geranium Body Wash:

Rose Geranium Homemade Shower Gel Ingredients:

  • 1 cup liquid castile soap
  • 10 drops of rose essential oil
  • 5 drops of geranium essential oil

How to Make Rose Geranium Homemade Shower Gel:

  • Combine the liquid castile soap, rose essential oil, and geranium essential oil.
  • Stir gently to create a harmonious blend.
  • Store the mixture in a bottle for use.

6. Uplifting Bergamot Ylang Ylang Body Wash:

Bergamot Ylang-Ylang DIY Body Wash Ingredients:

  • 1 cup liquid castile soap
  • 10 drops of bergamot essential oil
  • 5 drops ylang-ylang essential oil

How To Make Bergamot Ylang-Ylang DIY Body Wash:

  • Mix the liquid castile soap, bergamot essential oil, and ylang-ylang essential oil.
  • Stir gently to ensure proper mixing.
  • Transfer the mixture to a suitable container.

7. Comforting Sandalwood Cedarwood Body Wash:

Cedarwood DIY Shower Gel Ingredients:

  • 1 cup liquid castile soap
  • 10 drops of sandalwood essential oil
  • 5 drops of cedarwood essential oil

How to Make Sandalwood Homemade Body Wash:

  • Combine the liquid castile soap, sandalwood essential oil, and cedarwood essential oil.
  • Gently stir to create a balanced blend.
  • Store the mixture in a bottle for use.

8. Invigorating Peppermint Eucalyptus Body Wash:

Ingredients For Making Peppermint Eucalyptus DIY Body Wash:

  • 1 cup liquid castile soap
  • 10 drops peppermint essential oil
  • 5 drops of eucalyptus essential oil

How to Make Peppermint Eucalyptus Body Wash DIY:

  • Mix the liquid castile soap, peppermint essential oil, and eucalyptus essential oil together.
  • Stir gently to ensure proper distribution of the oils.
  • Transfer the mixture to a container for storage.

9. Balancing Lavender Patchouli Body Wash:

Ingredients For Lavender Shower Gel DIY:

  • 1 cup liquid castile soap
  • 10 drops of lavender essential oil
  • 5 drops patchouli essential oil

How to Make Patchouli Homemade Shower Gel:

  • Combine the liquid castile soap, lavender essential oil, and patchouli essential oil.
  • Gently stir to create a well-blended mixture.
  • Store the body wash in a bottle.

10. Nourishing Vanilla Coconut Body Wash:

Ingredients For Vanilla Coconut DIY Body Wash:

  • 1 cup liquid castile soap
  • 10 drops vanilla essential oil
  • 1 tablespoon coconut oil (melted)

How to Make DIY Body Wash With Vanilla:

  • Mix the liquid castile soap, vanilla essential oil, and melted coconut oil together.
  • Stir gently to ensure the ingredients are thoroughly combined.
  • Transfer the mixture to a suitable container for storage.

Remember to shake the bottle before each use to ensure the oils are well-mixed.

These DIY aromatherapy body washes will not only cleanse your skin but also provide you with the therapeutic benefits of essential oils for a rejuvenating shower experience.

How To Store & Prolong Shelf Life Of Your Body Wash

  • Store your body washes in glass or plastic bottles with secure lids to prevent contamination.
  • Keep them in a cool, dry place away from direct sunlight.
  • Using a funnel can help prevent spills during transfer.

Shelf Life & Longevity

  • Most homemade body washes can last up to 6 months.
  • To extend shelf life, refrain from using water-based ingredients and avoid contaminating the products with wet hands.

How To Use Your DIY Body Washes

  • Wet your skin in the shower.
  • Shake the bottle before each use to mix the ingredients.
  • Apply a small amount onto a loofah or washcloth.
  • Massage onto your body in circular motions.
  • Rinse thoroughly with warm water.

Incorporating these DIY shower gel into your self-care routine can elevate your shower experience and promote well-being.

Experiment with different essential oil combinations and embrace the soothing effects of aromatherapy while taking care of your skin naturally.

[jetpack-related-posts]

My Super Simple, 4 Ingredient DIY Body Butter Recipe!

Filed Under: DIY Beauty, Body // 07/24/2024

homemade body butter

I have been using this DIY Homemade Body Butter Recipe for the last couple of years! It’s the only lotion that I ever use when I’m not using this whipped body butter that I love for winter!

It is perfect for dry and sensitive skin, and it only uses 4 ingredients!

This Body Butter is easy to make and it lasts for a long time. Plus, you can grab all of the ingredients on Amazon so that you don’t even have to leave your house to find everything!

If you have sensitive skin, you can try out my Colloidal Oatmeal Whipped Body Butter Recipe that soothes itchy skin and eases inflammation.

What Is Body Butter?

You’re in for a surprise if you’ve never used body butter!

It is similar to butter for your skin, well it’s exactly butter for your skin. Anyone can easily make their own body butter at home.

It’s so easy; all you have to do is combine your favorite oils by melting and whipping them together and you’ll have a lovely body butter.

You can choose to experiment with some of your favorite plant-based butters because we all need a decent moisturizer that isn’t overly oily and creates a lovely body butter recipe.

This recipe is incredibly nourishing and will make your skin feel incredibly smooth.

You can leave it as it is or add essential oils to create a great-smelling body butter for yourself or as a gift. Plus, it’s really great if you have sensitive skin.

Why This Recipe Is So Great!

  • It uses simple ingredients without any chemicals or artificial fragrances
  • It is easy to make and the perfect for all skin types
  • Makes great gifts
  • Very customizable by using your favorite essential oils

What You Need For Homemade Body Butter

  • A double boiler – you can always use a large heat-safe bowl on top of a pan with a little water in it.
  • Hand mixer – after your body butter cools a little you will want to beat your body butter to make it smooth. 
  • Time – while this only uses a few ingredients this isn’t a quick recipe, but it’s pretty hands-off so you can make it while you’re getting other things done. The mixture will need to be heated on the stove for about 45 minutes to 1 hour. 

Ingredients For Making DIY Body Butter

  • Coconut Oil
  • Shea Butter
  • Beeswax
  • Vitamin E
  • Essential Oils (optional)

Use this body butter in the winter or summer.

It is perfect all year long for all skin types! I love the way it keeps my skin so soft and silky all day long. Plus, it even smells great, with or without the essential oils!

I also love that these are pure, organic, and natural ingredients. You know exactly what you are putting on your skin.

DIY Homemade Body Butter Recipe

Ingredients You Will Need:

-1 Cup Coconut Oil

-1/2 cup Beeswax

–1 1/2 Cup Shea Butter

–1/4 Cup Vitamin E Oil

Directions To Follow:

-Melt all ingredients, except Vitamin E oil, in a double boiler. (I have found the longer you heat the mixture after it is melted helps keep the lotion from getting grainy over time. I like to heat mine for about 30 minutes after all the beeswax is melted.)

-Remove from heat, add Vitamin E Oil, and stir.

-Let cool for 15 minutes.

-Use a hand mixer to mix the lotion at a low speed.

-Pour into desired containers and let them sit overnight to cool completely.

Keep in mind that this recipe makes about 3 cups of Body Butter, but you can always cut the recipe in half or double the recipe to stock up or to give some as gifts! 

How To Best Use This Body Butter

homemade body butter
  • Every day all year for the entire body. 
  • Face Cream (add frankincense essential oil for extra skin support – optional)
  • Diaper Cream (add gentle baby or lavender essential oil – optional)
  • Chest Rub (add eucalyptus and peppermint essential oil)
  • Muscle Rub (add peppermint or cypress essential oil) 

How To Store Homemade Whipped Body Butter

The oils and butter in this body butter could melt if kept in a warm environment because they are natural and oily in nature.

This body butter should therefore be stored in a cold, dry environment. Then, if the oils begin to melt by accident, you can refrigerate the butter and re-whip it.

If stored in an air-tight jar in a cool dark place, this body butter will keep for up to 6 months.

If you would like to keep it for longer, you could add preservatives to it.

Although I have not directly added a preservative to this whipped body butter, I would choose Geogard ECT (Preservative ECO, Plantaserv M).

In the mixture, this preservative should make up 0.6% to 1%.

I recommend opting for natural preservatives like vitamin E oil (which is already included) or rosemary extract if you intend to store the body butter for an extended period.

These natural preservatives can help prolong the shelf life of your homemade product without introducing harsh chemicals.

Another option to consider for extending the shelf life is to store the body butter in smaller containers.

This reduces the exposure to air and contaminants each time you open a jar, helping to maintain the freshness of the product for a longer duration.

Additionally, it’s essential to keep your body butter away from direct sunlight and high temperatures, as these can accelerate the breakdown of the natural ingredients and cause the product to spoil more quickly.

For those who enjoy experimenting with different scents and textures, you can customize this recipe further by incorporating different essential oils or botanical extracts.

Lavender, chamomile, or rosemary essential oils are popular choices for their soothing properties, while citrus oils like lemon or orange can lend a refreshing scent.

You could also try adding a tablespoon of aloe vera gel to the mixture for added hydration and soothing benefits, especially beneficial for sun-exposed or irritated skin.

Furthermore, if you prefer a firmer body butter, you can adjust the ratio of oils and butters in the recipe.

Increasing the amount of cocoa butter or beeswax will result in a firmer consistency while adding more liquid oils will make the body butter softer and more spreadable.

Experimenting with different combinations of oils and butters can lead to unique textures and scents that cater to your specific skincare needs and preferences.

Have fun exploring and creating your signature homemade body butter recipe!

Pin For Later!

4 ingredient body butter that is non-greasy
super simple body butter that is great for summer!
4 ingredient body butter for sensitive skin
[jetpack-related-posts]

21 Soothing DIY Bath Salt Recipes With Essential Oils For Every Mood

Filed Under: Body, DIY Beauty, Self Care // 07/18/2024

best bath soak recipes

Bath salts have been cherished for centuries for their therapeutic properties.

When combined with the power of essential oils, they create an indulgent and relaxing bath experience that can cater to your specific needs.

Whether you’re seeking relaxation, rejuvenation, or relief, these 21 DIY bath salt recipes infused with essential oils have got you covered.

There’s nothing quite like a soothing bath to wash away the stresses of the day and rejuvenate your body and mind.

Elevate your bath routine experience with these delightful bath salt recipes infused with the power of essential oils. From relaxation to revitalization, these DIY bath salts are easy to make, customizable, and perfect for various occasions:

THE BEST BATH SALT RECIPES WITH ESSENTIAL OILS

LAVENDER BEDTIME BATH SOAK

lavender chamomile bath soak recipe

Indulge in a calming lavender-infused bath to unwind after a long day. Lavender’s soothing aroma promotes relaxation and tranquility.

Unwind and let go with this calming bath salt blend, designed to melt away tension and promote relaxation.

INGREDIENTS:

  • 1 Cup Epsom salt
  • ¼ Cup baking soda
  • 10 Drops of lavender essential oil
  • 5 Drops chamomile essential oil

DIRECTIONS:

  1. Mix Epsom salt and baking soda in a bowl.
  2. Add the lavender and chamomile essential oils.
  3. Stir well and store in a glass jar.

BEST TIME TO USE: Before bedtime to ensure a peaceful sleep.

CITRUS BURST UPLIFT

citrus bath soak recipe

Revitalize your senses with this invigorating citrus blend. It’s perfect for a morning pick-me-up.

Start your day off right with this refreshing bath salt recipe that awakens your senses and energizes your body.

INGREDIENTS:

  • 1 Cup sea salt
  • ¼ cup Coconut oil (melted)
  • 10 Drops of grapefruit essential oil
  • 5 Drops of lemon essential oil

DIRECTIONS:

  1. Combine sea salt and melted coconut oil.
  2. Add the grapefruit and lemon essential oils.
  3. Mix thoroughly and store in an airtight container.

BEST TIME TO USE: In the morning for a refreshing boost and some energy.

EUCALYPTUS RESPIRATORY RELIEF BATH SOAK

eucalyptus bath soak recipe

Clear your airways and refresh your mind with the cooling sensation of eucalyptus and peppermint. Breathe easy with this eucalyptus-infused bath salt that offers respiratory relief.

INGREDIENTS:

  • 1 cup sea salt
  • ¼ cup dried eucalyptus leaves
  • 10 drops of eucalyptus essential oil

DIRECTIONS:

  1. Combine sea salt and dried eucalyptus leaves.
  2. Add eucalyptus essential oil.
  3. Mix thoroughly and store in an airtight container.

BEST TIME TO USE: When feeling congested or during the flu season.

ROSE PETAL BATH SOAK

rose petal ylang-ylang bath salt recipe

Create a romantic ambiance with the delicate scent of roses and ylang-ylang, perfect for a luxurious self-care evening. Create a romantic atmosphere and pamper yourself with the luxurious scent of roses.

INGREDIENTS:

  • 1 Cup Dead Sea salt
  • ¼ Cup dried rose petals
  • 10 Drops of rose essential oil
  • 5 Drops ylang-ylang essential oil

DIRECTIONS:

  1. Mix Dead Sea salt and dried rose petals in a bowl.
  2. Add the rose and ylang-ylang essential oils.
  3. Combine gently and store in a decorative jar.

BEST TIME TO USE: For a special date night or self-care night routine.

CHAMOMILE LAVENDER BATH SOAK

lavender chamomile bath salt recipe

Soothe both your body and mind with the gentle properties of chamomile and the uplifting notes of cedarwood. Drift into tranquility with this calming blend of chamomile and lavender.

INGREDIENTS:

  • 1 Cup sea salt
  • ¼ Cup dried chamomile flowers
  • 10 Drops of lavender essential oil
  • 5 Drops of cedarwood essential oil

DIRECTIONS:

  1. Mix sea salt and dried chamomile flowers in a bowl.
  2. Add the lavender and cedarwood essential oils.
  3. Blend well and store in a dry container.

BEST TIME TO USE: When seeking a moment of inner peace

VANILLA BLISS BATH SOAK

vanilla bath soak recipe

Indulge your senses with the warm and comforting aroma of vanilla and sandalwood for a blissful and relaxing bath.

INGREDIENTS:

  • 1 Cup Dead Sea salt
  • ¼ Cup baking soda
  • 10 Drops vanilla essential oil

DIRECTIONS:

  1. Mix Dead Sea salt and baking soda.
  2. Add vanilla essential oil.
  3. Mix well and store in a decorative jar.

BEST TIME TO USE: Anytime you need a comforting and relaxing soak.

PEPPERMINT ENERGETIC SOAK

peppermint bath soak recipe

Kickstart your energy levels with the refreshing and invigorating scent of peppermint and spearmint. Invigorate your senses with the minty freshness of peppermint for an energetic bath.

INGREDIENTS:

  • 1 cup Epsom salt
  • ¼ cup dried peppermint leaves
  • 10 drops peppermint essential oil

DIRECTIONS:

  1. Combine Epsom salt and dried peppermint leaves.
  2. Add peppermint essential oil.
  3. Stir and store in a dry container.

BEST TIME TO USE: In the morning to awaken your mind.

FRANKINCENSE SOAK

frankincense bath salt recipe

Enhance your meditation practice with the grounding scents of frankincense.

INGREDIENTS:

  • 1 cup sea salt
  • ¼ cup dried frankincense resin
  • 10 drops of frankincense essential oil

DIRECTIONS:

  1. Mix sea salt and dried frankincense resin.
  2. Add frankincense essential oil.
  3. Mix thoroughly and store in an airtight container.

BEST TIME TO USE: Before meditation or moments of reflection. I like to meditate in the bath as well.

LEMON DETOX SOAK

lemon detox bath salt recipe

Detoxify your body and rejuvenate your mind with the zesty blend of lemon and Himalayan pink salt. Refresh and detoxify your body with the zesty scent of lemon.

INGREDIENTS:

  • 1 Cup Himalayan pink salt
  • ¼ Cup dried lemon peel
  • 10 Drops lemon essential oil

DIRECTIONS:

  1. Combine Himalayan pink salt and dried lemon peel.
  2. Add lemon essential oil.
  3. Mix well and store in a glass jar.

BEST TIME TO USE: When you want to cleanse your body or have a detox bath.

COCONUT SOAK

coconut tropical bath salt recipe

Transport yourself to a tropical paradise with the exotic combination of coconut and jasmine.

INGREDIENTS:

  • 1 Cup Dead Sea salt
  • ¼ Cup coconut oil (melted)
  • 10 Drops of coconut essential oil

DIRECTIONS:

  1. Mix Dead Sea salt and melted coconut oil.
  2. Add coconut essential oil.
  3. Stir and store in a container with a lid.

BEST TIME TO USE: Anytime you crave a mini vacation, or just want to relax and unwind.

CEDARWOOD BATH SALT

cedarwood bath soak recipe

Find balance and grounding with the earthy and woody scents of cedarwood and vetiver.

INGREDIENTS:

  • 1 Cup Epsom salt
  • ¼ Cup dried cedarwood chips
  • 10 Drops cedarwood essential oil

DIRECTIONS:

  1. Combine Epsom salt and dried cedar wood chips.
  2. Add cedarwood essential oil.
  3. Mix thoroughly and store in a dry container.

BEST TIME TO USE: When you need to reconnect with yourself.

PATCHOULI BATH SALT

patchouli bath salt recipe

Achieve inner harmony and relaxation with the rich, earthy notes of patchouli and the calming effects of lavender.

INGREDIENTS:

  • 1 Cup sea salt
  • ¼ Cup dried patchouli leaves
  • 10 Drops patchouli essential oil

DIRECTIONS:

  1. Mix sea salt and dried patchouli leaves.
  2. Add patchouli essential oil.
  3. Mix well and store in an airtight container.

BEST TIME TO USE: During moments of self-reflection.

GERANIUM BATH SOAK

geranium bath salt recipe

Escape to a blooming garden with the floral and herbaceous blend of geranium and rosemary.

INGREDIENTS:

  • 1 Cup Epsom salt
  • ¼ Cup dried rose petals
  • 10 Drops geranium essential oil
  • 5 Drops of rosemary essential oil

DIRECTIONS:

  1. Combine Epsom salt and dried rose petals.
  2. Add geranium essential oil.
  3. Stir and store in a glass jar.

BEST TIME TO USE: When you seek a fragrant escape.

STRESS RELIEF LAVENDER BATH SOAK

bergamot lavender bath soak

Ease away stress and tension with the soothing combination of lavender and bergamot. Melt away stress and tension with the timeless relaxation of lavender.

INGREDIENTS:

  • 1 Cup sea salt
  • ¼ Cup dried lavender buds
  • 10 Drops of lavender essential oil
  • 10 Drops of bergamot essence

DIRECTIONS:

  1. Mix sea salt and dried lavender buds.
  2. Add lavender essential oil.
  3. Mix thoroughly and store in a sealed container.

BEST TIME TO USE: After a long and demanding day.

JUNIPER BERRY BATH SOAK

juniper bath salt recipe

Indulge in a rejuvenating bath experience with the invigorating blend of juniper berry and eucalyptus. This bath soak will refresh your senses, clear your mind, and leave you feeling revitalized.

INGREDIENTS:

  • 1 Cup Epsom salt
  • ¼ Cup dried juniper berries
  • 10 Drops of juniper berry essential oil
  • ¼ cup dried eucalyptus leaves
  • 10 drops eucalyptus essential oil

DIRECTIONS:

  1. In a bowl, mix Epsom salt, dried juniper berries, and dried eucalyptus leaves.
  2. Add juniper berry and eucalyptus essential oils to the mixture.
  3. Stir well to distribute the oils evenly and ensure they infuse the salts and botanicals.
  4. Transfer the blend to a clean, airtight container or jar.

BEST TIME TO USE: During a cold, eucalyptus can help ease congestion, making this bath perfect for when you’re feeling under the weather.

YLANG-YLANG BATH SOAK

ylang-ylang bath salt recipe

Ignite your senses with the sensual and exotic blend of ylang-ylang and jasmine.

INGREDIENTS:

  • 1 Cup Dead Sea salt
  • ¼ Cup dried rose petals
  • 10 Drops ylang-ylang essential oil

DIRECTIONS:

  1. Mix Dead Sea salt and dried rose petals.
  2. Add ylang-ylang essential oil.
  3. Blend gently and store in a decorative jar.

BEST TIME TO USE: For a romantic and indulgent bath.

GRAPEFRUIT BATH SOAK

grapefruit peppermint bath salt recipes

Invigorate your senses and boost your mood with the zesty and refreshing scent of grapefruit and peppermint.

INGREDIENTS:

  • 1 Cup sea salt
  • ¼ Cup dried grapefruit peel
  • 10 Drops of grapefruit essential oil
  • 10 Drops of peppermint essential oil

DIRECTIONS:

  1. Combine sea salt and dried grapefruit peel.
  2. Add grapefruit and peppermint essential oil.
  3. Stir and store.

BEST TIME TO USE: In the morning to start your day with positivity.

LAVENDER MINT BATH SOAK

Sink into relaxation mode with the calming combination of lavender and spearmint.

INGREDIENTS:

  • 1 Cup Himalayan pink salt
  • ¼ Cup Epsom salt
  • 10 Drops of lavender essential oil
  • 5 Drops peppermint essential oil

DIRECTIONS:

  1. Combine Himalayan pink salt and Epsom salt.
  2. Add the lavender and peppermint essential oils.
  3. Mix well and store in a container with a lid.

BEST TIME TO USE: Whenever you need to de-stress and unwind.

BERGAMOT JOY BATH SOAK

Infuse your bath with happiness and joy using the uplifting scents of bergamot and orange.

Immerse yourself in a fragrant oasis of relaxation with this rejuvenating Bergamot and Orange Bliss Bath Soak. The harmonious blend of citrusy bergamot and uplifting orange essential oils will envelop you in a sense of tranquility and joy.

INGREDIENTS:

  • 1 cup Epsom salt
  • ¼ cup dried orange peel
  • 10 drops bergamot essential oil
  • 5 drops sweet orange essential oil

DIRECTIONS:

  1. In a mixing bowl, combine the Epsom salt and dried orange peel. The dried orange peel will release its natural citrus fragrance into the bath soak.
  2. Add 10 drops of bergamot essential oil and 5 drops of sweet orange essential oil to the mixture. These essential oils will enhance the aroma and therapeutic benefits of the bath soak.
  3. Stir the ingredients thoroughly to evenly distribute the oils and incorporate the dried orange peel.
  4. Transfer the blend to a clean, airtight container for storage. Make sure the container is tightly sealed to preserve the scent and prevent moisture from affecting the mixture.

BEST TIME TO USE: This Bergamot and Orange Bliss Bath Soak is perfect for those times when you need a mood boost, relaxation, or a little bit of both.

CLARY SAGE TRANQUIL BATH SOAK

Immerse yourself in a serene bath experience with the calming blend of clary sage and cedarwood essential oils. This soothing bath soak is designed to melt away stress, promote relaxation, and envelop you in a sense of tranquility.

INGREDIENTS:

  • 1 cup Epsom salt
  • ¼ cup dried clary sage leaves
  • ¼ cup dried cedarwood chips
  • 10 drops clary sage essential oil
  • 10 drops cedarwood essential oil

DIRECTIONS:

  1. In a mixing bowl, combine the Epsom salt, dried clary sage leaves, and dried cedar wood chips. Mix well to evenly distribute the ingredients.
  2. Add the clary sage and cedarwood essential oils to the mixture. Stir thoroughly to ensure that the essential oils are well incorporated.
  3. Transfer the blend to an airtight container or a glass jar with a lid, preserving the aromatic potency of the essential oils.
  4. When you’re ready to use the bath soak, add about ½ to 1 cup of the mixture to a warm bath as the tub is filling. Swirl the water to help the salts dissolve.

BEST TIME TO USE: This Clary Sage and Cedarwood Tranquility Bath Soak is ideal for moments when you need to unwind, destress, and find a moment of calm in your day. It’s perfect for evenings, allowing you to transition into a peaceful night’s sleep.

Whether you’ve had a long day or simply want to treat yourself to a serene escape, this bath soak will transport you to a realm of tranquility.

TEA TREE BATH SOAK

Indulge in the ultimate relaxation experience with this soothing bath soak infused with the powerful trio of tea tree, eucalyptus, and lavender. Let the harmonious blend of these essential oils calm your mind, invigorate your senses, and rejuvenate your body.

INGREDIENTS:

  • 1 cup Epsom salt
  • ¼ cup dried lavender buds
  • 10 drops tea tree essential oil
  • 5 drops eucalyptus essential oil
  • 5 drops lavender essential oil

DIRECTIONS:

  1. In a mixing bowl, combine the Epsom salt and dried lavender buds.
  2. Add the tea tree, eucalyptus, and lavender essential oils to the mixture.
  3. Gently stir the ingredients until the oils are evenly distributed and the fragrance is infused into the salts.
  4. Carefully transfer the blend into an airtight container or glass jar for storage.’

BEST TIME TO USE: This bath soak is versatile and can be enjoyed at different times for various benefits.

Conclusion: Elevate your bath time into a luxurious ritual by creating these homemade bath salts infused with the magic of essential oils. Whether you’re seeking relaxation, energy, detoxification, or simply a delightful aroma, these DIY bath salt recipes offer a natural and personalized solution for every mood. Treat yourself to the soothing embrace of aromatherapy and self-care, and transform your bath into a haven of well-being.

Elevate your self-care routine by indulging in the luxury of these homemade bath salt recipes infused with essential oils. Whether you’re looking to relax, rejuvenate, or simply treat yourself to a fragrant soak, these bath salts are versatile and tailored to your needs. Create your oasis of tranquility and pampering with these easy-to-make recipes, transforming your bath into a haven of relaxation and rejuvenation.

[jetpack-related-posts]

The Best Homemade Lip Scrub Recipes For Soft, Lucious Lips

Filed Under: DIY Beauty // 05/03/2023

5 easy DIY lip scrubs for smooth lips

Your lips will look soft, smooth, and healthy after using this homemade lip scrub to remove flaky, dry skin. using this simple method, you may make your own homemade lip scrub using basic, all-natural ingredients.

Nothing is worse than having dry, flaky lips. Your lips may feel dry and chapped during colder weather, or even during the summer when you don’t drink enough water. Although I regularly apply this homemade lip balm to my lips, sometimes it’s necessary to exfoliate the lips’ damaged skin.

Although there are lots of lip exfoliants you can buy online, is it really worth that price? Why would you pay $10 to $50 for a product when you could make it yourself for under a dollar? I have a quick and simple homemade sugar lip scrub recipe that uses things you probably already have in your kitchen.

What Is A Lip Scrub

A mechanical exfoliator, or one that physically eliminates dead skin cells, is what lip scrubs are. Lips that have been properly exfoliated can more easily absorb protective and hydrating products like lip balm.

An exfoliator and a nourishing agent are the two main ingredients that make up a lip scrub. The emollient or nourishing component gives your exfoliant a hydrating basis that makes it simpler to apply to your lips. These two work together to moisturize and hydrate your lips.

How To Exfoliate Your Lips

-Before you begin, make sure your lips are makeup-free.

-To remove dead skin, gently exfoliate your homemade lip scrub.

-To help keep the air around you wet, use a humidifier, this will help prevent tearing your lips open and causing them to bleed.

-If you exfoliate in the morning, wear an SPF lip balm; if you’re getting ready for bed, use a hydrating lip balm.

Tips For Exfoliating Your Lips

–Be Gentle: Don’t exfoliate lips too hard! When applying your sugar scrub, rub it into your skin in a gentle slow motion to avoid tearing your skin open.

-Don’t Overdo It: Only exfoliate your lips once or twice a week; this will remove enough dry skin to keep your lips soft and supple, until your next exfoliation. And make sure to avoid exfoliating when your lips are feeling extra sensitive.

-SPF: Apply lip balm with an SPF ingredient before going outside to protect your lips from the sun’s harmful rays.

-Always Moisturize: After exfoliating, choose a creamy lip balm to moisturize your lips. The Shea Butter and natural oils in NIVEA Original Care Lip Balm will help keep your lips moisturized for up to 24 hours!

-Be Patient: You should wait at least an hour after exfoliating your lips to apply any makeup to it.

Should You Exfoliate Your Lips

You should be exfoliating your lips! There are numerous easy ways to make a lip scrub at home, so you don’t need to do anything elaborate to exfoliate. But first, let’s take a closer look at how exfoliating might benefit you before we share our homemade lip scrub recipe.

Benefits Of Lip Exfoliation

Lip care is not just important for looking good. You can better maintain soft, supple, and healthy-looking lips by exfoliating your lips once or twice a week. Other advantages of lip scrubs include but are not limited to:

-Getting rid of dry skin prevents chapped and dry lips.

-Exfoliating your lips can stop them from becoming dehydrated, which can result in swelling, bleeding, or dryness.

-To soften and smooth out your lips.

-To prevent discomfort by maintaining the moisture of your lips.

-Minimizes the appearance of discoloration by balancing your lip tone.

-To improve the appearance and durability of your lipstick.

Homemade Lip Scrub Recipes

You can attempt a variety of straightforward, all-natural DIY lip exfoliant solutions. Currently, you probably have an exfoliating ingredient in your home. Try making your own DIY exfoliating scrub:

1. Basic Homemade Lip Scrub

Coconut oil and sugar lip scrub

Although I prefer sugar, if your lips are particularly delicate you should use baking soda.

Ingredients For DIY Lip Scrub

–A small container

–Coconut oil

–Sugar (or baking soda)

-Your choice of essential oil (optional)

Directions For Homemade Lip Scrub

-In a small saucepan, liquefy the coconut oil and turn off the heat.

-Add one or two drops of essential oil, if using, to the mixture of coconut oil and white sugar (brown sugar may also be used).

-In this homemade lip scrub, I used lavender oil, but geranium and vanilla are also wonderful options!

-Place a lid on the glass jar or container after scooping the scrub inside.

-Scoop some sugar scrub out of the bottle, then brush your lips with it lightly. To exfoliate dead skin cells, gently rub it in a circular manner onto your lips. After washing off with warm water, apply lip balm, lipstick, or homemade lip gloss. Use this scrub 1-2 times per week, or whenever you have dry lips, as part of your weekly skincare routine.

2. Honey Sugar Lip Scrub

Honey and sugar for lip scrub

Another really easy one to make, trust me, this will leave your lips feeling ultra soft and moisturized.

Ingredients For Honey Sugar Lip Scrub

-1 Tsp of honey

-2 Tsp of sugar

-Lavender essential oil.

Directions For Making Honey Sugar Lip Scrub

-Combine the sugar and honey together.

-Add a few drops of lavender essential oil to this mixture.

-Massage the mixture into your lips, then wait around ten minutes.

-With the aid of a wet face cloth, remove the honey sugar lip scrub.

(An efficient natural exfoliator is sugar. It transforms into an excellent moisturizing lip scrub when combined with honey. Simply make the basic sugar lip scrub if you don’t have honey.)

3. Coconut And Honey Lip Scrub

Coconut oil, honey and sugar for lip scrub

Ingredients For Coconut And Honey Lip Scrub

-1 Tbs coconut oil

-1 Tbs organic honey

-2 Tbs sugar

-1/2 Tbs lukewarm water

Directions For Coconut, Honey Lip Scrub

-Mix the honey and coconut oil together first.

-To this mixture, add the sugar and the heated water.

-After rubbing the mixture on your lips for two to three minutes in a circular motion, rinse with lukewarm water.

4. Chocolate Lip Scrub

Coconut oil, honey, sugar and cocoa powder lip scrub

Ingredients For Chocolate Lip Scrub

-1 Tbs cocoa powder

-2 Tbs brown sugar

-1 Tsp vanilla extract

-1Tsp honey

-2 Tsp coconut oil

Directions For Chocolate Lip Scrub

-Mix the cocoa powder, brown sugar, vanilla extract, honey, and melted coconut oil together.

-Apply a small amount of the scrub to your lips and rub it in gentle circular motions.

-Allow the mask to sit on your lips for a couple of minutes to really get its full benefits.

-Wipe off with a soft wet cloth or wash with lukewarm water.

5. Coffee And Honey Lip Scrub

Honey and coffee for lip scrub

Ingredients For Coffee And Honey Lip Scrub

-1 Tbs coffee grounds

-1 Tbs honey

Directions For Coffee And Honey Lip Scrub

-Combine the coffee and honey together.

-Apply a small amount of this scrub on your lips and massage for about a minute in a circular motion.

-Continue using it as a mask for one more minute to reap its full benefits.

-Wash off with warm water for lips that are immediately moisturized.

Ingredients Information

Why Use Coconut Oil In Your DIY Lip Scrub

There is nothing else like organic coconut oil for your skin! Coconut oil is rich in fatty acids and antioxidants that nourish the skin, it can permeate the skin more deeply than other products due to its low molecular weight and way of attaching to proteins. If necessary, you can also use shea butter, sweet almond oil, jojoba oil, or olive oil for coconut oil. When you run out of coconut oil, these oils are a great substitute.

Why Use Sugar In Your DIY Lip Scrub

For the basis of your lib scrubs, you can use white sugar, brown sugar, raw sugar, or coconut sugar. While brown sugar and coconut sugar have a subtle, sweet scent, cane sugar, which is the standard in most scrubs, has almost no scent. Sugar exfoliates the skin effectively and is gentle enough for sensitive skin.

Why Use Honey In Your DIY Lip Scrub

Honey is beneficial for both dry and chapped lips. It possesses wound healing, anti-inflammatory, and anti-microbial effects. Apply honey to your lips throughout the day to add moisture, promote healing, and prevent cracking or infection in chapped lips.

Why Use Cocoa Powder In Your DIY Lip Scrub

Antioxidants found in cocoa powder help to combat the effects of aging, brighten your skin, and lessen the appearance of red spots. You can frequently find antioxidants in fruits, vegetables, tea, chocolate, and wine.

Why Use Coffee In Your DIY Lip Scrub

You can utilize this hidden weapon to maintain the youthful appearance of your skin and lips. Caffeine is a superfood that also tones the lips and aids with pigmentation reduction, is added to coffee. Coffee grinds, which are rich in antioxidants, efficiently exfoliate dry, chapped lips to provide you with flushed lips.

How To Choose Your Scent For Your DIY Lip Scrub

To give this lip scrub a revitalizing scent, add a fragrance. I use organic essential oils, but you may also use herbs, plant extracts (like vanilla extract), and scents.

Lavender oil: Lavender oil deeply nourishes your lips and is excellent for preventing sunburns on your lips.

Peppermint oil: Peppermint oil aids in promoting blood flow under the lips and producing a fuller appearance that makes your lips look larger.

Vanilla Extract: It can aid in soothing and moisturizing chapped, dry lips. Vanilla extract may be used to make lip balm that is not only delicious-smelling but also good for your lips.

How To Store Your DIY Lip Scrub

Making homemade lip scrubs in small batches is always a good idea. They’ll last you for approximately a week and stay fresh. Use an old, dry, clean lip balm or eyeshadow container to store your scrub, or buy containers on Amazon. To avoid bacteria, sterilizing the container by soaking it in hot water for a while is advised, and storing it in the fridge.

All of these homemade lip scrub recipes are simple to make and may keep your lips soft, smooth, and moisturized without irritating them.

Natural lip hydrators include coconut, honey, and vanilla, while sugar acts as a scrub. However, be careful not to over-scrub your lips because this could harm them.

Also, be sure to eat well and drink plenty of water. The majority of your skin care problems can be resolved with a healthy lifestyle. Therefore, feel free to select one of the homemade lip scrubs on the list; we are confident that your lips will adore the recipes.

[jetpack-related-posts]

DIY Bath Bomb Recipe

Filed Under: DIY Beauty // 04/05/2023

homemade bath bomb recipe

This easy-to-make DIY only requires a little mixing, some gentle spritzing, and a short period of molding, and by the end, you’ll have dozens of bubbling bath bombs in a variety of shapes and colors, which will smell and soften bath water as they bubble.

No matter who is on your list, they make wonderful presents. Play around with colors and scents; for instance, combine yellow and red to create orange, or try mixing lemon and lavender.

Bath bombs have become a hugely popular product to brighten at-home self-care. They make bath time fun for kids and relaxing for adults. This DIY bath bomb recipe allows you to enjoy the luxury bath at home without the expensive price tag.

Using common, budget-friendly ingredients, I’ll show you how to make these DIY Bath Bombs at home.

What You’ll Need

-Baking soda (aluminum free is best)

-Cornstarch

-Citric acid

-Spritzer bottles

-Food coloring or you can use Mica powder which is a natural soap colorant that is safe for use in bath bombs.

-Essential oils

-Baking molds

-Epsom salt (magnesium sulfate)

-Coconut oil or Argon oil

How To Make Bath Bomb

Step 1

Sift 1 3/4 cup baking soda, 1 cup citric acid, 1 cup of Epsom salt, and 2 cups cornstarch to make a powdered mixture and run it through a sieve to remove chunks. To make different tints, fill small spritzer bottles with water and add about 6 drops of food coloring to each.

Or if you’re using mica powder you’ll mix that in with the dry ingredients.

Step 2

Pour 1 cup of powdered mixture into a glass bowl. Then lightly spritz, stirring after each spritz, until the powder is your desired color. Add water slowly, so the mixture does not fizz. If mixing two tints, alternate colors as you spritz. You will do this with only water and no food coloring if you’re using mica powder.

Check the consistency of the powder with your fingers; when it can be tightly packed or shaped, stop spritzing—this may take a little while.

Step 3

Select an essential oil. Add 5 drops if it’s one of the stronger scents—like peppermint or lavender—6 if it’s a weaker one—like lemon or grapefruit. You can choose different scents based on what you need for that day. Also, take this time to add about 10 drops of coconut or argon oil to the mixture

Mix it well before firmly packing the mixture into small baking molds. I like to use 1/4 cup for each fizzy, which is good for one bath. Allow the mixture to set for two hours, then pop out carefully. Repeat with different tints and essential oils for the remaining powder.

Step 4

Store in an airtight container for up to six months. You can also wrap them in plastic wrap. If you want to get really fancy, you can use shrink-wrap sleeves to wrap your bath bombs. Heat them with a blow dryer or heat gun to shrink the wrap around your homemade bath bombs.

When you’re ready to use the bath bomb, simply drop it in your bath water and let it fizz and dissolve. It should take about 30 seconds for it to dissolve completely.

[jetpack-related-posts]

How To Make Whipped Body Butter

Filed Under: DIY Beauty // 04/05/2023

homemade non-greasy whipped body butter

This DIY whipped body butter recipe is perfect for the winter months if you have really dry skin.

If you’re anything like me, your skin gets super dry in the cold, and well I love in a really cold area. In the winter, when the air is so dry and I’m taking hot showers, my skin gets so dry.

This body butter goes on smooth and is so nourishing for the skin.

Anything that you put on your skin can absorb right into your body. That is why I love making my own homemade products.

All the ingredients are pure enough to cook with and I know exactly what goes into it.

For this recipe, you only need a few basic ingredients: shea butter, cocoa butter, and coconut oil. I also add essential oils for scent and the amazing health properties they have.

This body butter recipe is so light and fluffy it almost feels like a cloud!

In this post, you’ll learn how to create homemade body butter from natural ingredients!

What Is Body Butter?

You’re in for a surprise if you’ve never used body butter!

It is similar to butter for your skin, well it’s exactly butter for your skin. Anyone can easily make their own body butter at home.

It’s so easy; all you have to do is combine your favorite oils by melting and whipping them together and you’ll have a lovely body butter.

Although I adore my standard whipped coconut oil moisturizer, it dissolves at room temperature and can sometimes be a little too greasy.

You can choose to experiment with some of your favorite plant-based butters because we all need a decent moisturizer that isn’t overly oily and creates a lovely body butter recipe.

This homemade body butter has a beautiful scent and sensation.

Additionally, it is incredibly nourishing and will make your skin feel incredibly smooth.

You can leave it as it is or add essential oils to create a great-smelling body butter for yourself or as a gift. Plus, it’s really great if you have sensitive skin.

How To Make Whipped Body Butter

Ingredients for Whipped Body Butter:

  • 1/3 Cup coconut oil: There is nothing else like organic coconut oil for your skin! Coconut oil can penetrate the skin more thoroughly than other products due to its low molecular weight and way of attaching to proteins. This is the one I use.
  • 1/3 Cup shea butter: For dry skin, shea butter is a powerful emollient. It’s the ideal ingredient to include in your body care recipes because of its emollient qualities, particularly in body butter. This is the one I use.
  • 1/3 Cup cocoa butter wafers: Lotions, creams, and body butter will gain a viscous and creamy consistency from cocoa butter, which softens at body temperature. Vitamin E, another natural antioxidant, as well as a number of other vitamins and minerals, are also present in cocoa butter. These are the ones I use.
  • 1/3 Cup jojoba oil: Low comedogenic jojoba oil is a carrier oil that moisturizes and calms irritated skin. Sweet almond oil, which contains fatty acids and vitamins A and E and penetrates the skin rapidly, is a suitable alternative to jojoba oil if it is not available. This is the one I use.
  • 2 Teaspoon arrowroot powder: Due to its oil basis, this moisturizer may feel a little greasy on some skin types. Cornstarch or arrowroot powder can be added to reduce the greasy sensation on your skin. In the absence of arrowroot flour, corn starch or tapioca starch are suitable alternatives. This is the one I use.
  • Essential oils (optional): These plant-based oils are better than synthetic fragrances because they are all-natural. Don’t go overboard, though; just a few droplets will do to flavor homemade body butter.

Also read: 21 Soothing DIY Bath Salt Recipes With Essential Oils For Every Mood

Why These Ingredients:

  • Coconut oil – is moisturizing, can help promote wound healing, and has antibacterial, antifungal, and antiviral properties.
  • Jojoba oil – is very moisturizing, and promotes wound healing while also having anti-inflammatory properties. Jojoba oil can also have anti-aging properties.
  • Cocoa butter – can help keep in moisture by giving skin a protective barrier.
  • Shea butter – is rich in antioxidants, highly moisturizing, and promotes skin healing.
  • Essential oils. – because they smell nice and they have many great properties.

Directions for Making Your Whipped Body Butter:

  • Melt the coconut oil, cocoa butter, and shea butter in a double boiler or saucepan over low heat to create your body butter. In the absence of a double boiler, a sizable glass measuring cup will do.
  • Then turn off the heat and stir in the jojoba oil and essential oils, if using, to the warmed cocoa butter and oils. To add the essential oils, just mix thoroughly.
  • Place the mixture in the refrigerator after pouring it into a medium glass bowl. About two hours of cooling time is required. As an alternative, you could chill the oils in the fridge.
  • When the mixture is completely solid, take the dish out of the refrigerator, put it in your stand mixer, and whip the body butter with it (a hand mixer also works if that’s what you have). When the body butter is light and airy, add the arrowroot flour and beat again.
  • Finally, scoop the body butter into containers and store it in a cool, dry place.

Tips For Making DIY Body Butter

  • This makes a really great gift for friends and family.
  • You can double or triple this recipe.
  • Be careful using citrus oils, like lemon or orange, since they can make your skin sensitive to the sun. If you do use them, don’t go out in the sun for awhile. Or, simply use this body butter at night.

How To Store Homemade Whipped Body Butter

The oils and butter in this dish could melt if kept in a warm environment because they are natural and oily in nature.

This body butter should therefore be stored in a cold, dry environment. Then, if the oils begin to melt by accident, you can refrigerate the butter and re-whip it.

If stored in an air-tight jar in a cool dark place, this body butter will keep for up to 6 months. If you would like to keep it for longer, you could add preservatives to it.

Although I have not directly added a preservative to this whipped body butter, I would choose Geogard ECT (Preservative ECO, Plantaserv M). In the mixture, this preservative should make up 0.6% to 1%.

I recommend opting for natural preservatives like vitamin E oil or rosemary extract if you intend to store the body butter for an extended period.

These natural preservatives can help prolong the shelf life of your homemade product without introducing harsh chemicals.

Another option to consider for extending the shelf life is to store the body butter in smaller containers.

This reduces the exposure to air and contaminants each time you open a jar, helping to maintain the freshness of the product for a longer duration.

Additionally, it’s essential to keep your body butter away from direct sunlight and high temperatures, as these can accelerate the breakdown of the natural ingredients and cause the product to spoil more quickly.

For those who enjoy experimenting with different scents and textures, you can customize this recipe further by incorporating different essential oils or botanical extracts.

Lavender, chamomile, or rosemary essential oils are popular choices for their soothing properties, while citrus oils like lemon or orange can lend a refreshing scent.

You could also try adding a tablespoon of aloe vera gel to the mixture for added hydration and soothing benefits, especially beneficial for sun-exposed or irritated skin.

Furthermore, if you prefer a firmer body butter, you can adjust the ratio of oils and butters in the recipe.

Increasing the amount of cocoa butter or shea butter will result in a firmer consistency, while adding more liquid oils will make the body butter softer and more spreadable.

Experimenting with different combinations of oils and butters can lead to unique textures and scents that cater to your specific skincare needs and preferences.

Have fun exploring and creating your signature homemade body butter recipe!

Pin For Later!

how to make your own homemade whipped body butter
homemade affordable whipped body butter
how to make your own homemade whipped body butter
[jetpack-related-posts]

DIY Homemade Bath Salts On A Budget

Filed Under: DIY Beauty // 03/14/2023

home made bath salts for relaxation

Making your own bath salt blends at home is surprisingly simple.

There is nothing better than a hot bath after a long, stressful day, except maybe a hot bath enhanced with aromatic bath salts, of course.

Making your own bespoke bath salt blends to meet your requirements (such as easing tight muscles, easing the day’s stress, or softening skin) and then spicing them up with your favorite essential oils is surprisingly simple.

You can even use food coloring to give your salt mixture a lovely, calming hue as a final touch.

What You Need

– A container to store the bath salts in.

– Coarse sea salt.

– Epsom salt (Epsom salt is also known as magnesium sulfate. It’s a chemical compound made up of magnesium, sulfur, and oxygen, this is different from the coarse sea salt).

– Baking Soda.

– Essential oils of your choice (essential oils have different benefits that you can add to your bath salts, so choose the essential oils based on your specific needs).

– Food coloring to make the bath salts look extra fancy and professionally made.

How To Make The Bath Salt

Step 1

Mix 6 parts coarse sea salt, 3 parts Epsom salts (to relieve sore muscles, promotes sleep, and reduce inflammation and stress), and 1 part baking soda (for cleansing and detoxifying properties that may help to purify your body and boost immunity as well as soothe skin irritation) in a big bowl.

Step 2

Add a few drops of essential oils (Sea salts and essential oils are a great combination. The relaxing properties of hot water complement the effects of well-chosen salts and essential oils) and combine.

Step 3

Add food coloring drops until you get the desired color.

Now that you’ve made your bath salt, scoop it into your previously prepared container and store them away to use for your next hot bath.

Essential Oil Blends For Your Bath Salts

Try these essential oil blends in your DIY bath salts for the following benefits:

Relaxing Blend

2 Parts Lavender essential oil for every 1 part Vetiver essential oil.

Mood-Boosting Blend

2 Parts Lavender essential oil for every 1 part Lemon essential oil.

Essential Oil Blend For Soft Skin

Equal parts Lavender essential oil, Frankincense essential oil, and Palmarosa essential oil.

Anti-inflammatory Blend

2 Parts Lavender essential oil for every 1 part Rosemary essential oil.

Muscle Relaxer Blend

2 Parts Peppermint essential oil for every 1 part Rosemary essential oil.

[jetpack-related-posts]

DIY Honey Oatmeal Soap Recipe: For Healthy and Hydrated Skin

Filed Under: DIY Beauty // 03/14/2023

oatmeal soap

This regular bar of soap can be transformed into an exfoliating soap bar with a wonderful scent by just adding honey and oatmeal and is perfect for sensitive and dry skin.

This natural soap made from organic rolled oats and honey will leave your skin feeling incredibly smooth and looking brilliant.

Oatmeal And Honey Soap Recipe

Oatmeal has many benefits that’s why it’s utilized in oatmeal milk baths and can treat a variety of skin irritations because it has so many wonderful skin-friendly properties.

You can make use of instant oats, colloidal oatmeal, or oatmeal powder. Oatmeal can be turned into powder by mixing it quickly in a blender.

We’ll be using powdered oatmeal for this recipe, which you can create by blending plain rolled oats.

What You Need

– 2 Pounds oatmeal melt and pour soap base.

– 1 Cup organic rolled oats that you’ve blended into a fine powder.

– 2 Tablespoons of Raw honey.

– Soap mold.

– Essential oil of your choice (I like to use either vanilla, lemon, or lavender essential oils).

How To Make Your Honey Oatmeal Soap

– Cut the oatmeal melt and pour soap base into small chunks and place them into a double boiler.

– Melt over medium heat. Stirring occasionally with a wooden spoon. 

– Remove from the heat when it’s fully melted.

– Add in the oatmeal powder, essential oil, and raw honey. Stir to mix.

– Pour into soap molds.

– Allow it to harden then remove it from the molds.

Now that you’re done, they are ready to use for your next self-care day whenever you take your next shower or bath.

Pin For Later!

[jetpack-related-posts]

DIY Lip Balm To Revive Dry, Chapped Lips

Filed Under: DIY Beauty // 03/07/2023

DIY lip balm recipe

Make various lip balms by following these simple directions.

Divide the mixture and fragrance and color the batches separately if you want to make more than one type of lip balm at once. I prefer to use essential oils that smell edible for lip balms, such as citrus or vanilla.

Basil, mint, orange, or lemon essential oils might help to soften the powerful scent of lavender essential oil.

What You Need

– Lip balm tubes or lip balm tins

– Beeswax pellets

– Shea butter

– Cocoa butter

– Coconut oil

– Jojoba oil

– Vitamin E oil

– Essential oils of your choice

How To Make Your Lip Balm

1. Measure 1 teaspoon beeswax, 2 teaspoons shea butter, and 1 teaspoon cocoa butter and put in the top of a double boiler.

2. Melt the butters and waxes over low heat in your double boiler until completely combined.

3. Add 1 teaspoon each of coconut oil and jojoba oil and stir until combined.

4. Remove the bowl from the heat and add about 5 drops of Vitamin E oil and 10 drops of the essential oils of your choice.

5. Pour into your storage containers.

6. Allow to cool completely (for at least 30 minutes).

[jetpack-related-posts]
  • 1
  • 2
  • Next Page »

Copyright © 2026 · Theme by Marketing Templates Co.

We use cookies on our website to give you the most relevant experience by remembering your preferences and repeat visits.Read More By clicking “Accept All”, you consent to the use of ALL the cookies. However, you may visit "Cookie Settings" to provide a controlled consent.
Cookie SettingsAccept All
Manage consent

Privacy Overview

This website uses cookies to improve your experience while you navigate through the website. Out of these, the cookies that are categorized as necessary are stored on your browser as they are essential for the working of basic functionalities of the website. We also use third-party cookies that help us analyze and understand how you use this website. These cookies will be stored in your browser only with your consent. You also have the option to opt-out of these cookies. But opting out of some of these cookies may affect your browsing experience.
Necessary
Always Enabled
Necessary cookies are absolutely essential for the website to function properly. These cookies ensure basic functionalities and security features of the website, anonymously.
CookieDurationDescription
cookielawinfo-checkbox-analytics11 monthsThis cookie is set by GDPR Cookie Consent plugin. The cookie is used to store the user consent for the cookies in the category "Analytics".
cookielawinfo-checkbox-functional11 monthsThe cookie is set by GDPR cookie consent to record the user consent for the cookies in the category "Functional".
cookielawinfo-checkbox-necessary11 monthsThis cookie is set by GDPR Cookie Consent plugin. The cookies is used to store the user consent for the cookies in the category "Necessary".
cookielawinfo-checkbox-others11 monthsThis cookie is set by GDPR Cookie Consent plugin. The cookie is used to store the user consent for the cookies in the category "Other.
cookielawinfo-checkbox-performance11 monthsThis cookie is set by GDPR Cookie Consent plugin. The cookie is used to store the user consent for the cookies in the category "Performance".
viewed_cookie_policy11 monthsThe cookie is set by the GDPR Cookie Consent plugin and is used to store whether or not user has consented to the use of cookies. It does not store any personal data.
Functional
Functional cookies help to perform certain functionalities like sharing the content of the website on social media platforms, collect feedbacks, and other third-party features.
Performance
Performance cookies are used to understand and analyze the key performance indexes of the website which helps in delivering a better user experience for the visitors.
Analytics
Analytical cookies are used to understand how visitors interact with the website. These cookies help provide information on metrics the number of visitors, bounce rate, traffic source, etc.
Advertisement
Advertisement cookies are used to provide visitors with relevant ads and marketing campaigns. These cookies track visitors across websites and collect information to provide customized ads.
Others
Other uncategorized cookies are those that are being analyzed and have not been classified into a category as yet.
SAVE & ACCEPT