• HOME
  • RELATIONSHIPS
  • HOLIDAYS
  • WELLNESS
  • CAREER & FINANCE
  • FASHION
  • BEAUTY
  • LIVING

Advice From Nobody

You are here: Home / Archives for BEAUTY / DIY Beauty

The Best Homemade Lip Scrub Recipes For Soft, Lucious Lips

Filed Under: DIY Beauty // 05/03/2023

5 easy DIY lip scrubs for smooth lips

Your lips will look soft, smooth, and healthy after using this homemade lip scrub to remove flaky, dry skin. using this simple method, you may make your own homemade lip scrub using basic, all-natural ingredients.

Nothing is worse than having dry, flaky lips. Your lips may feel dry and chapped during colder weather, or even during the summer when you don’t drink enough water. Although I regularly apply this homemade lip balm to my lips, sometimes it’s necessary to exfoliate the lips’ damaged skin.

Although there are lots of lip exfoliants you can buy online, is it really worth that price? Why would you pay $10 to $50 for a product when you could make it yourself for under a dollar? I have a quick and simple homemade sugar lip scrub recipe that uses things you probably already have in your kitchen.

What Is A Lip Scrub

A mechanical exfoliator, or one that physically eliminates dead skin cells, is what lip scrubs are. Lips that have been properly exfoliated can more easily absorb protective and hydrating products like lip balm.

An exfoliator and a nourishing agent are the two main ingredients that make up a lip scrub. The emollient or nourishing component gives your exfoliant a hydrating basis that makes it simpler to apply to your lips. These two work together to moisturize and hydrate your lips.

How To Exfoliate Your Lips

-Before you begin, make sure your lips are makeup-free.

-To remove dead skin, gently exfoliate your homemade lip scrub.

-To help keep the air around you wet, use a humidifier, this will help prevent tearing your lips open and causing them to bleed.

-If you exfoliate in the morning, wear an SPF lip balm; if you’re getting ready for bed, use a hydrating lip balm.

Tips For Exfoliating Your Lips

–Be Gentle: Don’t exfoliate lips too hard! When applying your sugar scrub, rub it into your skin in a gentle slow motion to avoid tearing your skin open.

-Don’t Overdo It: Only exfoliate your lips once or twice a week; this will remove enough dry skin to keep your lips soft and supple, until your next exfoliation. And make sure to avoid exfoliating when your lips are feeling extra sensitive.

-SPF: Apply lip balm with an SPF ingredient before going outside to protect your lips from the sun’s harmful rays.

-Always Moisturize: After exfoliating, choose a creamy lip balm to moisturize your lips. The Shea Butter and natural oils in NIVEA Original Care Lip Balm will help keep your lips moisturized for up to 24 hours!

-Be Patient: You should wait at least an hour after exfoliating your lips to apply any makeup to it.

Should You Exfoliate Your Lips

You should be exfoliating your lips! There are numerous easy ways to make a lip scrub at home, so you don’t need to do anything elaborate to exfoliate. But first, let’s take a closer look at how exfoliating might benefit you before we share our homemade lip scrub recipe.

Benefits Of Lip Exfoliation

Lip care is not just important for looking good. You can better maintain soft, supple, and healthy-looking lips by exfoliating your lips once or twice a week. Other advantages of lip scrubs include but are not limited to:

-Getting rid of dry skin prevents chapped and dry lips.

-Exfoliating your lips can stop them from becoming dehydrated, which can result in swelling, bleeding, or dryness.

-To soften and smooth out your lips.

-To prevent discomfort by maintaining the moisture of your lips.

-Minimizes the appearance of discoloration by balancing your lip tone.

-To improve the appearance and durability of your lipstick.

Homemade Lip Scrub Recipes

You can attempt a variety of straightforward, all-natural DIY lip exfoliant solutions. Currently, you probably have an exfoliating ingredient in your home. Try making your own DIY exfoliating scrub:

1. Basic Homemade Lip Scrub

Coconut oil and sugar lip scrub

Although I prefer sugar, if your lips are particularly delicate you should use baking soda.

Ingredients For DIY Lip Scrub

–A small container

–Coconut oil

–Sugar (or baking soda)

-Your choice of essential oil (optional)

Directions For Homemade Lip Scrub

-In a small saucepan, liquefy the coconut oil and turn off the heat.

-Add one or two drops of essential oil, if using, to the mixture of coconut oil and white sugar (brown sugar may also be used).

-In this homemade lip scrub, I used lavender oil, but geranium and vanilla are also wonderful options!

-Place a lid on the glass jar or container after scooping the scrub inside.

-Scoop some sugar scrub out of the bottle, then brush your lips with it lightly. To exfoliate dead skin cells, gently rub it in a circular manner onto your lips. After washing off with warm water, apply lip balm, lipstick, or homemade lip gloss. Use this scrub 1-2 times per week, or whenever you have dry lips, as part of your weekly skincare routine.

2. Honey Sugar Lip Scrub

Honey and sugar for lip scrub

Another really easy one to make, trust me, this will leave your lips feeling ultra soft and moisturized.

Ingredients For Honey Sugar Lip Scrub

-1 Tsp of honey

-2 Tsp of sugar

-Lavender essential oil.

Directions For Making Honey Sugar Lip Scrub

-Combine the sugar and honey together.

-Add a few drops of lavender essential oil to this mixture.

-Massage the mixture into your lips, then wait around ten minutes.

-With the aid of a wet face cloth, remove the honey sugar lip scrub.

(An efficient natural exfoliator is sugar. It transforms into an excellent moisturizing lip scrub when combined with honey. Simply make the basic sugar lip scrub if you don’t have honey.)

3. Coconut And Honey Lip Scrub

Coconut oil, honey and sugar for lip scrub

Ingredients For Coconut And Honey Lip Scrub

-1 Tbs coconut oil

-1 Tbs organic honey

-2 Tbs sugar

-1/2 Tbs lukewarm water

Directions For Coconut, Honey Lip Scrub

-Mix the honey and coconut oil together first.

-To this mixture, add the sugar and the heated water.

-After rubbing the mixture on your lips for two to three minutes in a circular motion, rinse with lukewarm water.

4. Chocolate Lip Scrub

Coconut oil, honey, sugar and cocoa powder lip scrub

Ingredients For Chocolate Lip Scrub

-1 Tbs cocoa powder

-2 Tbs brown sugar

-1 Tsp vanilla extract

-1Tsp honey

-2 Tsp coconut oil

Directions For Chocolate Lip Scrub

-Mix the cocoa powder, brown sugar, vanilla extract, honey, and melted coconut oil together.

-Apply a small amount of the scrub to your lips and rub it in gentle circular motions.

-Allow the mask to sit on your lips for a couple of minutes to really get its full benefits.

-Wipe off with a soft wet cloth or wash with lukewarm water.

5. Coffee And Honey Lip Scrub

Honey and coffee for lip scrub

Ingredients For Coffee And Honey Lip Scrub

-1 Tbs coffee grounds

-1 Tbs honey

Directions For Coffee And Honey Lip Scrub

-Combine the coffee and honey together.

-Apply a small amount of this scrub on your lips and massage for about a minute in a circular motion.

-Continue using it as a mask for one more minute to reap its full benefits.

-Wash off with warm water for lips that are immediately moisturized.

Ingredients Information

Why Use Coconut Oil In Your DIY Lip Scrub

There is nothing else like organic coconut oil for your skin! Coconut oil is rich in fatty acids and antioxidants that nourish the skin, it can permeate the skin more deeply than other products due to its low molecular weight and way of attaching to proteins. If necessary, you can also use shea butter, sweet almond oil, jojoba oil, or olive oil for coconut oil. When you run out of coconut oil, these oils are a great substitute.

Why Use Sugar In Your DIY Lip Scrub

For the basis of your lib scrubs, you can use white sugar, brown sugar, raw sugar, or coconut sugar. While brown sugar and coconut sugar have a subtle, sweet scent, cane sugar, which is the standard in most scrubs, has almost no scent. Sugar exfoliates the skin effectively and is gentle enough for sensitive skin.

Why Use Honey In Your DIY Lip Scrub

Honey is beneficial for both dry and chapped lips. It possesses wound healing, anti-inflammatory, and anti-microbial effects. Apply honey to your lips throughout the day to add moisture, promote healing, and prevent cracking or infection in chapped lips.

Why Use Cocoa Powder In Your DIY Lip Scrub

Antioxidants found in cocoa powder help to combat the effects of aging, brighten your skin, and lessen the appearance of red spots. You can frequently find antioxidants in fruits, vegetables, tea, chocolate, and wine.

Why Use Coffee In Your DIY Lip Scrub

You can utilize this hidden weapon to maintain the youthful appearance of your skin and lips. Caffeine is a superfood that also tones the lips and aids with pigmentation reduction, is added to coffee. Coffee grinds, which are rich in antioxidants, efficiently exfoliate dry, chapped lips to provide you with flushed lips.

How To Choose Your Scent For Your DIY Lip Scrub

To give this lip scrub a revitalizing scent, add a fragrance. I use organic essential oils, but you may also use herbs, plant extracts (like vanilla extract), and scents.

Lavender oil: Lavender oil deeply nourishes your lips and is excellent for preventing sunburns on your lips.

Peppermint oil: Peppermint oil aids in promoting blood flow under the lips and producing a fuller appearance that makes your lips look larger.

Vanilla Extract: It can aid in soothing and moisturizing chapped, dry lips. Vanilla extract may be used to make lip balm that is not only delicious-smelling but also good for your lips.

How To Store Your DIY Lip Scrub

Making homemade lip scrubs in small batches is always a good idea. They’ll last you for approximately a week and stay fresh. Use an old, dry, clean lip balm or eyeshadow container to store your scrub, or buy containers on Amazon. To avoid bacteria, sterilizing the container by soaking it in hot water for a while is advised, and storing it in the fridge.

All of these homemade lip scrub recipes are simple to make and may keep your lips soft, smooth, and moisturized without irritating them.

Natural lip hydrators include coconut, honey, and vanilla, while sugar acts as a scrub. However, be careful not to over-scrub your lips because this could harm them.

Also, be sure to eat well and drink plenty of water. The majority of your skin care problems can be resolved with a healthy lifestyle. Therefore, feel free to select one of the homemade lip scrubs on the list; we are confident that your lips will adore the recipes.

[jetpack-related-posts]

How To Make Coconut Lime Body Scrub For Silky-Soft Skin

Filed Under: DIY Beauty // 04/30/2023

DIY coconut lime body scrub

Summer will soon arrive as May approaches and the temperature begins to rise quickly. When you have dry skin after the winter, the first few days of wearing shorts and dresses can be a little unsettling. Therefore, you need a good body scrub by your side in this situation. In my opinion, coconut and lime make a great mix. Making and using this scrub in the shower is so much fun. You get silky soft skin after using this scrub, which is like having a tropical summery party in the shower. I’ll also demonstrate how easy it is to make.

A zester works excellent for zesting all citrus and makes it simple to zest a lime. Remember to reserve the lime for future use. You can use any lime oil, but I really like to use these essential oils. It is of the greatest caliber and is reasonably priced. Since coconut oil isn’t particularly fragrant, I added a little coconut extract to intensify the coconut flavor. Remember that we really want that tropical explosion.

Coconut Lime Body Scrub

With just a few ingredients, you can make this easy coconut lime body scrub! This body scrub hydrates and exfoliates your skin, leaving it feeling incredibly soft.

Ingredients For The Coconut Lime Body Scrub

-1/2 Cup Virgin Coconut Oil

-1 Cup Organic sugar or salt

-20 Drops of Lime Essential Oil

-1 Tsp lime zest

-1 Tsp coconut extract

Directions For Making The Coconut Lime Body Scrub

Step 1: The coconut oil should be added to a medium-sized bowl and stirred with a spoon until it softens up. The coconut oil must not be melted for your scrub to have a light, fluffy texture.

Step 2: Stir to combine the coconut oil with the lime zest, lime essential oil, and coconut extract.

Step 3: Add the sugar and thoroughly combine.

Step 4: Store in a clean container. This can be kept for a few weeks at room temperature. I use mine a couple of times a week and keep it in the shower.

You should use them within two to three weeks and store them in a cool, dry area, as you do with all homemade body scrubs. Because lime oil is a natural preservative, you shouldn’t be concerned that the lime zest will spoil in the mixture. But be careful not to let water into your container while using it in the shower, as that could cause the scrub to dissolve.

An excellent moisturizing body scrub is coconut oil. I simply rinse it off in the shower and towel dry it throughout the winter when my skin is really dry. However, you can still feel its moisturizing effects if you rinse with a mild soap or body wash afterward if your skin is oilier than normal. Just pay attention to your skin; you are the expert. Your skin will be left feeling silky smooth after using this scrub, and you’ll be prepared for summer.

TIP: Why You Should Use Lime Extract And Not Lime Juice?

The pH range of normal adult skin is between 4 and 6, making it moderately acidic. Skin can become extremely irritated by acids with pH values of 3 or below. The pH of lime juice is about 2.3. Your skin may become more prone to irritation and inflammation, including acne if you expose it to acidic substances. It’s also STICKY!

[jetpack-related-posts]

How To Make Creamy Oat Milk And Honey Body Wash At Home

Filed Under: DIY Beauty // 04/16/2023

creamy oat milk and honey body wash

Do you want to make your own homemade body wash?

This simple, step-by-step guide demonstrates how to prepare a creamy body wash that cleanses the skin gently and leaves it feeling soft and revived.

The moisturizing recipe, which has only 5 ingredients including essential oils, has a luxurious, creamy texture that is perfect for relieving and nourishing dry skin.

DIY Oat Milk And Honey Body Wash

You may enjoy the advantages of a milk bath in the shower by using this homemade milk and honey body wash.

The body cleanser recipe is also quite simple! Simple weighing and mixing results in a wonderful homemade shower milk.

My favorite feature of this natural body wash recipe, aside from its simplicity, is its rich, creamy texture. The milky shower gel creates a rich, moisturizing lather that feels luxurious. Additionally, your skin will feel hydrated, soft, and clean afterward. You’ll enjoy it!

Benefits Of This Homemade Oat Milk And Honey Body Wash

After a shower, your skin should feel dry and stingy, thus it must have been adequately cleansed. Yes, but not in a positive sense. It can be a sign of abrasive surfactants like sodium laureth or sodium lauryl sulfate.

Because they are inexpensive and effective foaming agents—which we have been taught to connect with washing power—many commercial body cleansers contain these surfactants. However, they also deplete the skin’s natural lipids and fats, which compromises the skin’s protective barrier and results in dry, irritated, and itchy skin.

However, this oat milk and honey body wash recipe is sulfate-free.

It is made with a gentle surfactant that softly cleanses. Milk, honey, and jojoba oil are all included in the body wash formula, adding refining properties that hydrate and shield the skin.

So what exactly makes oat milk and honey such amazing ingredients for skincare products?

Ingredients Needed For Oat Milk And Honey Body Wash

The ingredients for this simple oat milk and honey moisturizing body wash recipe are as follows:

– The surfactant, which provides the body wash its cleansing power, is Cocamidopropyl Betaine. Cocamidopropyl betaine is a surfactant (a type of cleanser) derived from coconut oil. Surfactants lower the surface tension and make it possible to wash off dirt and grime.

– Plant oils are used to restore the lipids lost during cleansing. Sweet almond oil was applied. Of course, you can choose any other liquid carrier oil you have or want, such as jojoba, fractionated coconut oil, avocado oil, or whatever oil you love.

– Oat milk powder gives the body wash an incredibly thick, creamy feel and is packed with nutrients that are good for the skin. Oat milk powder is such a great ingredient, so great we made a hydrating bar soap out of it as well.

– Raw honey: The best kind is high-quality unpasteurized honey.

– Essential oils offer extra skincare advantages as well as a natural smell.

– I used the natural broad-spectrum preservative Geogard ECT to preserve my body wash mix. A preservative extends the shelf life and ensures that our homemade milk body wash doesn’t become a feeding ground for yeast, mold, and bacteria. The shelf life of the oat milk and honey body wash recipe is 4 months.

Benefits Of Honey On Your Skin

Honey is a useful component in homemade skincare products. Honey is a nutritious powerhouse, packed with peptides, antioxidants, vitamins, and fatty acids.

Honey absorbs moisture into the skin as a natural humectant. Keeping your skin hydrated and supple.

Honey helps to relieve chronic skin disorders like eczema and psoriasis by reducing redness and inflammation.

Honey’s antibacterial and anti-inflammatory qualities help to reduce the appearance of acne and pimples.

Honey includes an enzyme called glucose oxidase, which, when applied to the skin, transforms into hydrogen peroxide. There is a slight skin-brightening effect of hydrogen peroxide.

Benefits Of OatMilk On Your Skin

Oat milk is a fantastic antioxidant that helps to repair skin damage from UV rays, pollution, and other factors.

In turn, this maintains the radiance of your skin by minimizing discoloration, fine lines, and wrinkles.

Additionally, it has anti-inflammatory qualities that help lessen acne flare-ups. Oat milk is a humectant, which aids in the skin’s ability to retain water.

How To Make Oat Milk And Honey Body Wash

Step 1: Mix The Liquid Ingredients

The oat milk and honey mixture is a skincare staple, and the creamy body wash recipe couldn’t be simpler to make.

Blend all the liquid ingredients. In a glass measuring cup or mixing bowl, combine the Cocamidopropyl Betaine, jojoba oil, honey, and essential oils.

Stir for two to three minutes, or until the honey is completely dissolved. Once the honey is well dissolved, the fluid will initially seem streaky and then get cloudy.

Step 2: Dissolve The Oat Milk Powder

Add the oat milk powder to your liquid mixture and thoroughly mix with the liquids.

It may take many hours for the milk powder to dissolve and turn the body wash liquid from lumpy to thick and creamy. There is nothing else you need to do; the dissolving process will take course on its own.

Step 3: Preserve And Store

To fully combine the preservative into the body wash liquid, add the Geogard ECT and stir well.

Then bottle your body wash and store it in your bathroom to use during your showers.

Best Essential Oil Blends

You can combine various essential oils to create the impact or aroma that you want. This homemade body wash can be used for aromatherapy as well as for cleansing your body.

Depending on your preferences, choose one of these energizing or relaxing scents.

For An Uplifting Body Wash

– Peppermint essential oil

– Orange essential oil

– Lime essential oil

– Grapefruit essential oil

– Eucalyptus essential oil

– Rosemary essential oil

I suggest using a combination of any of these oils.  I especially like peppermint and eucalyptus combined for an invigorating body wash.  I use 10 drops of peppermint and 15 drops of eucalyptus.

For A Relaxing Body Wash

I suggest this for right before bedtime, I like to use a combination of lavender and chamomile essential oil in my bedtime body wash. These two oils together create the perfect blend for relaxing and getting you ready for bedtime.

– Lavender essential oil

– Bergamot essential oil

– Geranium essential oil

– Frankincense essential oil

– Chamomile essential oil

When you give this recipe a try, your body will greatly benefit.  Don’t be afraid to try different essential oil combinations to find the perfect DIY Body Wash just for you!

[jetpack-related-posts]

DIY Bath Bomb Recipe

Filed Under: DIY Beauty // 04/05/2023

homemade bath bomb recipe

This easy-to-make DIY only requires a little mixing, some gentle spritzing, and a short period of molding, and by the end, you’ll have dozens of bubbling bath bombs in a variety of shapes and colors, which will smell and soften bath water as they bubble.

No matter who is on your list, they make wonderful presents. Play around with colors and scents; for instance, combine yellow and red to create orange, or try mixing lemon and lavender.

Bath bombs have become a hugely popular product to brighten at-home self-care. They make bath time fun for kids and relaxing for adults. This DIY bath bomb recipe allows you to enjoy the luxury bath at home without the expensive price tag.

Using common, budget-friendly ingredients, I’ll show you how to make these DIY Bath Bombs at home.

What You’ll Need

-Baking soda (aluminum free is best)

-Cornstarch

-Citric acid

-Spritzer bottles

-Food coloring or you can use Mica powder which is a natural soap colorant that is safe for use in bath bombs.

-Essential oils

-Baking molds

-Epsom salt (magnesium sulfate)

-Coconut oil or Argon oil

How To Make Bath Bomb

Step 1

Sift 1 3/4 cup baking soda, 1 cup citric acid, 1 cup of Epsom salt, and 2 cups cornstarch to make a powdered mixture and run it through a sieve to remove chunks. To make different tints, fill small spritzer bottles with water and add about 6 drops of food coloring to each.

Or if you’re using mica powder you’ll mix that in with the dry ingredients.

Step 2

Pour 1 cup of powdered mixture into a glass bowl. Then lightly spritz, stirring after each spritz, until the powder is your desired color. Add water slowly, so the mixture does not fizz. If mixing two tints, alternate colors as you spritz. You will do this with only water and no food coloring if you’re using mica powder.

Check the consistency of the powder with your fingers; when it can be tightly packed or shaped, stop spritzing—this may take a little while.

Step 3

Select an essential oil. Add 5 drops if it’s one of the stronger scents—like peppermint or lavender—6 if it’s a weaker one—like lemon or grapefruit. You can choose different scents based on what you need for that day. Also, take this time to add about 10 drops of coconut or argon oil to the mixture

Mix it well before firmly packing the mixture into small baking molds. I like to use 1/4 cup for each fizzy, which is good for one bath. Allow the mixture to set for two hours, then pop out carefully. Repeat with different tints and essential oils for the remaining powder.

Step 4

Store in an airtight container for up to six months. You can also wrap them in plastic wrap. If you want to get really fancy, you can use shrink-wrap sleeves to wrap your bath bombs. Heat them with a blow dryer or heat gun to shrink the wrap around your homemade bath bombs.

When you’re ready to use the bath bomb, simply drop it in your bath water and let it fizz and dissolve. It should take about 30 seconds for it to dissolve completely.

[jetpack-related-posts]

How To Make Whipped Body Butter

Filed Under: DIY Beauty // 04/05/2023

homemade non-greasy whipped body butter

This DIY whipped body butter recipe is perfect for the winter months if you have really dry skin.

If you’re anything like me, your skin gets super dry in the cold, and well I love in a really cold area. In the winter, when the air is so dry and I’m taking hot showers, my skin gets so dry.

This body butter goes on smooth and is so nourishing for the skin.

Anything that you put on your skin can absorb right into your body. That is why I love making my own homemade products.

All the ingredients are pure enough to cook with and I know exactly what goes into it.

For this recipe, you only need a few basic ingredients: shea butter, cocoa butter, and coconut oil. I also add essential oils for scent and the amazing health properties they have.

This body butter recipe is so light and fluffy it almost feels like a cloud!

In this post, you’ll learn how to create homemade body butter from natural ingredients!

What Is Body Butter?

You’re in for a surprise if you’ve never used body butter!

It is similar to butter for your skin, well it’s exactly butter for your skin. Anyone can easily make their own body butter at home.

It’s so easy; all you have to do is combine your favorite oils by melting and whipping them together and you’ll have a lovely body butter.

Although I adore my standard whipped coconut oil moisturizer, it dissolves at room temperature and can sometimes be a little too greasy.

You can choose to experiment with some of your favorite plant-based butters because we all need a decent moisturizer that isn’t overly oily and creates a lovely body butter recipe.

This homemade body butter has a beautiful scent and sensation.

Additionally, it is incredibly nourishing and will make your skin feel incredibly smooth.

You can leave it as it is or add essential oils to create a great-smelling body butter for yourself or as a gift. Plus, it’s really great if you have sensitive skin.

How To Make Whipped Body Butter

Ingredients for Whipped Body Butter:

  • 1/3 Cup coconut oil: There is nothing else like organic coconut oil for your skin! Coconut oil can penetrate the skin more thoroughly than other products due to its low molecular weight and way of attaching to proteins. This is the one I use.
  • 1/3 Cup shea butter: For dry skin, shea butter is a powerful emollient. It’s the ideal ingredient to include in your body care recipes because of its emollient qualities, particularly in body butter. This is the one I use.
  • 1/3 Cup cocoa butter wafers: Lotions, creams, and body butter will gain a viscous and creamy consistency from cocoa butter, which softens at body temperature. Vitamin E, another natural antioxidant, as well as a number of other vitamins and minerals, are also present in cocoa butter. These are the ones I use.
  • 1/3 Cup jojoba oil: Low comedogenic jojoba oil is a carrier oil that moisturizes and calms irritated skin. Sweet almond oil, which contains fatty acids and vitamins A and E and penetrates the skin rapidly, is a suitable alternative to jojoba oil if it is not available. This is the one I use.
  • 2 Teaspoon arrowroot powder: Due to its oil basis, this moisturizer may feel a little greasy on some skin types. Cornstarch or arrowroot powder can be added to reduce the greasy sensation on your skin. In the absence of arrowroot flour, corn starch or tapioca starch are suitable alternatives. This is the one I use.
  • Essential oils (optional): These plant-based oils are better than synthetic fragrances because they are all-natural. Don’t go overboard, though; just a few droplets will do to flavor homemade body butter.

Also read: 21 Soothing DIY Bath Salt Recipes With Essential Oils For Every Mood

Why These Ingredients:

  • Coconut oil – is moisturizing, can help promote wound healing, and has antibacterial, antifungal, and antiviral properties.
  • Jojoba oil – is very moisturizing, and promotes wound healing while also having anti-inflammatory properties. Jojoba oil can also have anti-aging properties.
  • Cocoa butter – can help keep in moisture by giving skin a protective barrier.
  • Shea butter – is rich in antioxidants, highly moisturizing, and promotes skin healing.
  • Essential oils. – because they smell nice and they have many great properties.

Directions for Making Your Whipped Body Butter:

  • Melt the coconut oil, cocoa butter, and shea butter in a double boiler or saucepan over low heat to create your body butter. In the absence of a double boiler, a sizable glass measuring cup will do.
  • Then turn off the heat and stir in the jojoba oil and essential oils, if using, to the warmed cocoa butter and oils. To add the essential oils, just mix thoroughly.
  • Place the mixture in the refrigerator after pouring it into a medium glass bowl. About two hours of cooling time is required. As an alternative, you could chill the oils in the fridge.
  • When the mixture is completely solid, take the dish out of the refrigerator, put it in your stand mixer, and whip the body butter with it (a hand mixer also works if that’s what you have). When the body butter is light and airy, add the arrowroot flour and beat again.
  • Finally, scoop the body butter into containers and store it in a cool, dry place.

Tips For Making DIY Body Butter

  • This makes a really great gift for friends and family.
  • You can double or triple this recipe.
  • Be careful using citrus oils, like lemon or orange, since they can make your skin sensitive to the sun. If you do use them, don’t go out in the sun for awhile. Or, simply use this body butter at night.

How To Store Homemade Whipped Body Butter

The oils and butter in this dish could melt if kept in a warm environment because they are natural and oily in nature.

This body butter should therefore be stored in a cold, dry environment. Then, if the oils begin to melt by accident, you can refrigerate the butter and re-whip it.

If stored in an air-tight jar in a cool dark place, this body butter will keep for up to 6 months. If you would like to keep it for longer, you could add preservatives to it.

Although I have not directly added a preservative to this whipped body butter, I would choose Geogard ECT (Preservative ECO, Plantaserv M). In the mixture, this preservative should make up 0.6% to 1%.

I recommend opting for natural preservatives like vitamin E oil or rosemary extract if you intend to store the body butter for an extended period.

These natural preservatives can help prolong the shelf life of your homemade product without introducing harsh chemicals.

Another option to consider for extending the shelf life is to store the body butter in smaller containers.

This reduces the exposure to air and contaminants each time you open a jar, helping to maintain the freshness of the product for a longer duration.

Additionally, it’s essential to keep your body butter away from direct sunlight and high temperatures, as these can accelerate the breakdown of the natural ingredients and cause the product to spoil more quickly.

For those who enjoy experimenting with different scents and textures, you can customize this recipe further by incorporating different essential oils or botanical extracts.

Lavender, chamomile, or rosemary essential oils are popular choices for their soothing properties, while citrus oils like lemon or orange can lend a refreshing scent.

You could also try adding a tablespoon of aloe vera gel to the mixture for added hydration and soothing benefits, especially beneficial for sun-exposed or irritated skin.

Furthermore, if you prefer a firmer body butter, you can adjust the ratio of oils and butters in the recipe.

Increasing the amount of cocoa butter or shea butter will result in a firmer consistency, while adding more liquid oils will make the body butter softer and more spreadable.

Experimenting with different combinations of oils and butters can lead to unique textures and scents that cater to your specific skincare needs and preferences.

Have fun exploring and creating your signature homemade body butter recipe!

Pin For Later!

how to make your own homemade whipped body butter
homemade affordable whipped body butter
how to make your own homemade whipped body butter
[jetpack-related-posts]

DIY Homemade Bath Salts On A Budget

Filed Under: DIY Beauty // 03/14/2023

home made bath salts for relaxation

Making your own bath salt blends at home is surprisingly simple.

There is nothing better than a hot bath after a long, stressful day, except maybe a hot bath enhanced with aromatic bath salts, of course.

Making your own bespoke bath salt blends to meet your requirements (such as easing tight muscles, easing the day’s stress, or softening skin) and then spicing them up with your favorite essential oils is surprisingly simple.

You can even use food coloring to give your salt mixture a lovely, calming hue as a final touch.

What You Need

– A container to store the bath salts in.

– Coarse sea salt.

– Epsom salt (Epsom salt is also known as magnesium sulfate. It’s a chemical compound made up of magnesium, sulfur, and oxygen, this is different from the coarse sea salt).

– Baking Soda.

– Essential oils of your choice (essential oils have different benefits that you can add to your bath salts, so choose the essential oils based on your specific needs).

– Food coloring to make the bath salts look extra fancy and professionally made.

How To Make The Bath Salt

Step 1

Mix 6 parts coarse sea salt, 3 parts Epsom salts (to relieve sore muscles, promotes sleep, and reduce inflammation and stress), and 1 part baking soda (for cleansing and detoxifying properties that may help to purify your body and boost immunity as well as soothe skin irritation) in a big bowl.

Step 2

Add a few drops of essential oils (Sea salts and essential oils are a great combination. The relaxing properties of hot water complement the effects of well-chosen salts and essential oils) and combine.

Step 3

Add food coloring drops until you get the desired color.

Now that you’ve made your bath salt, scoop it into your previously prepared container and store them away to use for your next hot bath.

Essential Oil Blends For Your Bath Salts

Try these essential oil blends in your DIY bath salts for the following benefits:

Relaxing Blend

2 Parts Lavender essential oil for every 1 part Vetiver essential oil.

Mood-Boosting Blend

2 Parts Lavender essential oil for every 1 part Lemon essential oil.

Essential Oil Blend For Soft Skin

Equal parts Lavender essential oil, Frankincense essential oil, and Palmarosa essential oil.

Anti-inflammatory Blend

2 Parts Lavender essential oil for every 1 part Rosemary essential oil.

Muscle Relaxer Blend

2 Parts Peppermint essential oil for every 1 part Rosemary essential oil.

[jetpack-related-posts]

DIY Honey Oatmeal Soap Recipe: For Healthy and Hydrated Skin

Filed Under: DIY Beauty // 03/14/2023

diy soap for all skin types

This regular bar of soap can be transformed into an exfoliating soap bar with a wonderful scent by just adding honey and oatmeal and is perfect for sensitive and dry skin.

This natural soap made from organic rolled oats and honey will leave your skin feeling incredibly smooth and looking brilliant.

Oatmeal And Honey Soap Recipe

Oatmeal has many benefits that’s why it’s utilized in oatmeal milk baths and can treat a variety of skin irritations because it has so many wonderful skin-friendly properties.

You can make use of instant oats, colloidal oatmeal, or oatmeal powder. Oatmeal can be turned into powder by mixing it quickly in a blender.

We’ll be using powdered oatmeal for this recipe, which you can create by blending plain rolled oats.

What You Need

– 2 Pounds oatmeal melt and pour soap base.

– 1 Cup organic rolled oats that you’ve blended into a fine powder.

– 2 Tablespoons of Raw honey.

– Soap mold.

– Essential oil of your choice (I like to use either vanilla, lemon, or lavender essential oils).

How To Make Your Honey Oatmeal Soap

– Cut the oatmeal melt and pour soap base into small chunks and place them into a double boiler.

– Melt over medium heat. Stirring occasionally with a wooden spoon. 

– Remove from the heat when it’s fully melted.

– Add in the oatmeal powder, essential oil, and raw honey. Stir to mix.

– Pour into soap molds.

– Allow it to harden then remove it from the molds.

Now that you’re done, they are ready to use for your next self-care day whenever you take your next shower or bath.

[jetpack-related-posts]

12 DIY Hair Masks To Revive Dry And Damaged Hair

Filed Under: DIY Beauty, Hair // 03/09/2023

diy hair masks for all your hair needs

DIY products, such as DIY hair masks, may appear difficult to make or you may not feel like they work.

Yet, using hair masks can be a particularly effective way to cure your hair issues. While the shelves of your neighborhood cosmetic store are stocked with a wide selection of ready-made masks to choose from, you can also make your own hair mask at home using items you probably already have on hand, such as olive oil, avocado, or honey.

Also, these DIY hair treatments can help with various issues, including dryness and restoring brittle strands.

Do DIY Hair Masks Actually Work?

Homemade hair masks can be effective, but they are sometimes not as beautifully made as salon-grade products.

While homemade hair masks may not be as effective as salon-grade masks, which are created specifically to target issues like color-treated hair or keratin bond strengthening, most experts believe that they may frequently be useful in between salon visits.

Without having to spend a fortune on salon-grade hair products, there are several ingredients you can use in an at-home mask to help improve the texture and health of your hair.

Homemade hair masks can work incredibly well if the ingredients are right and your hair is in good condition. To prevent residue in your hair, you must, however, combine and strain very carefully.

Best Hair Masks For Reviving Your Hair

Every ingredient targets different needs, so there are different ‘bests’ for different purposes: (To get the most out of these hair masks, you have to first wash your hair with a clarifying shampoo to unclog the cuticle).

1. Rosemary And Olive Oil Mask

Great For: Promoting Hair Growth

Ingredients:

– Gel scraped from one aloe leaf
– 1 Pack of fresh rosemary
– 2 Tablespoons of olive oil
– 3 Capsules of vitamin E oil
– Conditioner of your choice

Directions:

1. Blend ingredients together until smooth.

2. Strain the mixture to get rid of any chunky pieces.

3. Pour the mixture into a bowl then add a few scoops of your conditioner and mix well.

4. Let the product sit for 30 minutes then rinse it out.

5. Finnish off with your usual conditioner.

While there isn’t a magical way to get longer and thicker locks overnight, this mask can help promote growth. Rosemary helps boost blood circulation to the scalp… the improved blood circulation helps follicles get the nutrients required for healthy growth.

2. Coconut Oil Mask

Great For: Adding Moisture To The Hair

Ingredients:

1 Tablespoon of coconut oil

Directions:

1. Before bed, warm coconut oil in the microwave, then massage into damp hair, avoiding the roots.

2. Tie hair into a bun and cover it with a shower cap.

3. Shampoo and continue with your usual wash day.

This is more of a hot oil treatment than a hair mask but yields great benefits. I suggest doing this one at least once every month to add moisture to your hair and replenish it.

3. Apple Cider Vinegar And Tea Tree Oil Mask

Great For: Getting Rid Of Dandruff

Ingredients:

– ½ Cup apple cider vinegar

– ½ Cup warm water

– 10-12 Drops of tea tree oil

– 1 Tablet of aspirin

Directions:

1. Crush up the aspirin.

2. Thoroughly mix the ingredients in a spray bottle and spray it all over your scalp.

3. Let it sit for around 30 minutes and shampoo it out, and continue with your regular wash day.

Aspirin contains salicylic acid, which helps to reduce inflammation and exfoliates dandruff flakes. You can repeat the “mask” each time you plan to wash your hair until the dandruff goes away.

4. Coconut Oil And Cinnamon Hair Mask

Great For: Thinning And Breakage

Ingredients:

– 1 Teaspoon ground cinnamon

– 1 Teaspoon of coconut oil

Directions:

1. Mix the ingredients together well.

2. Apply the mask onto your roots and part, massaging into your scalp.

3. Let the mask sit for 30 to 45 minutes, then rinse with warm water.

The spice works to stimulate blood circulation and promote hair growth and strength, while the coconut oil is rich in fatty acids, helping to further repair the hair.

5. Coconut Oil And Yogurt Mask

Great For: Repairing Dry Hair

Ingredients:

– 1 Tablespoon of coconut oil

– 1 Tablespoon castor oil

– 1/2 Cup plain yogurt

– 1 Whole egg

Directions:

1. Mix all of the ingredients together in a bowl until well combined.

2. Use your fingertips to apply the mask, working your way from the scalp down to your ends.

3. Cover your hair with a warm towel or shower cap to lock in the natural heat from the scalp and leave it on for 15 to 20 mins.

4. Rinse well with warm water, then shampoo as usual.

The egg in this DIY mask has plenty of vitamins to nourish strands, plus it contains hydrating ingredients like coconut oil and yogurt. The protein in Greek yogurt and eggs will help strengthen weak, dry hair strands and prevent breakage. So if you’re looking for a homemade hair mask to repair dry hair, this is the one for you.

6. Banana, Yogurt, And Honey Hair Mask

Great For: Reducing Frizz

Ingredients:

– 1 Sliced banana
– 2 Tablespoons of plain yogurt
– 1 Tablespoon of honey

Directions:

1. Combine all the ingredients together in a blender or mash the banana and mix the ingredients until they are all mixed together well.

2. Apply the mask to damp hair from roots to ends.

3. Tie your hair up and cover it with a shower cap.

4. Leave the mask on your hair for about 30-45 minutes.

5. Rinse with your regular shampoo and conditioner.

Bananas are full of natural oils, potassium, carbohydrates, and vitamins, all of which help lock in moisture and help eliminate that annoying frizz, and yogurt has incredible benefits for your frizzy hair as well. Yogurt has high levels of lactic acid, which helps treat dull and damaged hair, so this ingredient is a must.

7. Aloe Vera, Avocado, And Egg Hair Mask

Great For: Strengthening Brittle Hair

Ingredients:

– 1 Whole Egg

– 2 Tablespoons olive oil

– 1/2 Avocado

– 2 Tablespoons avocado oil

– 1 Tablespoon coconut oil

– Aloe vera leaf juice

Directions:

1. Blend all the ingredients until totally smooth.

2. Wet your hair.

3. Scoop up the mask and smooth it through your hair until it’s totally saturated.

4. Cover your hair with a shower cap or grocery bag, and let it sit for at least 20 minutes.

5. Jump in the shower and shampoo and condition it like usual.

If you’ve been loading up on moisture and your hair is still feeling dry or brittle, you may need a protein treatment. This DIY mask uses protein-rich eggs, coconut oil, and avocado to help restore strength, along with moisturizing aloe vera and olive oil to increase elasticity.

8. Sugar And Coconut Oil Scrub

Great For: Exfoliating Your Scalp

Ingredients:

– 2 Tablespoons of your favorite hair conditioner

– 2 Tablespoons raw sugar
– 2 Drops of peppermint essential oil (or your favorite essential oil)
– 2 Tablespoons coconut oil
– 2 Drops of tea tree oil

Directions:

1. In a bowl, mix together the coconut oil, the essential oil of your choice, and the tea tree oil.

2. In another bowl, combine the brown sugar and your favorite hair conditioner.

3. Part your hair into sections and apply the oil mixture to slightly damp hair, starting at your scalp and working to the ends.

4. Take the brown sugar/hair conditioner mixture and apply to the scalp only, lightly massaging. Do not scrub.

5. Leave the mixture in your hair for one hour, then rinse with lukewarm water and shampoo normally.

This is both a hair mask and a scrub. And when it comes to scrubs, they are beneficial to anyone who has product buildup or an excessively oily scalp.

9. Coconut Oil, Mayonaise, And Yogurt Hair Mask

Great For: Repairing Damaged Hair

Ingredients:

– 2 Tablespoons full-fat yogurt

– ½ Cup mayonnaise

– 2 Tablespoons coconut oil

Directions:

1. Combine all the ingredients together and mix the ingredients until they are all mixed together well.

2. Apply the mask to damp hair from roots to ends.

3. Tie your hair up and cover it with a shower cap.

4. Leave the mask on your hair for about 50-60 minutes.

5. Rinse with your regular shampoo and conditioner.

If your hair is damaged, your hair routine should be filled with some deep-conditioning masks that give you cuticle-repairing proteins, and a lot of strand-smoothing moisture. This inexpensive mask will help do just that.

10. Olive Oil, Egg, And Honey Hair Mask

Great For: Adding Shine To Dull Hair

Ingredients:

– 1 Egg yolk

– Tablespoon of olive oil

– Tablespoon honey

Directions:

1. Place the egg yolk, honey, and olive oil in a bowl.

2. Use a fork or a whisk to gently mix together.

3. Apply the mixture, starting at the scalp and working your way down the hair to the ends.

4. Leave it on for 30 minutes then rinse it off.

Egg yolks are rich in fat, protein, and biotin, and although these proteins may be too large to penetrate the follicle itself, they can coat the hair follicle to add a glossy look. By combining this with olive oil and honey, your hair should achieve a shine that lasts through a few washes.

11. Avocado And Olive Oil Hair Mask

Great For: Reducing The Appearance Of Split Ends

Ingredients:

– ½ An avocado
– ½ Cup olive oil

Directions:

1. Mash the ingredients in a bowl with a fork and mix them together.

2. Apply to the split ends only.

3. Leave the mask on for 20 minutes and rinse with warm water.

Nothing can fix split ends except a trim, however, a mask will coat the split ends to make them look healthy in the meantime. Avocados have minerals that will seal the cuticle, as well as proteins and vitamins to nourish and soften the hair. A layer of olive oil will add extra shine and sleekness to gloss over the damaged hair.

12. Avocado And Egg Hair Mask

Great For: Color-Treated Hair

Ingredients:

– 2 Whole eggs
– 2 Tablespoons of any thick conditioner
– 1 Tablespoon castor oil
– 1 Ripe avocado
– 2 Tablespoons full-fat milk

Directions:

1. Whisk all the ingredients together.

2. Refrigerate the hair mask overnight

3. Apply it to your hair in sections.

4. Leave it in for 20 minutes and then rinse out.

Color-treated hair is vulnerable to damage, and this mask will help target even the worst color-related breakage. It’s made with eggs which contain protein, the building blocks of healthy hair.

[jetpack-related-posts]

DIY Lip Balm To Revive Dry, Chapped Lips

Filed Under: DIY Beauty // 03/07/2023

DIY lip balm recipe

Make various lip balms by following these simple directions.

Divide the mixture and fragrance and color the batches separately if you want to make more than one type of lip balm at once. I prefer to use essential oils that smell edible for lip balms, such as citrus or vanilla.

Basil, mint, orange, or lemon essential oils might help to soften the powerful scent of lavender essential oil.

What You Need

– Lip balm tubes or lip balm tins

– Beeswax pellets

– Shea butter

– Cocoa butter

– Coconut oil

– Jojoba oil

– Vitamin E oil

– Essential oils of your choice

How To Make Your Lip Balm

1. Measure 1 teaspoon beeswax, 2 teaspoons shea butter, and 1 teaspoon cocoa butter and put in the top of a double boiler.

2. Melt the butters and waxes over low heat in your double boiler until completely combined.

3. Add 1 teaspoon each of coconut oil and jojoba oil and stir until combined.

4. Remove the bowl from the heat and add about 5 drops of Vitamin E oil and 10 drops of the essential oils of your choice.

5. Pour into your storage containers.

6. Allow to cool completely (for at least 30 minutes).

[jetpack-related-posts]

3 DIY Natural Face Masks To Get You From Acne-Prone Skin To Glowing Skin In No Time

Filed Under: Skin, DIY Beauty // 02/09/2023

diy natural face masks

A DIY natural face scrub is a great way to get glowing skin right at home, at almost no cost.

With skincare products being so expensive, you have to pay an arm and a leg just to curate the perfect skincare routine to help clear up your acne-prone skin.

So I have compiled a great list of face scrubs you can try in the comfort of your home.

These easy DIY recipes are some of the best exfoliating scrubs and face masks that are great natural options that are easy to make and beat many of the facial products out there.

Related Post: 15 Best Spa Facials & Facial Treatments For Acne-Prone Skin

Why You Should Make Homemade Face Masks

1. Cheap and budget-friendly way to get a facial: Making your own face mask is a very affordable way to have an at-home facial.

2. Easy To Make and Use: Making face masks at home is fairly easy. You simply mash and mix your ingredients and plop it onto your face.

3. Super Accessible: Another reason that making our own face masks and scrubs is how accessible it is to everyone. We all want super healthy skin and amazing facials, or expensive masks with high-quality ingredients can get us there, but that’s not always accessible to us. The products used for face masks and scrubs, however, are almost always super accessible to us.

3 Face Masks For Acne-Prone Skin

Homemade face scrubs are the perfect recipes to attempt if you’re new to do-it-yourself skincare.

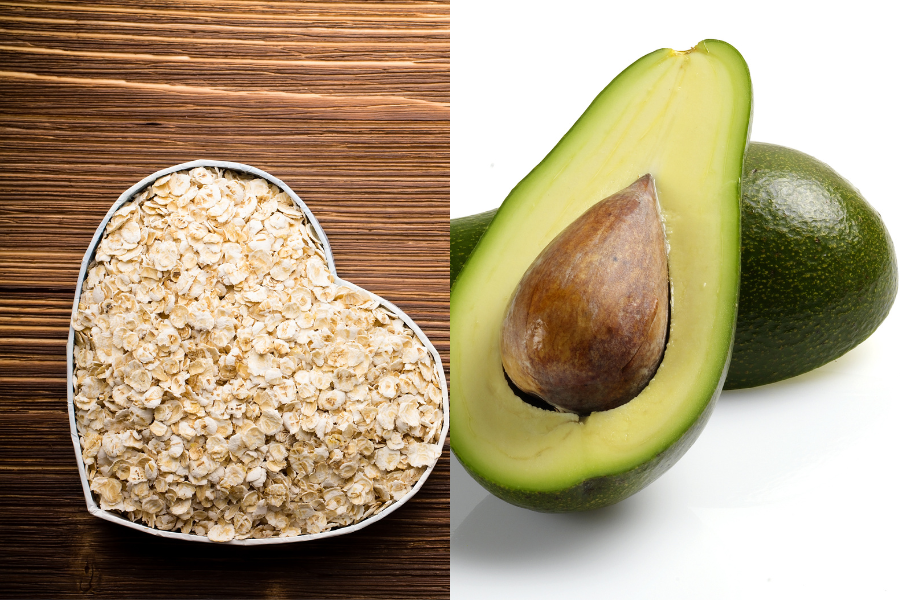
1. Avocado & Oatmeal Mask For Gentle Exfoliation

avocado and oatmeal

Exfoliating your skin is important for removing dead skin cells from your skin, allowing for a natural skin glow from within, as well as allowing your pores to open up and release any trapped sebum which can cause an acne breakout.

This avocado & oatmeal face scrub is gentle, soothing, and a great addition to your skincare regimen.

Avocado and oatmeal make a gentle exfoliating face mask that is perfect for all skin types. Here’s how to prepare it.

Ingredients For Your Avocado Oatmeal Face Mask

-1 small avocado or 1/2 a larger avocado.

-1 tablespoon of ground oats.

How To Prepare And Apply Your Face Mask

-Mix the avocado and ground oats in a small bowl.

-Use your favorite cleanser to cleanse your skin.

-Apply the avocado and oatmeal face mask and let it sit for 10 to 15 minutes.

-Spray your face with water and start massaging your face in a circular motion for 5 to 10 minutes (Waiting 15 minutes will allow for the nutrients to absorb into your skin before you wash it off).

-Wash your face with lukewarm water, avocado is a fat so cold water won’t truly wash it off.

-Pat your face dry and apply your moisturizer.

Benefits Of The Avocado & Oatmeal Face Scrub

Avocados are healthy fats, and those same healthy fats and oils make them a really great addition to your skincare routine.

The healthy fatty acids in avocados penetrate the skin help soften, hydrate, and nourish the face, as well as reduce the appearance of fine lines and wrinkles.

The antioxidants found in avocados help to remove dead skin cells, unclog pores, reduce acne breakouts and exfoliate the skin.

And oatmeal helps to soak up excess oils released by your skin which helps to treat acne, and its dense antioxidant and anti-inflammatory properties help to soothe dry skin as well as remove dead skin cells.

Oats also contain natural cleansers, called saponins, that are incredibly effective at removing dirt and oil from your skin.

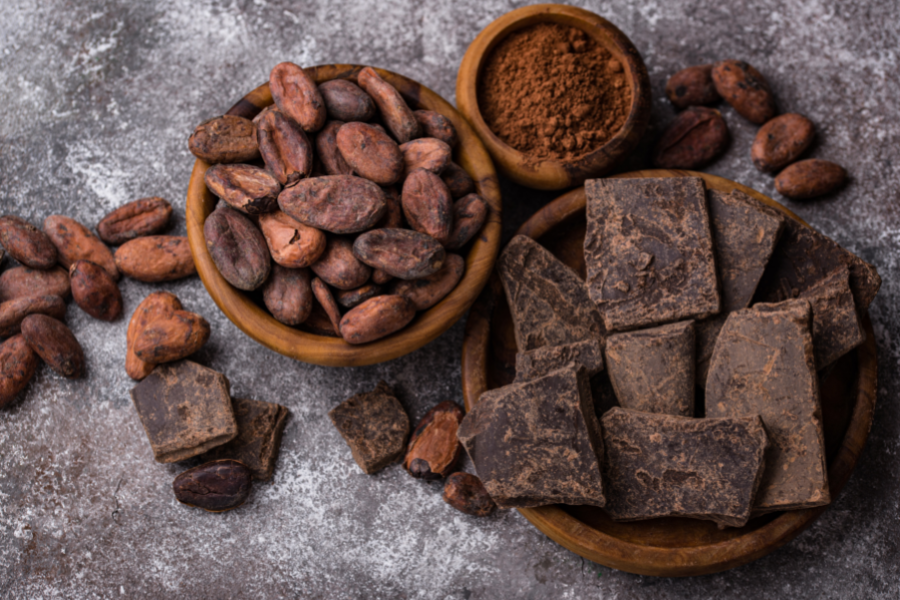
2. Cocoa Powder and Coffee Face Mask

cocoa powder

Coffee works wonders on the skin, it’s good for reducing swelling around the face, rejuvenating the skin, and for reducing inflammation and redness.

Coffee in skincare is great for brightening, anti-aging, stubborn dark circles under the eyes, and reducing inflammation.

It also includes antibacterial properties great for fighting acne. Cacao is extremely high in antioxidants, has firming agents, and is known to protect against free radical damage, but you should always still wear sunscreen.

Ingredients For Your Cocoa Powder & Coffee Face Mask

-4 tablespoons finely ground coffee beans.

-4 tablespoons unsweetened cocoa powder.

-8 tablespoons whole milk (or any milk of your choice)

-1 tablespoon lemon juice

-1 tablespoon honey (for extra oily or highly acne-prone skin, use additional lemon juice here instead of honey)

How To Prepare And Apply Your Face Mask

-Mix the coffee and cocoa powder in a small bowl.

-Add your milk, lemon juice, and honey if using. (Warm the honey in the microwave for a few seconds to loosen it up a bit)

-Cleanse your face with your favorite cleanser.

-Apply your face mask and rub it in for a few minutes in small, gentle circular motions.

-Let the mask sit for 10 to 15 minutes.

-Rinse with warm water and pat dry.

-Moisturize your skin.

Benefits Of The Cocoa Powder and Coffee Face Mask

Coffee beans reduce inflammation and redness, while also reducing the appearance of dark circles under the eyes. The coffee grounds are also a great exfoliator that removes dead skin for a brighter, more lively skin complexion, giving you that natural glow.

Cocoa powder is filled with antioxidants that protect you against the sun. It is also high in sulfur which can reduce the risk of acne breakouts.

Milk is great for giving your skin a youthful, smooth, and healthy glow, it contains amino acids which help keep your skin hydrated and moisturized.

Lemon juice contains natural vitamin C to lighten, brighten, and tighten, all while controlling the production of sebum and oil which helps with acne prevention.

3. Flaxseed Facial Scrub

flaxseed

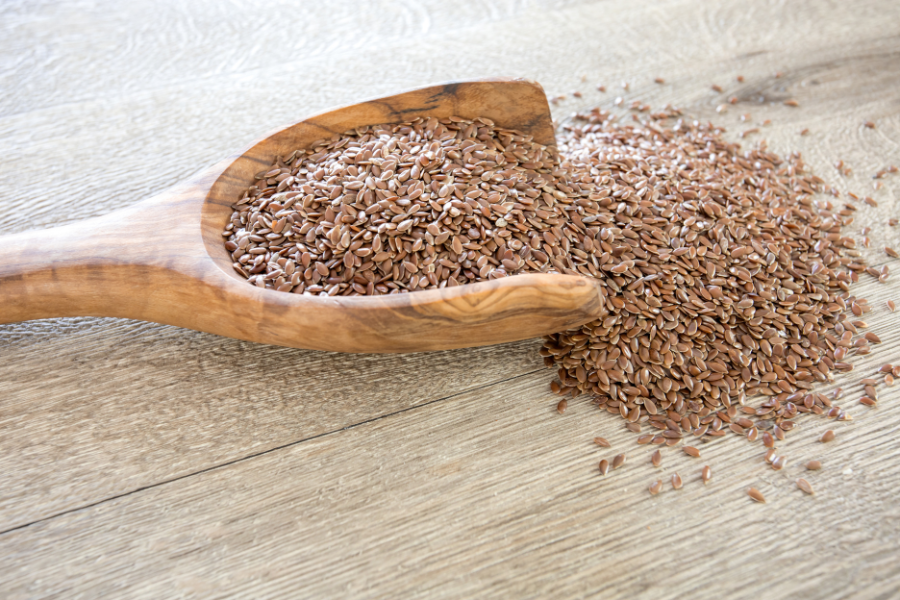
Flaxseed is a superstar plant food that has been making its way into all our food, haircare, and skincare, so why not into our DIY masks?

When applied topically, flaxseed can do wonders for your skin.

It is packed full of omega-3 fatty acids which help keep your skin hydrated and smooth and reduces the appearance of wrinkles and fine lines.

The natural oils in flaxseed help balance your skin’s natural oil production and the antioxidants protect the skin from free radicals and sun damage while calming inflammation.

Ingredients For Your Flaxseed Facial Scrub

-1 ½ tbsp flaxseed meal

-1 ½ tbsp brown sugar

-3 tbsp coconut oil

How To Prepare And Apply Your Facial Scrub

-Combine all the ingredients in a small bowl and mix well.

-Cleanse your face.

-Gently massage the flaxseed facial scrub onto your entire face rubbing in a circular motion for a few minutes.

-Let the scrub sit for 10 to 15 minutes.

-Rinse with cool water and pat face dry.

Benefits Of The Flaxseed Facial Scrub

The natural oils in flaxseed help balance your skin’s natural oil production and the antioxidants protect the skin from free radicals and sun damage while calming inflammation, which helps prevent acne breakouts.

Sugar is amazing for its glycolic acid compounds. When used as an exfoliant, glycolic acid removes the dead skin cells to leave fresher, brighter skin, while improving blood flow to your skin’s surface. Sugar also works as a moisturizer for the skin.

Coconut oil is another moisturizing agent in this facial scrub and is great for hydrating dry or irritated skin.

It can reduce inflammation and aid in skin infections.

So these face masks will leave your skin soft, hydrated, and moisturized while aiding in reducing your acne breakouts.

[jetpack-related-posts]
  • « Previous Page
  • 1
  • 2

Copyright © 2026 · Theme by Marketing Templates Co.

We use cookies on our website to give you the most relevant experience by remembering your preferences and repeat visits.Read More By clicking “Accept All”, you consent to the use of ALL the cookies. However, you may visit "Cookie Settings" to provide a controlled consent.
Cookie SettingsAccept All
Manage consent

Privacy Overview

This website uses cookies to improve your experience while you navigate through the website. Out of these, the cookies that are categorized as necessary are stored on your browser as they are essential for the working of basic functionalities of the website. We also use third-party cookies that help us analyze and understand how you use this website. These cookies will be stored in your browser only with your consent. You also have the option to opt-out of these cookies. But opting out of some of these cookies may affect your browsing experience.
Necessary
Always Enabled
Necessary cookies are absolutely essential for the website to function properly. These cookies ensure basic functionalities and security features of the website, anonymously.
CookieDurationDescription
cookielawinfo-checkbox-analytics11 monthsThis cookie is set by GDPR Cookie Consent plugin. The cookie is used to store the user consent for the cookies in the category "Analytics".
cookielawinfo-checkbox-functional11 monthsThe cookie is set by GDPR cookie consent to record the user consent for the cookies in the category "Functional".
cookielawinfo-checkbox-necessary11 monthsThis cookie is set by GDPR Cookie Consent plugin. The cookies is used to store the user consent for the cookies in the category "Necessary".
cookielawinfo-checkbox-others11 monthsThis cookie is set by GDPR Cookie Consent plugin. The cookie is used to store the user consent for the cookies in the category "Other.
cookielawinfo-checkbox-performance11 monthsThis cookie is set by GDPR Cookie Consent plugin. The cookie is used to store the user consent for the cookies in the category "Performance".
viewed_cookie_policy11 monthsThe cookie is set by the GDPR Cookie Consent plugin and is used to store whether or not user has consented to the use of cookies. It does not store any personal data.
Functional
Functional cookies help to perform certain functionalities like sharing the content of the website on social media platforms, collect feedbacks, and other third-party features.
Performance
Performance cookies are used to understand and analyze the key performance indexes of the website which helps in delivering a better user experience for the visitors.
Analytics
Analytical cookies are used to understand how visitors interact with the website. These cookies help provide information on metrics the number of visitors, bounce rate, traffic source, etc.
Advertisement
Advertisement cookies are used to provide visitors with relevant ads and marketing campaigns. These cookies track visitors across websites and collect information to provide customized ads.
Others
Other uncategorized cookies are those that are being analyzed and have not been classified into a category as yet.
SAVE & ACCEPT