• HOME
  • RELATIONSHIPS
  • HOLIDAYS
  • WELLNESS
  • CAREER & FINANCE
  • FASHION
  • BEAUTY
  • LIVING

Advice From Nobody

You are here: Home / Archives for AdviceFromNobody

Crunchy Apple-Celery Salad with Maple-Dijon Vinaigrette

Filed Under: Food & Drink // 06/17/2025

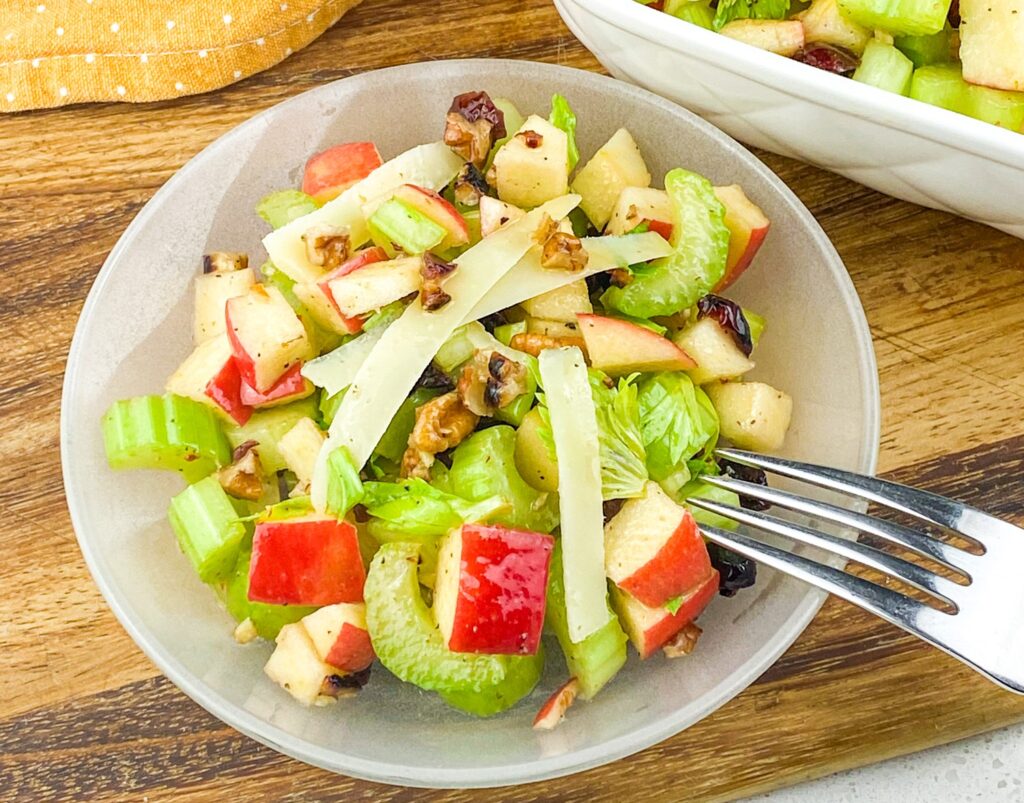
If you’ve been stuck in a salad rut lately—you know, the kind that’s just greens, cucumbers, and the same ol’ bottled ranch dressing—this Crunchy Apple-Celery Salad with Maple-Dijon Vinaigrette is here to change everything. It’s crisp, it’s tangy, it’s sweet, and it packs a serious crunch in every bite. Even better? It’s super simple to make and feels a little bit fancy without any actual fuss.

Whether you’re planning a light lunch, need a refreshing side for your dinner spread, or want a unique offering for your next potluck, this salad delivers big time.

Let’s break it all down—from what makes this salad so special, to exactly how to make it at home, with a few bonus tips to customize it to your taste.

Also Read: Crisp Apple-Celery Salad with Toasted Hazelnuts

Why You’ll Love This Apple-Celery Salad

This salad is one of those recipes that surprises people, in the best way. Celery isn’t always the star of the show, but here, it shines thanks to its natural crunch and mild, earthy flavor. Paired with sweet apples, chewy dried cranberries, toasted pecans, and a sweet-tangy vinaigrette, it creates a perfect harmony of textures and flavors.

Plus, the salad is topped off with shaved Parmesan for a little salty bite that balances everything out.

And let’s not forget about the Maple-Dijon vinaigrette. It’s sweet, tangy, slightly sharp, and adds a burst of flavor to every bite. Best of all, you can whip it up in seconds with pantry staples.

How To Make Apple-Celery Salad

PrintPrint

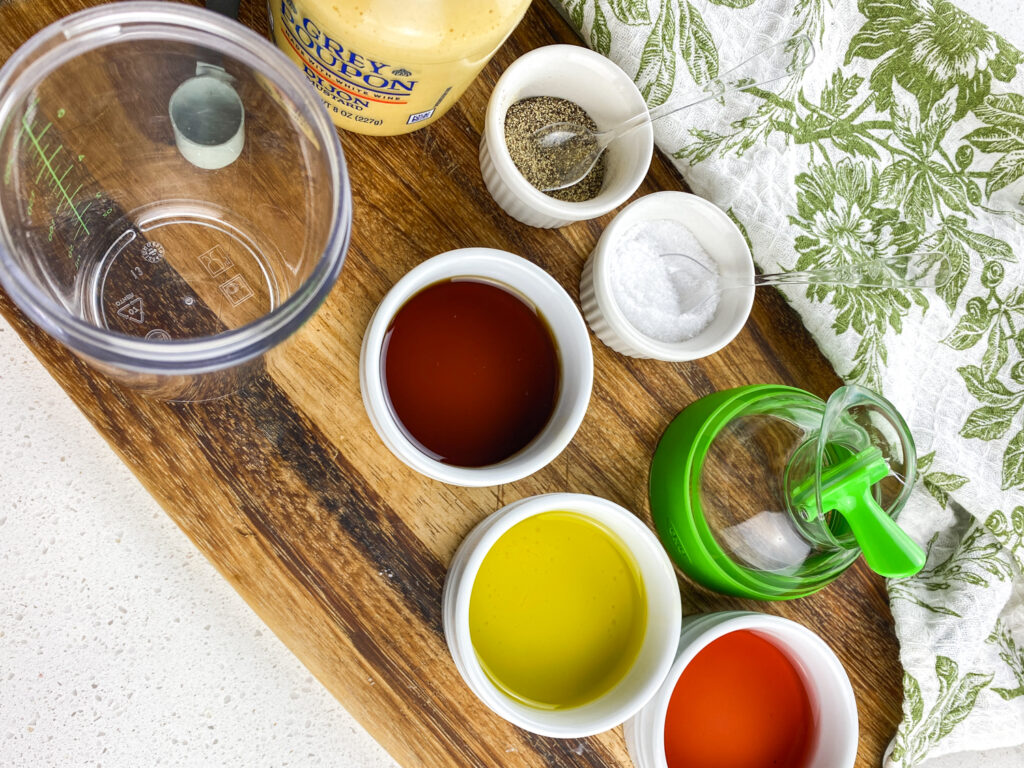
Ingredients For The Apple-Celery Salad

  • Maple-Dijon Salad Vinaigrette
  • 1 tsp. Dijon mustard
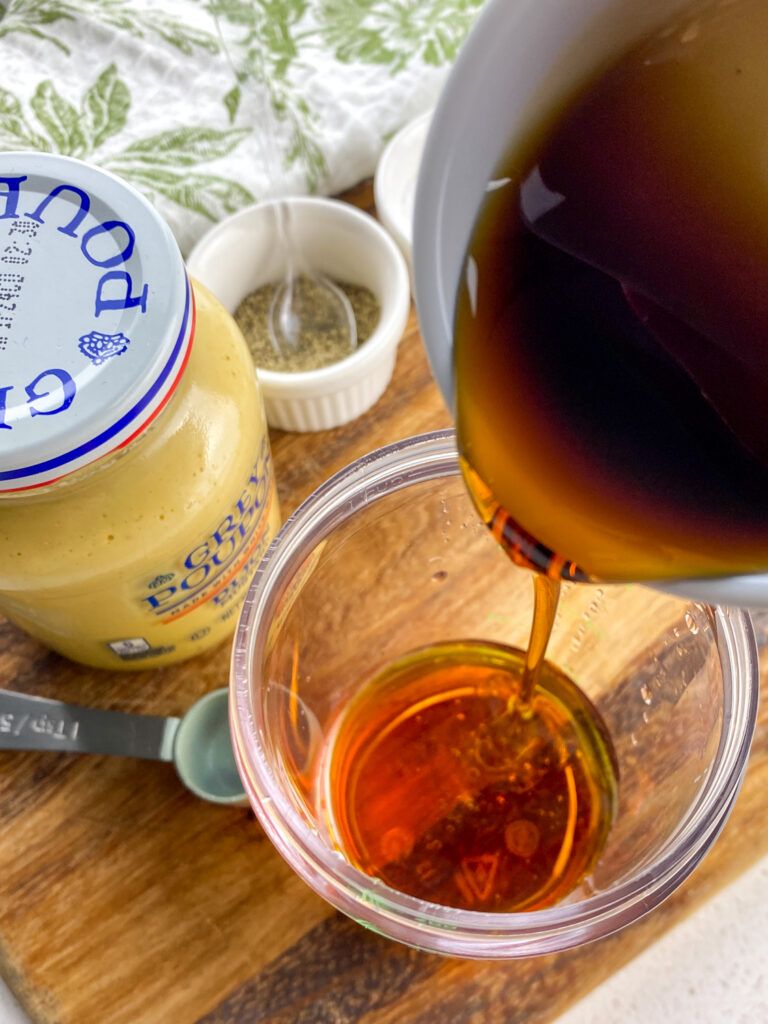
    This adds a punch of flavor and acts as an emulsifier to help the vinaigrette stay mixed. If you want a more savory, less sweet dressing, feel free to bump this up by 1-2 teaspoons.

  • 2 tbsp. real maple syrup
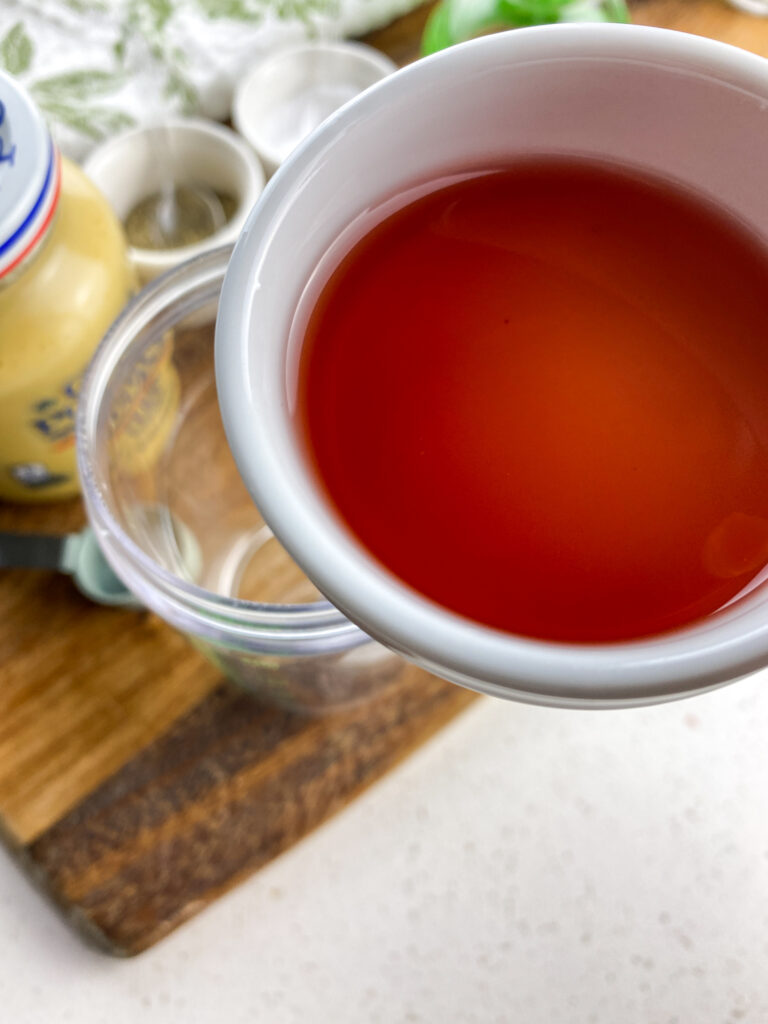
    Make sure you’re using real maple syrup—not pancake syrup. The natural sweetness of maple plays beautifully with the tang of the vinegar and mustard.

  • 2 tbsp. red wine vinegar
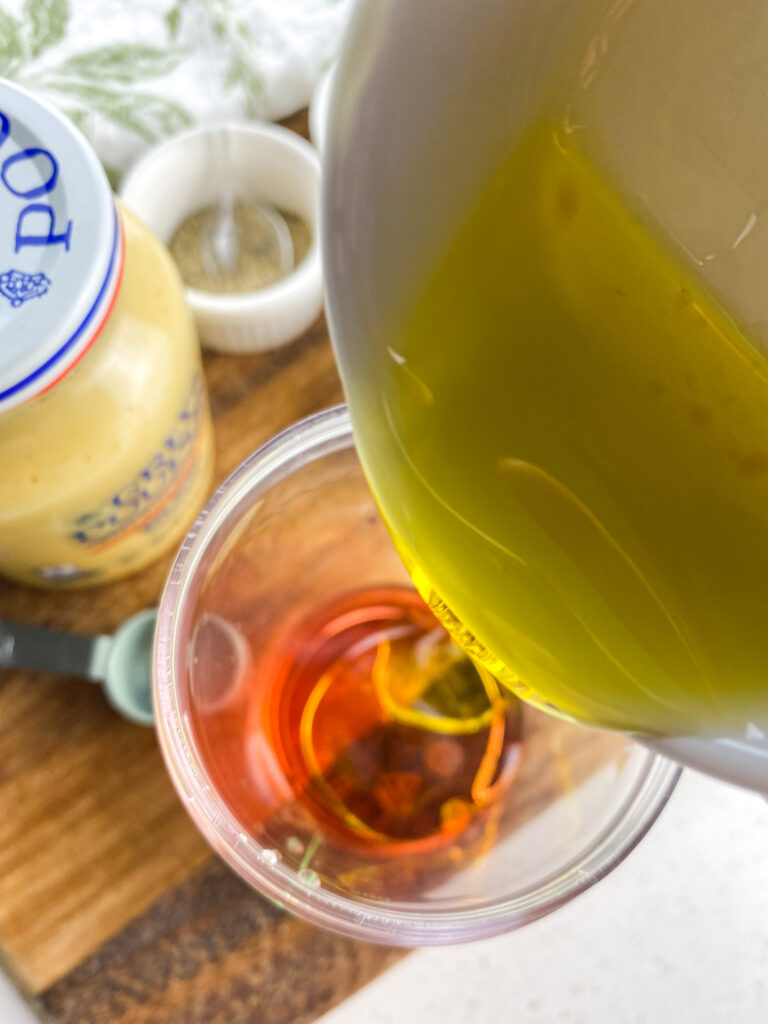
    This gives the vinaigrette its signature zing. If you’re out, you can sub with apple cider vinegar or white wine vinegar in a pinch.

  • 2 tbsp. extra virgin olive oil
    Adds smoothness and richness. A good-quality olive oil goes a long way here.

  • Sea salt and black pepper, to taste
    These bring out all the flavors in the dressing.

  • Salad Ingredients:
  • ¼ cup pecans, roughly chopped, divided
    These get toasted for extra crunch and depth of flavor. You’ll use some in the salad and save a few for topping.

  • 6 large celery stalks, sliced
    Look for fresh, firm stalks. Organic is best if you can swing it!

  • Celery leaves (from stalks), roughly chopped
    Don’t toss these! They’re slightly bitter and add a herby bite that balances the sweetness in the salad.

  • 1 large red apple, chopped
    A crisp, sweet variety like Fuji or Honeycrisp works perfectly here. Leave the skin on for color and texture.

  • ¼ cup dried cranberries
    Adds a chewy sweetness that really pops.

  • Sea salt and black pepper, to taste
    Just a pinch is all you need to enhance the overall flavor.

  • 3 tbsp. Parmesan cheese, shaved
    Adds a salty-savory finish that elevates the whole salad.

Step-By-Step Guide For Apple Celery Salad

Step 1: Make the Maple-Dijon Vinaigrette

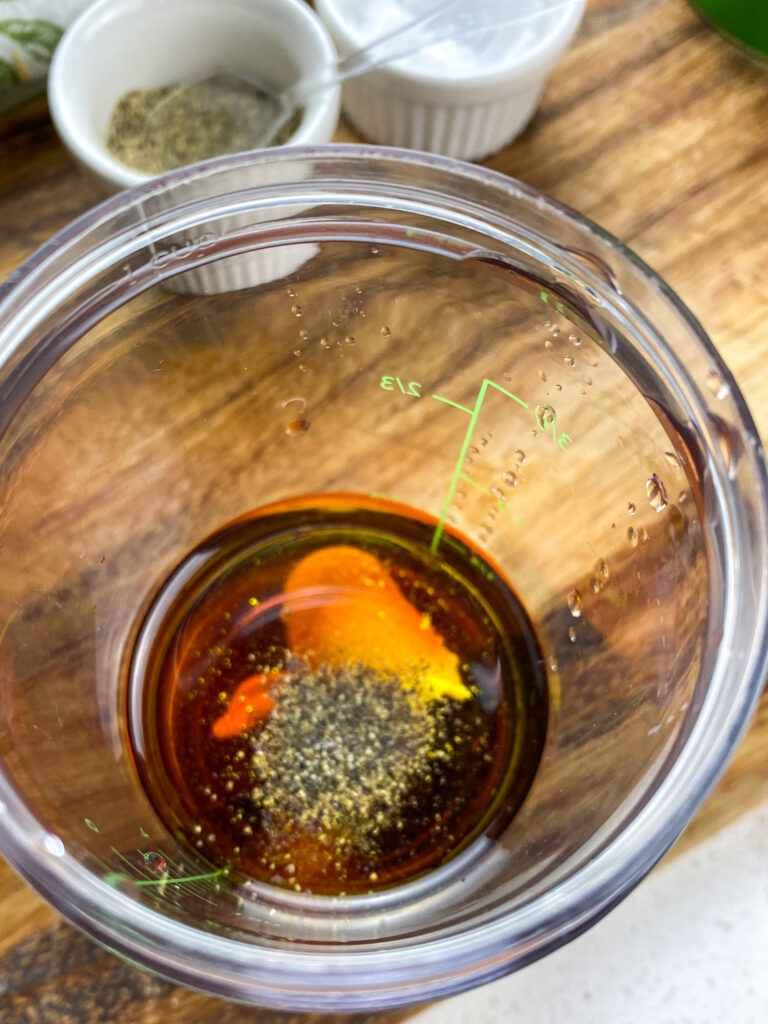
In a salad shaker or a jar with a tight-fitting lid, combine:

  • 1 tsp Dijon mustard
  • 2 tbsp maple syrup
  • 2 tbsp red wine vinegar
  • 2 tbsp olive oil
  • A pinch of salt and pepper

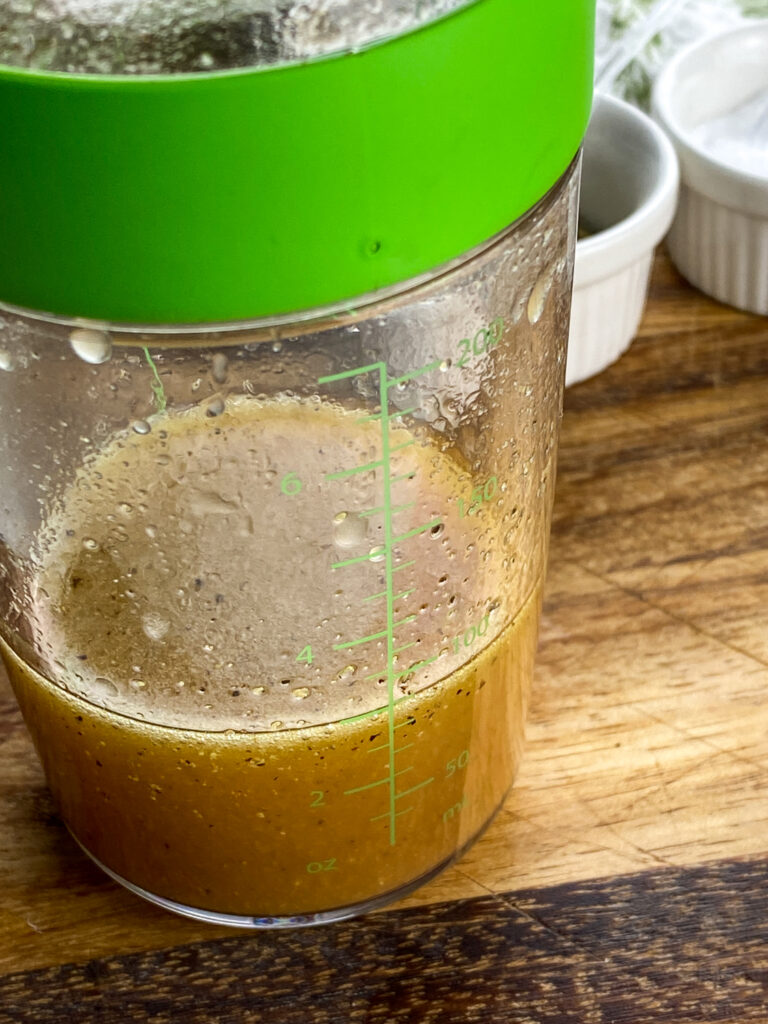
Seal the lid and shake it like you mean it until everything is well combined and the vinaigrette looks smooth and slightly thickened. Set it aside while you prep the salad.

Pro Tip: Make a double batch and keep it in the fridge. This vinaigrette is also amazing on spinach salads, roasted veggies, or even grilled chicken.

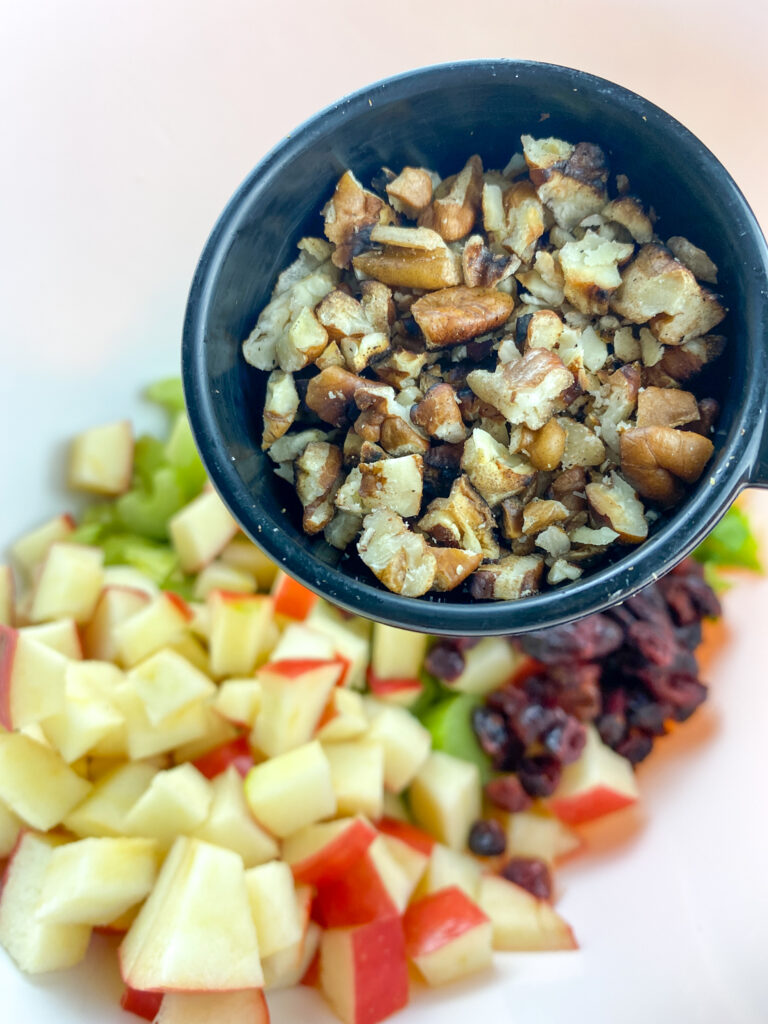
Step 2: Toast the Pecans

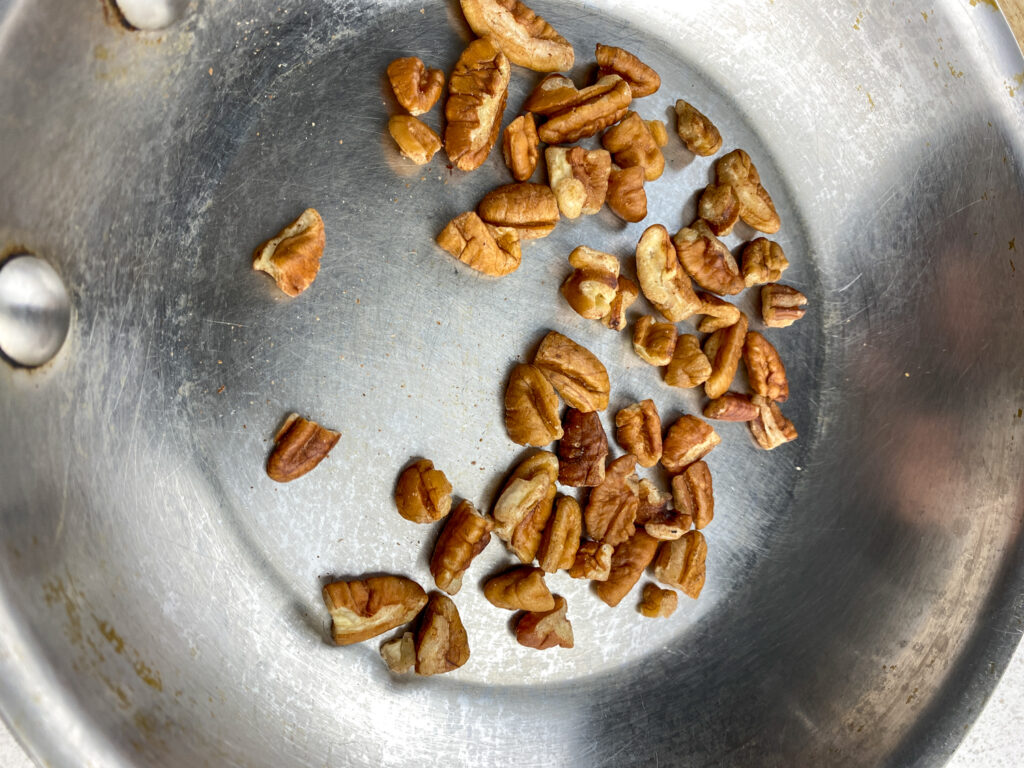
Add the chopped pecans to a dry skillet over medium heat. Stir occasionally and keep an eye on them—you’ll know they’re ready when they smell fragrant and nutty (about 3–4 minutes). Pull them off the heat and let them cool while you assemble the rest of the salad.

Step 3: Build the Salad

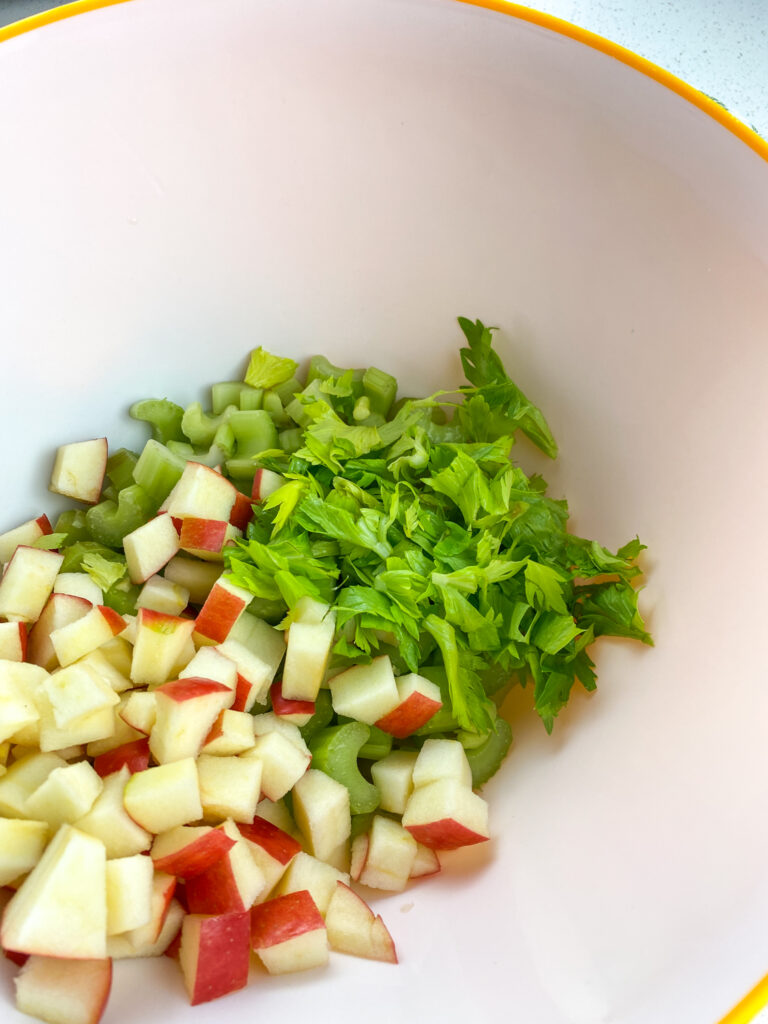
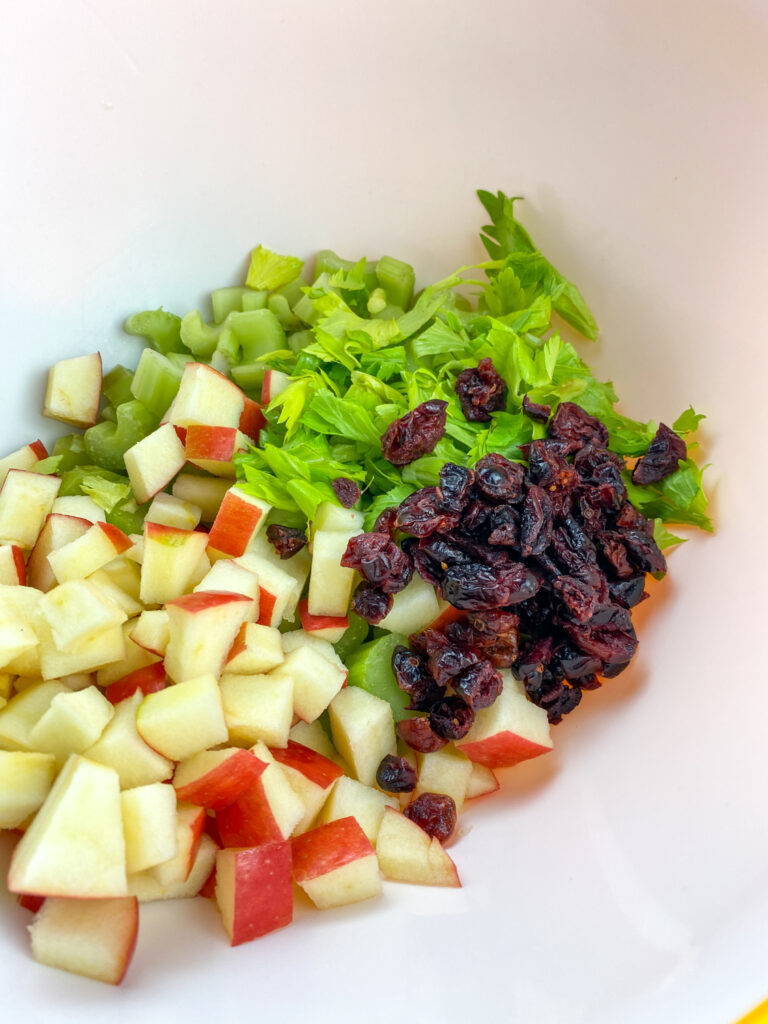
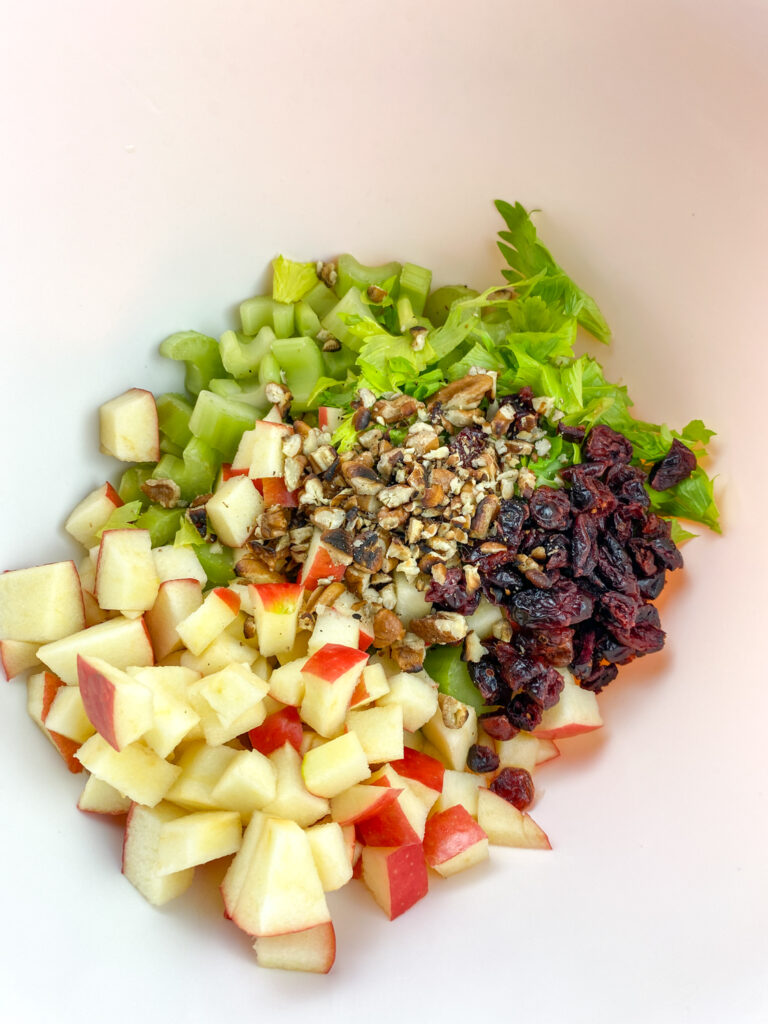
In a large salad bowl, add:

  • Sliced celery
  • Chopped apple
  • Chopped celery leaves
  • Dried cranberries
  • 3 tbsp toasted pecans

Step 4: Dress The Salad

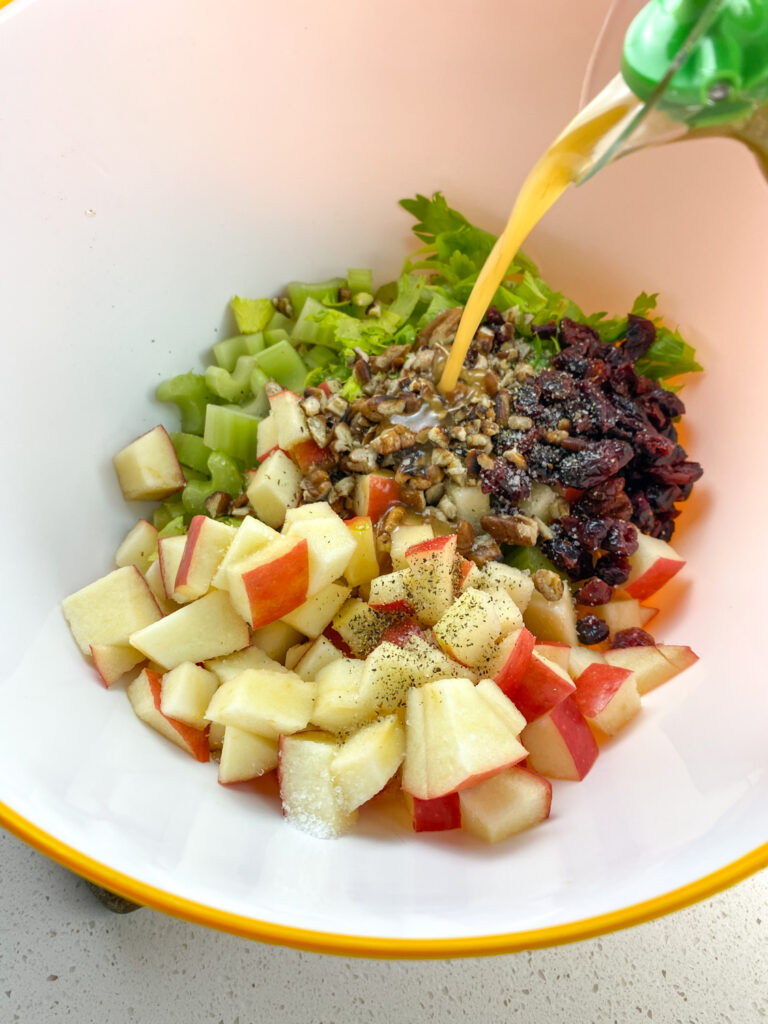
Sprinkle a little salt and pepper over everything, then drizzle the vinaigrette over the top. Toss everything together until it’s all evenly coated.

Step 4: Serve It Up

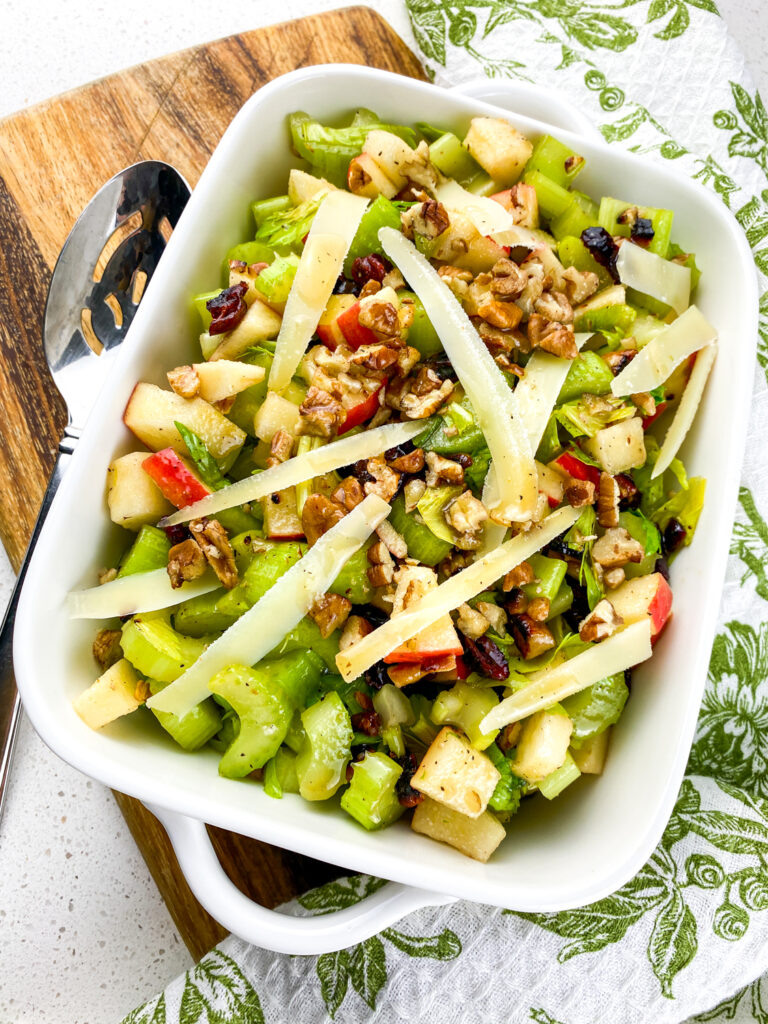
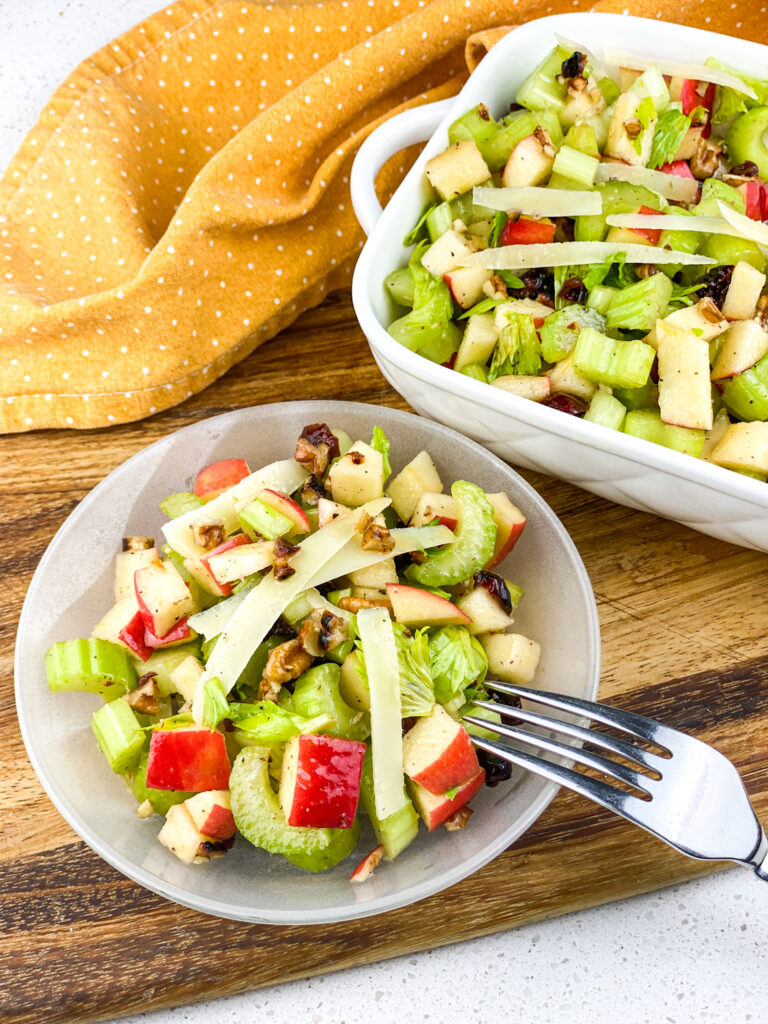
Plate the salad onto chilled salad plates (this makes it feel extra fancy), and top each serving with the remaining toasted pecans and shaved Parmesan cheese.

Tips & Tricks for the Best Salad

  • Gluten-Free? This salad is naturally gluten-free as is!
  • Make Ahead? Yes, the flavors in this recipe will intensify with time, so you may want to prepare a double (or triple) batch. Store any leftovers in an airtight container in the refrigerator for several days. However, be sure to toss the chopped apple with some fresh lemon juice before adding it to the salad to minimize browning.
  • Want More Protein? Add grilled chicken, leftover turkey, or a handful of chickpeas to make it more of a main course.
  • No Pecans? Walnuts, almonds, or even sunflower seeds work great too.
  • Dairy-Free? Just skip the Parmesan or use a dairy-free alternative.

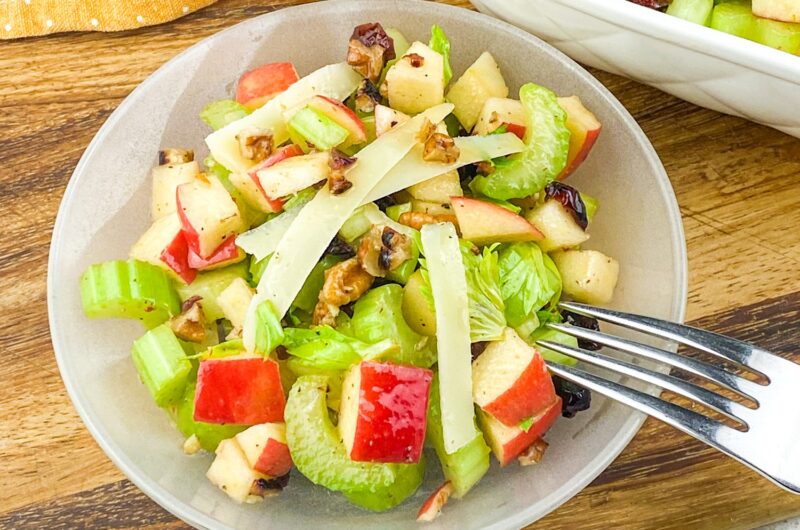
This Crunchy Apple-Celery Salad with Maple-Dijon Vinaigrette is proof that salads don’t have to be boring. It’s vibrant, full of contrast, and just bursting with flavor—from the crunch of the celery and pecans, to the sweet bite of apples and cranberries, to that rich, tangy vinaigrette that ties it all together.

It’s the kind of salad people remember—and request. So go ahead and bookmark this one. You’ll be making it again and again. Now go grab a crisp apple, a handful of celery, and get your salad bowl ready. You’re about to upgrade your side dish game in the most delicious way.

Apple-Celery Salad with Maple-Dijon Vinaigrette
Print

Apple-Celery Salad with Maple-Dijon Vinaigrette

Recipe by AdviceFromNobodyCourse: SaladsCuisine: AmericanDifficulty: Easy
Servings

4-6

servings
Prep time

15

minutes
Cooking time

3

minutes

This Crunchy Apple-Celery Salad with Maple-Dijon Vinaigrette is here to change everything. It’s crisp, it’s tangy, it’s sweet, and it packs a serious crunch in every bite. Even better? It’s super simple to make and feels a little bit fancy without any fuss.

Ingredients

  • Maple-Dijon Salad Vinaigrette:
  • 2 Tbs. real maple syrup

  • 2 Tbs. red wine vinegar

  • 2 Tbs. extra virgin olive oil

  • Sea salt and black pepper, to taste

  • 1 tsp. Dijon Mustard**

    **For less sweet results, add 1-2 additional teaspoons of Dijon mustard

  • Salad Ingredients:
  • ¼ c. pecans, roughly chopped, divided

  • 1 large red apple, chopped

  • ¼ cup dried cranberries

  • Sea salt and black pepper, to taste

  • 3 Tbs. Parmesan cheese, shaved

  • 6 large celery stalks (preferably organic), sliced

  • Celery leaves (from stalks), roughly chopped

Directions

  • Prepare the vinaigrette by adding all ingredients to a salad shaker or jar with a tight-fitting lid. Cover and shake vigorously to combine. Set aside.
  • Add chopped pecans to a small dry skillet set over medium heat. Heat for several minutes, stirring occasionally, until toasted. Remove from heat and set aside.
  • Add celery, apples, celery leaves, cranberries, and three tablespoons toasted pecans to a large salad bowl. Season with salt and black pepper, to taste. Drizzle the vinaigrette on top and toss to combine.
  • To serve, divide the salad onto chilled salad plates and top with remaining toasted pecans and shaved Parmesan cheese. Enjoy!
[jetpack-related-posts]

13 Irresistible Antipasto Salad Recipes That’ll Steal the Show at Any Meal

Filed Under: Food & Drink // 06/17/2025

If you’ve ever been to an Italian dinner party (or just dreamed of hosting one), then you know the antipasto platter is where the magic starts. But what if you could take all those delicious bites—like olives, cured meats, cheese, and veggies—and toss them into one epic, flavor-packed salad? That’s exactly what antipasto salad recipes are all about.

These salads are basically the no-rules, totally customizable, and ridiculously satisfying MVPs of the salad world. Whether you’re looking for something quick for a weeknight dinner, a crowd-pleaser for a potluck, or a hearty lunch idea that doesn’t disappoint, there’s an antipasto salad recipe for it.

Also Read: Super Refreshing Mango Coconut Daiquiri

Antipasto Salad Recipe Ideas

In this post, I’ve rounded up 13 of the absolute best ones that are as easy to make as they are impressive to serve. Get your fork ready—this is not your average salad situation.

Spiral Antipasto Salad

spiral antipasto pasta salad

If there’s one dish that always shows up and shows out at a summer get-together, it’s this spiral antipasto pasta salad. But not just any pasta salad—I’m talking about one that checks all the boxes: hearty, fresh, tangy, salty, crunchy, and just plain satisfying. Colorful antipasto salad is refreshing and flavorful, and almost too pretty to eat.

Tortellini Antipasto Salad

tortellini antipasto salad

This salad is like the cool cousin of pasta salad and antipasto platter—wrapped up into one irresistible bowl. Creamy cheese tortellini? Yes. Spicy pepperoni? Double yes.

Sharp cheeses, briny olives, juicy tomatoes, peppery arugula, and a homemade balsamic vinaigrette that’s equal parts tangy and sweet? You’re about to be the MVP of any gathering when you bring this tortellini antipasto salad.

Italian Chopped Salad

Italian Chopped Salad is an easy salad recipe that has a large variety of zesty flavors and colors. Not only does this salad have all your favorite things you find in antipasto Italian salad, it features a delicious extra-virgin olive oil based italian dressing. This Italian Chopped Salad recipe is perfect for meal prep or to go along with an italian dinner.

Artichoke Antipasto Salad

This Italian antipasto salad combines antipasto with salad greens in one bowl! Creamy mozzarella balls, zesty pepperoni, and salami with tangy olives and artichokes tossed with your favorite dressing.

Mini Antipasto Skewers

One of the easiest appetizers ever, these antipasto skewers are made by threading meat, marinated veggies, fresh herbs, and soft cheese on a mini skewer. Packed with Italian flavor, they are crowd-pleasing and can be put together ahead of time.

Antipasto Salad With Cherry Peppers

This delectable Antipasto Salad contains crisp romaine, sweet tomatoes, marinated artichokes, soft mozzarella pearls, Kalamata olives, cherry peppers, pepperoncini, and salami. Then, it is drizzled with a tasty oil and vinegar Italian dressing.

Antipasto Salad With Banana Peppers

Say goodbye to plain, boring salads! Instead, make this tangy and rejuvenating Antipasto Salad. It’s a low-carb option that will keep you satisfied but boasts tons of flavor to keep your taste buds happy too. Every fork full is filled with salami, pepperoni, artichoke hearts, juicy tomatoes, lettuce, cheese, banana peppers, and tangy olives. It’s all drizzled in a homemade balsamic vinegar and mustard dressing.

Caprese Salad

Caprese salad is a simple and classic Italian salad made with juicy ripe tomatoes, fresh mozzarella cheese, fresh basil leaves, drizzled with olive oil, and seasoned with salt and pepper. 

It’s an easy throw-together salad that makes a wonderful appetizer any time of the year. The colors of the ingredients represent the Italian flag, and it’s usually served as an antipasto (appetizer) rather than a side dish.

Antipasti Salad with Prosciutto-Wrapped Breadsticks

This isn’t your average salad.  This show-stopping Antipasti Salad has it all:  vibrant veggies, delicious salami, briny olives, creamy bocconcini cheese, and the best part, crisp and salty prosciutto wrapped breadsticks!  Piled onto a bed of romaine lettuce and topped with sundried tomato vinaigrette, this colourful salad is ready to impress!

Pesto Tortellini Antipasto

Tortellini Pasta Salad is a tasty light dinner or a crowd-pleasing pasta salad for a cookout or spring or summer party. 

Packed with lots of Italian flavors from colorful grilled vegetables, salami, and provolone cheese, and seasoned with a simple pesto dressing, this easy and delicious tortellini salad will be one of your go-to recipes all year long.

Antipasto Salad with Lupini Beans

This Italian antipasto salad recipe with lupini beans is packed with protein and bursting with Mediterranean flavors enveloped in a sweet and zesty balsamic & olive oil dressing!

You can make this show-stopping antipasto salad with minimal effort! Serve it paired with Italian focaccia bread and a glass of red wine for a delicious Mediterranean-style meal!

Antipasto Salad With Pepperoni

What I love most is how every bite is a little different, as this antipasto salad is loaded with salami, pepperoni, plump mozzarella balls, olives, artichokes, sweet cherry tomatoes and many more great antipasto favorites.

Antipasto Salad With Olives

Now I want to tell you about the star of my potluck spread! My Antipasto Pasta Salad is so good and so satisfying that the guests may forego the main dish for a second helping.

Who says salads have to be boring? With antipasto salad recipes, you get bold flavor, rich textures, and endless room for creativity—all in one bowl. Whether you’re keeping it classic with salami and mozzarella or switching things up with marinated artichokes and roasted red peppers, these recipes are your ticket to turning any meal into an Italian-inspired feast.

So the next time you’re craving something fresh but filling, skip the usual and dive into one of these antipasto salad creations. Your taste buds (and your dinner guests) will thank you.

[jetpack-related-posts]

Tortellini Antipasto Salad, The Crowd-Pleasing Pasta Salad

Filed Under: Food & Drink // 06/16/2025

Tortellini Antipasto Salad is bold, hearty, and full of flavor, with just enough pizzazz to make people think you tried way harder than you did (don’t worry, your secret’s safe with me).

This salad is like the cool cousin of pasta salad and antipasto platter—wrapped up into one irresistible bowl. Creamy cheese tortellini? Yes. Spicy pepperoni? Double yes. Sharp cheeses, briny olives, juicy tomatoes, peppery arugula, and a homemade balsamic vinaigrette that’s equal parts tangy and sweet? You’re about to be the MVP of any gathering.

Let’s break it all down—from the vinaigrette (yes, you can totally use the store-bought stuff, but if you make it yourself, I promise it’s worth it) to the final Parmesan-showered serving moment.

Also Read: Antipasto Pasta Salad You’ll Make All Summer Long

Why You’ll Love This Tortellini Antipasto Salad

Before we dive into the nitty-gritty, let me tell you why this dish is about to be your new summer staple:

  • It’s filling – The tortellini gives it some real staying power. No one’s leaving your party hungry.
  • It’s balanced – You’ve got protein, carbs, veggies, and healthy fats in one pretty bowl.
  • It travels well – Picnics, potlucks, BBQs—it doesn’t get soggy and tastes just as great at room temp.
  • It’s a total flavor bomb – You’ve got creamy cheese, spicy meat, tangy dressing, salty olives, and fresh herbs. What more could you want?

Let’s get into the good stuff.

How To Make Tortellini Antipasto Salad

PrintPrint

Ingredients For Tortellini Antipasto Salad

  • Balsamic Vinaigrette (Makes about ¾ cup):
  • ½ cup extra virgin olive oil

  • ¼ cup balsamic vinegar

  • 2 teaspoons maple syrup (trust me—it balances the tang beautifully)

  • 1 teaspoon Dijon mustard

  • 2 teaspoons shallot, finely minced

  • Salt and black pepper, to taste

  • Salad Ingredients:
  • 20 oz. refrigerated tortellini (cheese-stuffed is best, but go wild)

  • 2 tablespoons extra virgin olive oil (added to the cooking water)

  • 2 cups fresh arugula

  • 2 tablespoons fresh basil, sliced into ribbons (aka chiffonade if you wanna sound fancy)

  • 4 oz. Pepper Jack cheese or another white cheese, cubed

  • 4 oz. pepperoni, chopped into bite-sized pieces

  • 1 cup black olives, halved

  • 1 cup cherry or grape tomatoes, halved

  • Sea salt and black pepper, to taste

  • ⅓ cup balsamic vinaigrette, divided

  • 3 tablespoons shaved Parmesan cheese, for garnish

Step-By-Step Guide For Antipasto Tortellini Salad

1. Make That Vinaigrette

If you’re making the vinaigrette from scratch (highly recommend), do this first. Just toss everything in a shaker or jar, seal it, and shake until emulsified. Set it aside to let those shallots infuse the dressing while you prep the rest.

2. Cook Your Tortellini

Boil your tortellini according to the package directions—but here’s the trick: add 2 tablespoons of olive oil to the boiling water. It helps keep the pasta from sticking and gives it a subtle richness.

Once the tortellini is cooked to perfection (soft, but still with a little bite), drain it and rinse it under cold water to cool it down. Then transfer it to a big ol’ mixing bowl.

3. Toss in the Good Stuff

Now’s the fun part—building layers of flavor. Add the arugula, fresh basil, cubed Pepper Jack cheese, chopped pepperoni, olives, and tomatoes to the tortellini. Season with sea salt and black pepper to taste.

4. Dress The Salad

Then take about half of your vinaigrette and drizzle it over the salad. Gently fold everything together—don’t stir too aggressively or your tortellini might fall apart. You want everything to be coated but not soggy.

5. Serve It Up

Transfer the salad to your favorite serving bowl (bonus points if it’s something rustic and Instagram-worthy), and top with shaved Parmesan and a light drizzle of the remaining vinaigrette.

And that’s it! You’re ready to wow.

Tips and Variations

Want to make it your own? Here are a few ways to switch things up based on your vibe, your fridge, or your mood.

1. Switch Up the Cheese

  • Pepper Jack adds a little heat, but mozzarella pearls or cubes of provolone would also be delish.
  • Want to make it vegetarian? Skip the pepperoni and add marinated artichokes or roasted red peppers instead.

Note: The Pepper Jack cheese featured in this recipe is a spicy derivative of Monterey Jack cheese which originated in Monterey, California. If it is not available in your area, Provolone or another semi-soft white cheese can be used instead

2. Don’t Skip the Arugula

It might seem like a weird addition, but that peppery bite cuts through the richness of the cheese and dressing in the best way. Spinach or baby kale will work if arugula’s not your thing.

3. Go Bold with Add-Ins

Capers, banana peppers, or sun-dried tomatoes can add a nice punch. You can even toss in some grilled chicken if you’re looking to make it a full meal.

4. Make It Ahead

This salad actually gets better as it sits for a little bit. Make it a few hours before serving, keep it in the fridge, and just give it a toss before plating.

If you’re tired of limp lettuce salads and pasta salads that taste like straight-up mayo, this Tortellini Antipasto Salad is the glow-up your side dish game needs. It’s rich but refreshing, easy to throw together, and totally customizable based on what’s in your fridge.

So the next time you’re staring into your pantry wondering what to make that’s easy and impressive, remember this recipe. Keep a pack of tortellini in your fridge and a jar of olives in your pantry, and you’re already halfway there.

Tortellini Antipasto Salad
Print

Tortellini Antipasto Salad

Recipe by AdviceFromNobodyCourse: SaladsCuisine: ItalianDifficulty: Easy
Servings

4-6

servings
Prep time

15

minutes
Cooking time

15

minutes

Tortellini Antipasto Salad is bold, hearty, and full of flavor, with just enough pizzazz to make people think you tried way harder than you did (don’t worry, your secret’s safe with me).

Ingredients

  • Balsamic Vinaigrette Ingredients: (Can use bottled dressing instead)
  • ½ cup extra virgin olive oil

  • ¼ cup balsamic vinegar

  • 2 tsp. maple syrup

  • 1 tsp. Dijon mustard

  • 2 tsp. shallot, finely minced

  • Salt and black pepper, to taste

  • Salad Ingredients:
  • 20 oz. refrigerated tortellini

  • 2 Tbs. extra virgin olive oil

  • 2 cups fresh arugula

  • 2 Tbs. fresh basil, sliced

  • 4 oz. Pepper Jack or other white cheese, cut into chunks

  • 4 oz. pepperoni, cut into small chunks

  • 1 cup black olives, cut in half

  • 1 cup cherry or grape tomatoes, cut in half

  • Sea salt and black pepper, to taste

  • 1/3 cup balsamic vinaigrette, divided

  • 3 Tbs. Parmesan cheese, shaved

Directions

  • Prepare the balsamic vinaigrette by combining all ingredients in a salad shaker or glass jar with a tight-fitting lid. Cover and shake vigorously until thoroughly combined. Set aside.
  • Prepare pasta according to package directions. (Add olive oil to the cooking water as instructed to prevent sticking). Rinse and drain well, and place in a large mixing bowl.
  • Add the fresh arugula, basil, Pepper Jack cheese, pepperoni, olives, and tomatoes. Season with salt and black pepper, to taste, and drizzle half the balsamic vinaigrette dressing on top. Gently fold the ingredients together with a spoon until thoroughly combined. 
  • To serve, transfer the salad to a large serving bowl and top with shaved Parmesan cheese and a light drizzle of the remaining balsamic vinaigrette. Enjoy
[jetpack-related-posts]

Antipasto Pasta Salad: The Fresh, Flavor-Packed Dish You’ll Make All Summer Long

Filed Under: Food & Drink // 06/16/2025

If there’s one dish that always shows up and shows out at a summer get-together, it’s pasta salad. But not just any pasta salad—I’m talking about one that checks all the boxes: hearty, fresh, tangy, salty, crunchy, and just plain satisfying. Colorful antipasto salad is refreshing and flavorful, and almost too pretty to eat.

Whether you serve this as a first course, a luncheon entrée, or as a light dinner, it will be just perfect. The homemade Italian vinaigrette is extremely easy to make and whips up in minutes. With a gorgeous medley of veggies, cheese, olives, and a bold red wine vinaigrette that will have everyone going back for seconds (and thirds—no judgment here).

Whether you’re hosting a backyard BBQ, packing a picnic, or meal-prepping for the week ahead, this recipe has your name written all over it. So grab a big bowl and let’s get into it!

Also Read: Tortellini Antipasto Salad, The Crowd-Pleasing Pasta Salad

Why You’ll Love This Antipasto Pasta Salad

Let’s start with the obvious: it’s absolutely delicious. This salad brings together the classic flavors of an antipasto platter (hello, olives, cheese, and veggies!) with the comfort of perfectly cooked pasta. It’s tangy and savory with just the right hint of sweetness from the corn and red wine vinegar dressing.

Plus, it’s:

  • Easy to make – Boil pasta, chop some stuff, mix and shake. That’s it.
  • Great for a crowd – Makes a huge batch, perfect for potlucks or family dinners.
  • Make-ahead friendly – The flavors get even better the longer they sit.
  • Customizable – You can totally play around with ingredients based on what you have.

Now let’s break down exactly what goes into this dreamy dish.

How To Make Antipasto Pasta Salad

PrintPrint

Ingredients For Antipasto Pasta Salad

  • For The Salad:
  • 16 oz. spiral pasta – Think rotini, fusilli, or any pasta that holds dressing well. You want all those little grooves to soak up the goodness.

  • 1 pint cherry tomatoes, quartered – Juicy and fresh. They add a sweet-tart burst to every bite.

  • 1 large red onion, chopped – Adds sharpness and crunch. If raw onion is too much for you, you can soak them in cold water first to mellow them out.

  • 1 can (12-15 oz.) sweet corn, rinsed and drained – That little pop of sweetness balances the saltiness of the olives and feta.

  • 1/2 pound feta cheese, crumbled – Creamy, salty, tangy—aka the holy grail of pasta salad cheese.

  • 1 jar (6 oz.) pitted green olives, halved – Briny and bold, these give major antipasto vibes.

  • 1/4 to 1/2 cup arugula (optional) – A peppery bite that adds color and freshness. Totally up to you.

  • 1/4 cup pistachios (optional) – For crunch and a slightly sweet nuttiness that elevates the whole salad.

  • For The Dressing:
  • 1/2 cup red wine vinegar – The base of our zippy vinaigrette.

  • 1 tablespoon sugar – Just enough to cut through the acidity.

  • 1 tablespoon dried oregano – Classic Italian flavor that ties everything together.

  • 2 teaspoons sea salt – Seasoning is key!

  • 1 teaspoon black pepper – A little kick.

  • 1 cup extra virgin olive oil – Rich, smooth, and the perfect carrier for all those seasonings.

Step-By-Step Guide For Making Antipasto Pasta Salad

Step 1: Cook the Pasta

Bring a large pot of salted water to a boil. Once it’s bubbling, toss in your spiral pasta and cook until al dente. You want the noodles to still have a little bite—they’ll soften a bit more once they soak up that dressing.

Drain the pasta and rinse it under cold water to stop the cooking process and cool it down. Nobody wants warm pasta salad. Set it aside.

Step 2: Chop and Toss

Grab your biggest mixing bowl (trust me—you’re gonna need it). Toss in your quartered cherry tomatoes, chopped red onion, sweet corn, olives, and crumbled feta. Add your cooled pasta and gently stir everything together until well combined.

If you’re going with the arugula and pistachios, you can stir them in now or save them as a garnish later for extra texture and flair.

Step 3: Make the Dressing

This part is so easy. In a small bowl, mason jar, or salad cruet, combine the red wine vinegar, sugar, oregano, sea salt, pepper, and olive oil. Shake it up or whisk it until everything is fully emulsified.

It’ll smell amazing—tangy, herby, and just the right amount of sweet.

Tip:  Extra dressing will keep for 1-2 weeks in your refrigerator. The salad once tossed, can be stored in the refrigerator for 3-4 days without losing freshness. Use whatever spiral pasta you have on hand (rotini, fusilli, cavatappi, etc.) I used tri-color in this recipe. This spirals capture the dressing beautifully.

Step 4: Dress It Up

Pour the dressing over your salad and give it a good toss to coat every last noodle and veggie in that delicious vinaigrette.

You can serve it right away, but if you have the time, let it chill in the fridge for an hour or so. That gives all the flavors time to mingle and soak into the pasta. Right before serving, sprinkle in your arugula and pistachios (if you haven’t already) and maybe even a pinch more feta on top because… why not?

Tips and Tricks:

  • Make it a meal: Add grilled chicken, salami, or even chickpeas if you want to bulk it up with some protein.
  • Switch it up: Don’t have green olives? Use kalamata. Not a fan of feta? Try mozzarella pearls or shaved parmesan.
  • Pasta shape matters: Go for something that has grooves or twists so the dressing clings to it—this is not the time for spaghetti.
  • Let it marinate: Like most pasta salads, this one tastes even better after sitting for a bit. It’s a great make-ahead option.
  • Meal prep win: Store leftovers in an airtight container in the fridge. It’ll last about 3-4 days, and the flavors just keep getting better.

This Antipasto Pasta Salad isn’t just a side dish—it’s the dish that brings people together. It’s colorful, packed with flavor, and so easy to throw together that you’ll wonder why you ever bought the store-bought stuff.

Next time you’re craving something fresh but hearty, give this recipe a try. You’ll have a new go-to for all your summer potlucks, lazy lunches, and sunny weekend dinners. Now excuse me while I go sneak another forkful from the fridge.

Antipasto Pasta Salad
Print

Antipasto Pasta Salad

Recipe by AdviceFromNobodyCourse: SaladsCuisine: ItalianDifficulty: Easy
Servings

4-6

servings
Prep time

15

minutes
Cooking time

15

minutes
Calories (For 6 Servings)

830

kcal

This Antipasto Pasta Salad isn’t just a side dish—it’s the dish that brings people together. It’s colorful, packed with flavor, and so easy to throw together that you’ll wonder why you ever bought the store-bought stuff.

Ingredients

  • Salad Ingredients
  • 16 oz. spiral pasta of choice

  • 1 pint cherry tomatoes, quartered

  • 1 large red onion, chopped

  • 1 12-15 oz. can sweet corn, rinsed and drained (varies by brand)

  • 1/2 pound feta cheese, crumbled

  • 1 6 oz. jar pitted green olives, halved

  • 1/4 – 1/2 cup arugula, to taste (optional)

  • 1/4 cup pistachios (optional)

  • Dressing Ingredients:
  • 1/2 c. red wine vinegar

  • 1 Tbs. sugar

  • 1 Tbs. dried oregano

  • 2 tsp. sea salt

  • 1 tsp. black pepper

  • 1 Cup extra virgin olive oil

Directions

  • Heat a large pot of generously salted water to a boil. Prepare pasta al dente according to package directions.
  • Drain the pasta and rinse with cold water.
  • Add pasta to a large mixing bowl. Add cherry tomatoes, onion, corn, olives, and feta cheese.
  • Gently stir to distribute ingredients.
  • To make dressing, add all ingredients to a medium bowl, mason jar, or salad cruet. Whisk or shake until thoroughly combined.
  • Pour dressing over salad and enjoy! If desired, garnish with a handful of arugula and sunflower seeds.
[jetpack-related-posts]

Mango Coconut Daiquiri: A Tropical Vacation in a Glass

Filed Under: Food & Drink // 06/15/2025

If your ideal afternoon involves sunshine, a hammock, and a fruity drink in hand, then say hello to your new favorite cocktail, the Mango Coconut Daiquiri. This tropical treat is everything you want in a summer drink—cool, creamy, fruity, and just boozy enough to put you in a good mood.

Whether you’re poolside with your besties, lounging on your patio pretending you’re in the Bahamas, or just need a mini mental escape after a long week, this daiquiri delivers. It’s got fresh mango (because nothing beats that sweet, juicy goodness), coconut rum, and a splash of white rum for that classic daiquiri kick.

Blend it all up with lime, coconut cream, and ice, and you’ve got yourself a drink that tastes like a beach day in a glass. Let’s dive into the recipe and why this combo works so well, plus some fun variations and tips to make your Mango Coconut Daiquiri the star of your next summer hangout.

Why You’ll Love This Mango Coconut Daiquiri

First things first, this daiquiri is ridiculously delicious. But beyond the taste, here’s why it deserves a permanent spot in your cocktail rotation:

  • Super Refreshing: Blended with ice and full of juicy fruit, it’s basically a grown-up slushie. Who doesn’t want that?
  • Easy to Make: Just toss everything into a blender and hit go. No shaking, muddling, or cocktail bar tricks needed.
  • Tropical Flavor Bomb: Mango + coconut is a match made in island heaven. Add a splash of lime and rum and it’s pure magic.
  • Visually Stunning: The golden-orange hue and garnishes make this drink totally Insta-worthy. It looks like you paid $18 for it at a fancy resort bar—but you made it at home in like five minutes.

How To Make Mango Coconut Daiquiri

PrintPrint

Ingredients For Mango Coconut Daiquiri

  • 1 mango, peeled and roughly chopped (save a couple of thin slices for garnish)

  • 2 oz. white rum (for that classic daiquiri backbone)

  • 2 oz. coconut rum (Malibu is perfect for that sweet coconut kick)

  • 1 lime, juiced (plus a little zest or peel for garnish)

  • 1 tsp. coconut cream (makes it luxuriously creamy—don’t skip this!)

  • 1 tbsp. simple syrup (adjust to taste depending on your mango’s sweetness)

  • 2 cups ice (crucial for that frosty texture)

Garnish Ideas:

  • Thin mango slices
  • A twist of lime peel
  • Bonus: add a tiny umbrella or a sprinkle of toasted coconut for the full island effect

Step-By-Step Guide For Mango Coconut Daiquiri

You won’t believe how simple it is. Here’s how to do it step by step:

Step 1: Blend It All Together: Add the chopped mango, white rum, coconut rum, lime juice, coconut cream, simple syrup, and ice to a blender.

Step 2: Blend Until Smooth: Let it run until the mixture is silky smooth and creamy. It should have that thick, icy, slushy texture we all love.

Step 3: Pour Into Chilled Glasses: Grab two large glasses—preferably chilled—and pour in your mango-coconut magic.

Step 4: Garnish Like a Pro: Top with fresh mango slices and a little lime zest or a thin lime twist. It adds color, aroma, and a touch of flair.

Sip & Enjoy: Pop in a straw, take a sip, and cue the mental beach vacation. You’re welcome.

Tips to Make It Even Better

  • Use a super ripe mango. The riper, the sweeter, and more flavorful your daiquiri will be. If fresh mango isn’t available, frozen mango chunks are a solid backup.
  • Adjust the sweetness to taste. Some mangoes are super sweet on their own. Taste your daiquiri before serving—if it needs a little more punch, just add another splash of simple syrup.
  • Crush the ice slightly before blending. Especially if your blender isn’t high-powered, this helps everything blend smoother and faster.
  • Double or triple the recipe. Planning a party or girls’ night in? This recipe scales easily, so blend up a big batch and keep the tropical vibes flowing.
  • Go full frozen. Want it even thicker? Use frozen mango chunks and skip some of the ice.

Fun Variations to Try

Once you’ve mastered the classic Mango Coconut Daiquiri, play around with these fun twists:

1. Spicy Mango Daiquiri

Add a tiny pinch of chili powder or blend in a slice of jalapeño. The heat balances the sweetness and gives it a spicy tropical twist.

2. Pineapple-Mango Fusion

Add ½ cup of chopped fresh or frozen pineapple for an extra fruity, tangy boost.

3. Mango Mojito Daiquiri

Throw in a few fresh mint leaves before blending and add a mint sprig on top—mint + mango = major summer vibes.

4. Creamy Coconut Upgrade

Up the coconut cream to 1 tablespoon for a richer, creamier sip that feels almost dessert-like.

5. Mocktail Version

Skip the rums and double the coconut cream and lime juice. Add a splash of coconut water or pineapple juice for flavor, and you’ve got a tropical mocktail everyone can enjoy.

The Mango Coconut Daiquiri is one of those recipes that just hits every time. It’s fruity, fresh, cool, and just boozy enough to help you unwind and feel like you’re on island time—no plane ticket required.

Even if you’re just making it to treat yourself on a quiet afternoon, this drink is pure joy in a glass. So stock up on mangoes, grab that bottle of coconut rum, and get ready to blend up some sunshine.

If you try it, let me know how it turns out! And if you discover a twist you love—like adding pineapple or a spicy kick—I want to hear about it. Until then, cheers to tropical sips and easy, breezy cocktail-making!

Mango Coconut Daiquiri
Print

Mango Coconut Daiquiri

Recipe by AdviceFromNobodyCourse: DrinksDifficulty: Easy
Servings

2

servings
Prep time

5

minutes
Calories

250

kcal

Ingredients

  • 1 mango, peeled and roughly chopped (Reserve a couple of thin slices for garnish)

  • 2 oz. white rum

  • 2 oz. coconut rum (like Malibu)

  • 1 lime, juiced (Reserve a few small lime zests or slices of peel for garnish)

  • 1 tsp. coconut cream

  • 1 Tbs. simple syrup

  • 2 cups ice

Directions

  • Add mango, white rum, coconut rum, lime juice, coconut cream, simple syrup, and ice to a blender.
  • Blend until mixture is smooth and creamy.
  • Pour into two large, chilled glasses.
  • Garnish with fresh mango slices and a little lime zest or peel.
  • Serve and enjoy!
[jetpack-related-posts]

Tasty Turkey and Sun-Dried Tomato Pinwheels

Filed Under: Food & Drink // 06/02/2025

Okay, let’s talk about one of my absolute favorite no-fuss, flavor-packed recipes: Turkey and Sun-Dried Tomato Pinwheels. These little rolled-up bites of deliciousness are everything you want in a snack—creamy, savory, a little tangy, and 100% crowd-pleasing. Whether you’re prepping for a picnic, throwing together a quick lunch, or just need something a little fancy-but-easy to serve at a get-together, these pinwheels totally deliver.

What I love most about them is how quickly they come together with ingredients you might already have in your fridge. And let’s be honest, anything wrapped in a tortilla and sliced into pinwheels just feels more fun to eat, right?

Also Read: 27+ Pinwheel Sandwich Recipes That Make Perfect Appetizers

How To Make These Turkey Pinwheels

PrintPrint

Ingredients For The Pinwheels

  • 6 oz. cream cheese, softened at room temperature

  • 1/4 cup sour cream

  • 1/2 cup sun-dried tomatoes, chopped (hello, flavor!)

  • 1 red bell pepper, seeded and finely diced

  • 2 scallions, finely diced

  • 1/4 cup fresh basil leaves, thinly sliced

  • 2 burrito-sized tortillas (the bigger the better!)

  • 8 turkey deli slices (I like to use oven-roasted, but go with your favorite)

  • Sea salt and black pepper, to taste

The combo of creamy cheese, zesty tomatoes, crunchy bell pepper, and fragrant basil is honestly what makes these so addicting.

Step-By-Step Guide

Step 1: Mix the magic

In a medium bowl, add the softened cream cheese, sour cream, chopped sun-dried tomatoes, red bell pepper, scallions, and that fresh basil. Give it a good stir until everything’s nicely combined. Season it with a little sea salt and cracked black pepper to taste. This mixture is chef’s kiss and honestly delicious enough to eat with a spoon (I won’t judge if you sneak a bite).

Step 2: Spread and layer

Divide the cream cheese mixture into two equal parts. Grab a tortilla and spread one half of the mixture evenly over it—an offset spatula works great here, but the back of a spoon will do the trick too. Then, layer on 4 slices of turkey, slightly overlapping to cover the whole thing.

Step 3: Roll it up!

Starting from the bottom edge, roll the tortilla up nice and tight, jelly roll style. Repeat the whole thing with the second tortilla.

Step 4: Chill

Now here’s the hard part—waiting. Wrap those rolled-up tortillas in parchment paper or plastic wrap and pop them in the fridge for at least 30 minutes. This step helps them firm up so they slice cleanly (and taste even better once everything melds together). You can also leave them overnight if you’re meal-prepping or hosting the next day. Just store them in the fridge until you’re ready.

Step 5: Slice and serve

When it’s go time, slice each roll into pinwheels—about 1-inch thick is perfect. Arrange them on a plate, or stack them neatly in a container if you’re heading out for a picnic or road trip.

Why You’ll Love These

  • They’re portable. Perfect for school lunches, meal prepping, or picnic baskets.
  • They’re make-ahead friendly. Mix, roll, chill, and you’re done.
  • They’re crowd-pleasers. Adults and kids alike can’t resist the combo of creamy, salty, crunchy, and fresh.
  • Totally customizable. Swap turkey for ham, try spinach instead of basil, or add a sprinkle of shredded cheese—these are super easy to make your own.

A Few Extra Tips:

  • Make sure your cream cheese is really soft before mixing. Cold cream cheese makes it harder to combine smoothly.
  • Want a spicy kick? Add a pinch of red pepper flakes or a few dashes of hot sauce to the cream cheese mixture.
  • These are best served cold or slightly chilled, so keep them in a cooler if you’re taking them on the go.

These Tasty Turkey and Sun-Dried Tomato Pinwheels are chef-approved snack goals. They’re elegant enough to serve at brunch or a baby shower, but easy enough to throw together for weekday lunches.

Every time I make them, I get asked for the recipe—so now it’s here for the world to see! Next time you need a reliable, tasty, and just plain fun recipe, give these pinwheels a try. You won’t regret it.

Turkey and Sun-Dried Tomato Pinwheels
Print

Turkey and Sun-Dried Tomato Pinwheels

Recipe by AdviceFromNobodyCourse: Appetizers, LunchCuisine: AmericanDifficulty: Easy
Servings

4

servings
Prep time

10

minutes
Calories

95

kcal

Ingredients

  • 6 oz. cream cheese, softened at room temperature

  • 1/4 cup sour cream

  • 1/2 cup sun-dried tomatoes, chopped

  • 1 red bell pepper, seeded and finely diced

  • 2 scallions, finely diced

  • 1/4 cup fresh basil leaves, thinly sliced

  • 2 burrito-sized tortillas

  • 8 turkey deli slices

  • Sea salt and black pepper to taste

Directions

  • In a medium bowl, combine cream cheese, sour cream, sun-dried tomatoes, bell pepper, scallions, and basil. Season to taste with salt and pepper. Mix well.
  • Divide the cream cheese mixture in half. Using an offset spatula, spread one-half of the mixture over the tortilla. Top with one-half of the turkey slices, slightly overlapping as needed.
  • Starting at the bottom edge, tightly roll up like a jelly roll.
  • Repeat with the second tortilla. 
  • Wrap the tortillas in parchment paper or plastic wrap and refrigerate for at least 30 minutes or up to 24 hours.
  • When ready to serve, slice into pinwheels and serve immediately or pack into a plastic storage container in a single layer for a picnic.
[jetpack-related-posts]

Slow Cooker Pulled Pork Lettuce Wraps (Flavor-Packed & Low-Carb!)

Filed Under: Food & Drink // 06/02/2025

Slow Cooker Pulled Pork Lettuce Wraps

This delicious low-carb pulled pork recipe takes only 10 minutes to put together. After that, you’re free to do something else while your slow cooker transforms it into a nearly effortless melt-in-your-mouth dish your family will love.

Whether you’re meal-prepping for the week, throwing together a quick weeknight dinner, or hosting a casual get-together, this recipe is a total win. The pork is slow-cooked to tender perfection, infused with a dreamy mix of spices (and a secret ingredient you probably weren’t expecting), then nestled into crisp lettuce leaves for a refreshing bite.

For even tastier results, allow pork to sit in its yummy juices once you’ve pulled it apart. This will allow it to absorb even more of that great flavor.

Also Read: 21 Light & Fresh Lettuce Wrap Recipes

How To Make These Lettuce Wraps

Nothing too fancy here—just a flavorful mix of pantry staples and fresh lettuce to wrap it all up.

PrintPrint

Ingredients For The Lettuce Wraps

  • 2 lbs. pork shoulder – This cut gets so tender and juicy in the slow cooker, it practically shreds itself.

  • 2 tsp onion powder

  • 1 tsp garlic powder

  • 2 tsp dried rosemary – Adds a hint of earthy flavor.

  • 2 tsp smoked paprika – For that rich, smoky taste.

  • ½ tsp cayenne pepper – Just enough to give it a kick (feel free to add more if you like it hot!).

  • 1 tsp ground fennel seeds – This gives the pork a subtle, sausage-y flavor that’s chef’s kiss.

  • 2 tsp unsweetened cocoa powder – Yep, you read that right. Cocoa brings depth and richness—trust the process.

  • Sea salt and black pepper, to taste

  • 1/3 cup organic sugar-free chicken broth – Keeps everything moist and flavorful as it cooks.

  • 8 iceberg or butter lettuce leaves – Your crunchy little edible cups of goodness. Butter lettuce is my personal fave, but use whatever you love.

Step-By-Step Guide

1. Spice It Up

In a small bowl, mix all the dry spices and cocoa powder together. Don’t forget to season it with a good pinch of sea salt and black pepper—don’t be shy here! Rub that spice blend alllll over your pork shoulder. Seriously, give it a good massage. This is where the magic starts.

2. Into the Slow Cooker

Place your seasoned pork in the slow cooker. Pour in the chicken broth—this helps keep things juicy and adds extra flavor while it simmers.

Pop the lid on and cook:

  • On high for 4 hours, or
  • On low for 6 hours

Your kitchen is going to smell amazing during this part, so fair warning—you’ll probably be counting down the minutes.

3. Shred It

Once the pork is tender and falling apart (and trust me, it will be), use two forks to shred it right in the slow cooker. Let the shredded pork hang out in all those juices for 20-30 more minutes on the “warm” setting. It soaks up even more flavor and becomes ultra-moist.

4. Wrap It Up

Now comes the fun part: building your lettuce wraps! Take a lettuce leaf, fill it with some crunchy broccoli slaw (optional, but highly recommended), and pile on that juicy pulled pork. Eat with your hands, napkins close by, and maybe a side of sweet potato fries if you’re feeling extra.

Why You’ll Love These Lettuce Wraps:

  • Low-carb & gluten-free – But still totally satisfying.
  • Meal prep-friendly – Make the pork ahead of time and use it throughout the week.
  • Customizable – Add avocado, a dollop of Greek yogurt, a splash of hot sauce, or whatever you’re craving.
  • Super easy – Minimal effort, major flavor. Your slow cooker does most of the work!

These Slow Cooker Pulled Pork Lettuce Wraps are the ultimate combo of bold flavor and feel-good ingredients. Whether you’re trying to cut back on carbs, eat a little cleaner, or just want something ridiculously tasty, this recipe’s got you covered.

Give it a try and let me know how you dressed yours up—did you add slaw, avocado, pickled onions? The options are endless, and I wanna hear all about it!

Slow Cooker Pulled Pork Lettuce Wraps
Print

Slow Cooker Pulled Pork Lettuce Wraps

Recipe by AdviceFromNobodyCourse: Appetizers, LunchCuisine: AmericanDifficulty: Easy
Servings

4

servings
Prep time

10

minutes
Calories

500

kcal

Ingredients

  • 2 lbs. pork shoulder

  • 2 tsp onion powder

  • 1 tsp garlic powder

  • 2 tsp dried rosemary

  • 2 tsp smoked paprika

  • ½ tsp cayenne pepper

  • 1 tsp ground fennel seeds

  • 2 tsp cocoa powder

  • Sea salt and black pepper, to taste

  • 1/3 cup organic sugar-free chicken broth

  • 8 iceberg or butter lettuce leaves

Directions

  • Combine all spices and the cocoa in a small bowl and season with salt and black pepper to taste.
  • Rub the spice mix all over the pork shoulder and transfer to a 5 or 6-quart slow cooker crock.
  • Add the chicken broth to the crock and cook on high for 4 hours or on low for 6.
  • Once the cooking time is complete, use two forks to pull the pork apart while it is still in the slow cooker crock.
  • Allow the pulled pork to remain in the juices with the slow cooker set to “warm” for 20-30 minutes to absorb more flavor.
  • To serve, fill each lettuce leaf with crunchy broccoli slaw and top with some pulled pork. Enjoy!
[jetpack-related-posts]

Super Easy Buffalo Chicken Lettuce Wraps

Filed Under: Food & Drink // 06/01/2025

buffalo chicken lettuce wraps

Okay, real talk—some nights you just don’t want to cook an elaborate dinner. You want something quick, easy, and maybe even a little healthy. But you also want it to taste like it came from your favorite neighborhood pub. If you’re nodding your head yes, then let me introduce you to your new go-to: Buffalo Chicken Lettuce Wraps.

These are everything you love about buffalo wings—spicy, tangy, and just a little messy—but with a fresh, light twist thanks to the crisp Bibb lettuce. And the best part? They’re made with rotisserie chicken, so there’s almost no actual cooking involved. Just a bit of sautéing, a whole lot of flavor, and boom—you’ve got dinner in under 30 minutes.

Also Read: 21 Light & Fresh Lettuce Wrap Recipes

Why You’ll Love These Buffalo Chicken Lettuce Wraps

Let’s start with what makes these wraps absolutely crave-worthy:

  • Fast and fuss-free: Using pre-cooked rotisserie chicken is a major time saver. Just shred, heat, and go.
  • Healthier than takeout: These wraps are low-carb and full of veggies, but still totally satisfying.
  • Packed with flavor: Between the sautéed veggies, hot sauce, and seasonings, you won’t miss the bun (or the guilt).
  • Totally customizable: Want to add ranch or blue cheese crumbles? Go for it. Prefer a different hot sauce? Do your thing.

How To Make These Buffalo Chicken Lettuce Wraps

PrintPrint

Ingredients For These Buffalo Chicken Lettuce Wrapsu003cspan id=u0022docs-internal-guid-d72b4a2d-7fff-2c4a-bf5b-2ca4a586771cu0022 style=u0022font-weight:normal;u0022u003eu003cdivu003eu003cspan style=u0022font-size: 12pt; font-family: Arial, sans-serif; color: rgb(0, 0, 0); background-color: transparent; font-weight: 700; font-variant-numeric: normal; font-variant-east-asian: normal; font-variant-alternates: normal; font-variant-position: normal; font-variant-emoji: normal; vertical-align: baseline;u0022u003eu003c/spanu003eu003c/divu003eu003c/spanu003e

  • 2 tablespoons coconut oil

  • 1 green bell pepper, finely diced

  • 2 celery stalks, diced

  • 1½ lbs. rotisserie chicken breast, shredded (hello, time saver!)

  • 2 teaspoons onion powder

  • 1 teaspoon garlic powder

  • Salt and pepper, to taste

  • ½ cup Frank’s hot sauce (or your favorite buffalo-style sauce)

  • 2 green onions, sliced

  • To Serve
  • 1 head Bibb or butter lettuce, leaves removed, washed, and patted dry

Step-By-Step Guide

Step 1: Sauté the Veggies

Start by heating the coconut oil in a large sauté pan over medium heat. Once it’s melted, toss in your diced green bell pepper and celery. You’ll want to sauté these for about 5 minutes, or until they’re tender but still have a slight bite. They add a nice crunch and flavor that balance out the spicy chicken later on.

Step 2: Add the Chicken and Seasoning

Now it’s time to toss in your shredded rotisserie chicken—seriously, how easy is that? Sprinkle in the onion powder and garlic powder, and season with a bit of salt and pepper. Stir everything well and let it cook for 2 to 3 minutes, just until the chicken is heated through and infused with all those lovely spices.

Step 3: Bring the Heat

Here’s where things get fun. Pour in the hot sauce (Frank’s is the classic, but feel free to get spicy with your favorite brand). Stir it all together and let it cook for another minute or two. The sauce should coat everything beautifully and be piping hot by the time you’re done.

Step 4: Add the Green Onions

Turn off the heat and stir in the sliced green onions for a little fresh, peppery bite. That’s it—you’re done!

Now comes the fun part: assembling your wraps.

Grab your Bibb or butter lettuce leaves (the softer, cuppier ones work best), and scoop in a few tablespoons of the buffalo chicken mixture. Don’t be shy—it’s okay if things get a little messy. These are finger foods, after all.

If you want to get extra with it, add a drizzle of ranch or blue cheese dressing, a sprinkle of shredded carrots, or even some avocado slices for a creamy twist.

Buffalo Chicken Lettuce Wraps are proof that healthy meals don’t have to be boring. They’re spicy, satisfying, and totally hit the spot—especially when you’re short on time but still want something homemade and delicious.

So the next time you’re tempted to grab takeout, remember this recipe. With a few simple ingredients and barely any cooking, you’ll have a flavor-packed meal that tastes like game-day eats but feels like a clean, fresh dinner. Total win-win.

Let me know if you try them out—tag me with your lettuce wrap creations or drop your own twist in the comments. Happy cooking

Buffalo Chicken Lettuce Wraps
Print

Buffalo Chicken Lettuce Wraps

Recipe by AdviceFromNobodyCourse: Appetizers, LunchCuisine: AmericanDifficulty: Easy
Servings

4

servings
Prep time

10

minutes
Cooking time

15

minutes
Calories

331

kcal

Ingredients

  • 2 Tbs coconut oil

  • 1 green bell pepper, finely diced

  • 2 celery stalks, diced

  • 1½ lbs. rotisserie chicken breast, shredded

  • 2 tsp onion powder

  • 1 tsp garlic powder

  • Salt and pepper, to taste

  • ½ cup Frank’s hot sauce

  • 2 green onions, sliced

  • To Serve
  • 1 head Bibb or butter lettuce, leaves removed, washed and patted dry

Directions

  • Melt the coconut oil in a large sauté pan over medium heat. Add the diced pepper and celery, and sauté until tender, around 5 minutes.
  • Add the chicken, onion powder, and garlic powder. Stir well and season with salt and pepper, to taste. Cook for 2-3 minutes, or until the chicken is heated through.
  • Add the hot sauce and sauté while stirring for another minute or two, until the sauce is heated through and everything is well coated. Remove from heat and stir in the sliced green onions.
  • To serve, fill Bibb lettuce cups with a few tablespoons of the chicken mixture and enjoy!
[jetpack-related-posts]

Easy & Flavor-Packed Chinese Pork Lettuce Wraps You’ll Want on Repeat

Filed Under: Food & Drink // 06/01/2025

If you’re looking for a quick, delicious, and better-than-takeout dinner idea, Chinese pork lettuce wraps are about to become your new obsession. Packed with savory ground pork, crunchy water chestnuts, and a mouthwatering hoisin-soy sauce combo, these wraps are the perfect balance of flavor and freshness.

Whether you’re throwing together a weeknight meal or hosting a fun appetizer night, these lettuce wraps are a total crowd-pleaser—and way easier to make than you might think. Grab some crisp lettuce leaves and let’s get cooking!

Also Read: 21 Light & Fresh Lettuce Wrap Recipes

How To Make These Chinese Pork Lettuce Wraps

PrintPrint

Ingredients For This Recipe

  • 1 Tbs coconut oil

  • 1 small onion, diced

  • 2 garlic cloves, minced

  • 2 medium carrots, finely diced

  • 8 oz. mushrooms, chopped

  • 1 lb. ground pork

  • 1 8-oz. can water chestnuts, drained and chopped

  • 3 Tbs low-sodium soy sauce

  • 2 Tbs oyster sauce

  • 1 Tbs sesame oil

  • 2 Tbs rice vinegar

  • 8-10 lettuce leaves

  • 2 scallions, sliced

  • 1/4 cup roasted salted cashews, roughly chopped

  • lime wedges, for serving

  • salt and pepper to taste

Step-By-Step Guide

1. Heat coconut oil in a large deep skillet over medium heat. 

2. Add onion, garlic, carrots, mushrooms, and pork; lightly season with salt and pepper. Cook, stirring occasionally, until the vegetables soften and the pork begins to brown, approximately 4-5 minutes.

3. Add water chestnuts and continue cooking until the pork is cooked through, another 2-3 minutes. 

4. Reduce heat to medium-low and add soy sauce, oyster sauce, sesame oil, and rice vinegar. Cook, stirring occasionally, until the sauce thickens, 6-7 minutes.

5. Spoon the pork mixture into lettuce wraps and top with sliced scallions and roasted cashews. Serve with a lime wedge and enjoy!

How to Cook Fresh Water Chestnuts

  1. Scratch chestnuts with a knife.
  2. Add chestnuts to a small pan with 2 cups of water.
  3. Add 1/2 tsp salt and 1/2 tsp sugar.
  4. Boil for 20 minutes or until soft. Note – check at 15 minutes with a knife. When cooked, chestnuts will be walnut soft.  
  5. Once cooked, drain the black water and wash the chestnuts.
  6. Let cool, peel, and slice or chop as the recipe requires.

Also Read: All About Water Chestnuts and How to Cook With Them

And there you have it—easy, flavorful Chinese pork lettuce wraps that are light, satisfying, and totally crave-worthy. They’re perfect for busy weeknights, casual get-togethers, or anytime you want something a little different (and a lot delicious).

Plus, they’re super customizable, so feel free to add your favorite toppings or spice it up to your liking. Once you try them, don’t be surprised if they end up on repeat in your kitchen. Enjoy!

Chinese Pork Lettuce Wraps
Print

Chinese Pork Lettuce Wraps

Recipe by AdviceFromNobodyCourse: Lunch, AppetizersCuisine: ChineseDifficulty: Easy
Servings

4

servings
Prep time

10

minutes
Cooking time

15

minutes
Calories

370

kcal

Ingredients

  • 1 Tbs coconut oil

  • 1 small onion, diced

  • 2 garlic cloves, minced

  • 2 medium carrots, finely diced

  • 8 oz. mushrooms, chopped

  • 1 lb. ground pork

  • 1 8-oz. can water chestnuts, drained and chopped

  • 3 Tbs low-sodium soy sauce

  • 2 Tbs oyster sauce

  • 1 Tbs sesame oil

  • 2 Tbs rice vinegar

  • 8-10 lettuce leaves

  • 2 scallions, sliced

  • 1/4 cup roasted salted cashews, roughly chopped

  • lime wedges, for serving

  • salt and pepper to taste

Directions

  • Heat coconut oil in a large deep skillet over medium heat.
  • Add onion, garlic, carrots, mushrooms, and pork; lightly season with salt and pepper. Cook, stirring occasionally, until the vegetables soften and the pork begins to brown, approximately 4-5 minutes.
  • Add water chestnuts and continue cooking until the pork is cooked through, another 2-3 minutes.
  • Reduce heat to medium-low and add soy sauce, oyster sauce, sesame oil, and rice vinegar. Cook, stirring occasionally, until the sauce thickens, 6-7 minutes.
  • Spoon the pork mixture into lettuce wraps and top with sliced scallions and roasted cashews. Serve with a lime wedge and enjoy!
  • How To Cook Fresh Water Chestnuts
  • Scratch chestnuts with a knife.
  • Add chestnuts to a small pan with 2 cups of water.
  • Add 1/2 tsp salt and 1/2 tsp sugar.
  • Boil for 20 minutes or until soft. Note – check at 15 minutes with a knife. When cooked, chestnuts will be walnut soft.
  • Once cooked, drain the black water and wash the chestnuts.
  • Let cool, peel, and slice or chop as the recipe requires.
[jetpack-related-posts]

Classic Cherries Jubilee: A Flambé Dessert That Never Goes Out of Style

Filed Under: Food & Drink // 05/31/2025

If you’ve ever wanted to add a little drama to dessert, Classic Cherries Jubilee is your showstopper. This old-school delight is elegant, fruity, and famously flambéed—literally! Made with juicy cherries, a splash of liqueur, and a warm, boozy flame, it’s the kind of dessert that turns an ordinary dinner into a celebration.

Whether you’re whipping it up for a dinner party or just treating yourself to something special, this timeless treat is surprisingly simple to make and absolutely unforgettable. Let’s bring a bit of vintage charm to your kitchen with this fiery favorite!

Also Read: Decadent Cherry & Chocolate Puff Pastry Tart You’ll Love

How To Make Cherries Jubilee

PrintPrint

Ingredients For Cherries Jubilee

  • 3 cups fresh or frozen cherries, pitted

  • 3 Tbs granulated sugar

  • 1 Tbs fresh lemon juice

  • 1/4 cup kirsch or rum

  • vanilla ice cream, for serving

  • chopped almonds or crushed cookies, for serving

Also Read: 39 Creative and Delicious Fresh Cherry Recipes

Step-By-Step Guide

1. Combine cherries, sugar, and lemon juice in a medium skillet over medium heat. 

2. Cook, stirring occasionally, until the sugar is dissolved and the cherries release their juices, approximately 6-7 minutes.

3. Remove the skillet from the heat and pour in the rum. Carefully ignite the alcohol with a utility lighter and return the skillet back to medium heat. 

4. Gently shake the pan with the cherries until the flame extinguishes itself. 

5. Stir the cherries and continue cooking for another minute. 

6. If you prefer to skip flambéing, you could just cook out the alcohol on the stovetop or skip the alcohol altogether and add a splash of cherry juice and vanilla extract in its place.

7. Spoon the cherry jubilee over vanilla ice cream and top with almonds or cookies, if desired. 

8. Serve immediately and enjoy!

Classic Cherries Jubilee proves that some desserts truly never go out of style. With its rich cherry flavor, stunning presentation, and just the right touch of boozy flair, it’s the perfect way to end a meal on a high note.

Whether you’re impressing guests or indulging in a little nostalgic treat for yourself, this fiery favorite is always a crowd-pleaser. So grab your cherries, light the flame, and enjoy a taste of timeless elegance—one delicious spoonful at a time.

Classic Cherries Jubilee
Print

Classic Cherries Jubilee

Recipe by AdviceFromNobodyCourse: DessertCuisine: FrenchDifficulty: Easy
Servings

4

servings
Prep time

10

minutes
Cooking time

10

minutes
Calories

320

kcal

Ingredients

  • 3 cups fresh or frozen cherries, pitted

  • 3 Tbs granulated sugar

  • 1 Tbs fresh lemon juice

  • 1/4 cup kirsch or rum

  • vanilla ice cream, for serving

  • chopped almonds or crushed cookies, for serving

Directions

  • Combine cherries, sugar, and lemon juice in a medium skillet over medium heat. 
  • Cook, stirring occasionally, until the sugar is dissolved and the cherries release their juices, approximately 6-7 minutes.
  • Remove the skillet from the heat and pour in the rum. Carefully ignite the alcohol with a utility lighter and return the skillet back to medium heat. 
  • Gently shake the pan with the cherries until the flame extinguishes itself. 
  • Stir the cherries and continue cooking for another minute. 
  • If you prefer to skip flambéing, you could just cook out the alcohol on the stovetop or skip the alcohol altogether and add a splash of cherry juice and vanilla extract in its place.
  • Spoon the cherry jubilee over vanilla ice cream and top with almonds or cookies, if desired. 
  • Serve immediately and enjoy!

    [jetpack-related-posts]
    • « Previous Page
    • 1
    • …
    • 12
    • 13
    • 14
    • 15
    • 16
    • …
    • 48
    • Next Page »

    Copyright © 2026 · Theme by Marketing Templates Co.

    We use cookies on our website to give you the most relevant experience by remembering your preferences and repeat visits.Read More By clicking “Accept All”, you consent to the use of ALL the cookies. However, you may visit "Cookie Settings" to provide a controlled consent.
    Cookie SettingsAccept All
    Manage consent

    Privacy Overview

    This website uses cookies to improve your experience while you navigate through the website. Out of these, the cookies that are categorized as necessary are stored on your browser as they are essential for the working of basic functionalities of the website. We also use third-party cookies that help us analyze and understand how you use this website. These cookies will be stored in your browser only with your consent. You also have the option to opt-out of these cookies. But opting out of some of these cookies may affect your browsing experience.
    Necessary
    Always Enabled
    Necessary cookies are absolutely essential for the website to function properly. These cookies ensure basic functionalities and security features of the website, anonymously.
    CookieDurationDescription
    cookielawinfo-checkbox-analytics11 monthsThis cookie is set by GDPR Cookie Consent plugin. The cookie is used to store the user consent for the cookies in the category "Analytics".
    cookielawinfo-checkbox-functional11 monthsThe cookie is set by GDPR cookie consent to record the user consent for the cookies in the category "Functional".
    cookielawinfo-checkbox-necessary11 monthsThis cookie is set by GDPR Cookie Consent plugin. The cookies is used to store the user consent for the cookies in the category "Necessary".
    cookielawinfo-checkbox-others11 monthsThis cookie is set by GDPR Cookie Consent plugin. The cookie is used to store the user consent for the cookies in the category "Other.
    cookielawinfo-checkbox-performance11 monthsThis cookie is set by GDPR Cookie Consent plugin. The cookie is used to store the user consent for the cookies in the category "Performance".
    viewed_cookie_policy11 monthsThe cookie is set by the GDPR Cookie Consent plugin and is used to store whether or not user has consented to the use of cookies. It does not store any personal data.
    Functional
    Functional cookies help to perform certain functionalities like sharing the content of the website on social media platforms, collect feedbacks, and other third-party features.
    Performance
    Performance cookies are used to understand and analyze the key performance indexes of the website which helps in delivering a better user experience for the visitors.
    Analytics
    Analytical cookies are used to understand how visitors interact with the website. These cookies help provide information on metrics the number of visitors, bounce rate, traffic source, etc.
    Advertisement
    Advertisement cookies are used to provide visitors with relevant ads and marketing campaigns. These cookies track visitors across websites and collect information to provide customized ads.
    Others
    Other uncategorized cookies are those that are being analyzed and have not been classified into a category as yet.
    SAVE & ACCEPT