For many looking for that perfect, sun-kissed glow has led them away from the harmful rays of the sun and into the world of sunless tanners.
Among these, self-tanning lotions and sunless spray tans have emerged as the frontrunners.
Both these sunless tanning products offer a golden glow without the risk of skin cancer or skin damage and premature aging associated with UV radiation.
But the choice between the comfort of applying self-tanning lotion at home or the coverage promised by a professional spray tan session can be a hard one to make.
- Everything You Need To Know About Tanning & Laser Hair Removal
- The Best Way to Tan Legs in a Tanning Bed or Sun Fast
- Does Self-Tanning Lotion Expire? +How To Make It Last Long
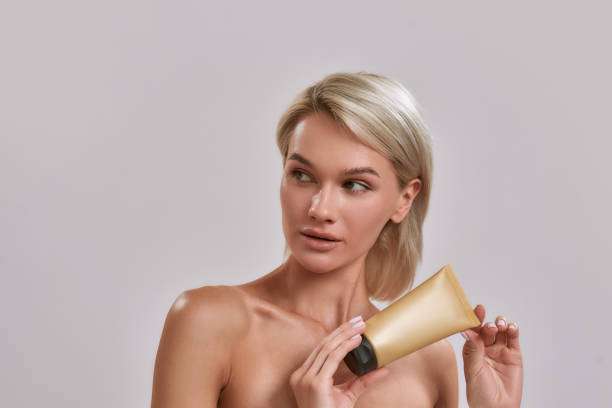
What Is Self-Tanning Lotions
Self-tanning lotions, featuring DHA as their active ingredient, interact with amino acids within your skin to create a perfect tan.
This fantastic reaction gifts you with that sought-after sun-kissed glow, minus the sun damage.
For the DIY girlies, self-tanner lotions are a great option over going to the beauty salon or the heat of a tanning bed.
They offer the golden glow of a natural-looking fake tan, without having to spend too much or even leave the house.
What Are The Pros of Self-Tanning Lotion
Self-tanning lotions are a great option for achieving that perfect glow from the comfort of your own home.
For those with pale skin or sensitive skin, it’s seen as the best way to get a natural-looking tan.
Unlike the sun bed, these self-tanning lotions keep your skin safe from sun damage, making it a safer alternative overall.
Not to mention, you dodge the unpleasant odor often associated with spray tans.
What Are The Cons of Self-Tanning Lotion
Self-tanning lotions, despite their convenience for home use, can leave you with uneven patches if not applied perfectly.
Achieving a streak-free tan requires patience and experience. Some self-tanners may result in an orange hue, far from the natural-looking tan you aimed for.
Additionally, the scent of certain lotions can be off-putting, lingering on your skin longer than you’d like. Given these cons, while self tanners present a safer alternative to UV exposure, they’re not perfect.
How to Use Self Tanning Lotion
Achieving that perfect glow at home has never been easier with self-tanning lotions.
However, preparing your skin is important; make sure your skin is cleansed and exfoliated to remove dead skin cells for an even tan.
For the application process, using an applicator mitt helps spread the lotion smoothly across your entire body, avoiding any streaks or patches.
Finally, aftercare involves keeping your skin moisturized to extend the tan’s lifespan and wearing broad-spectrum sunscreen to protect the newly tanned skin.
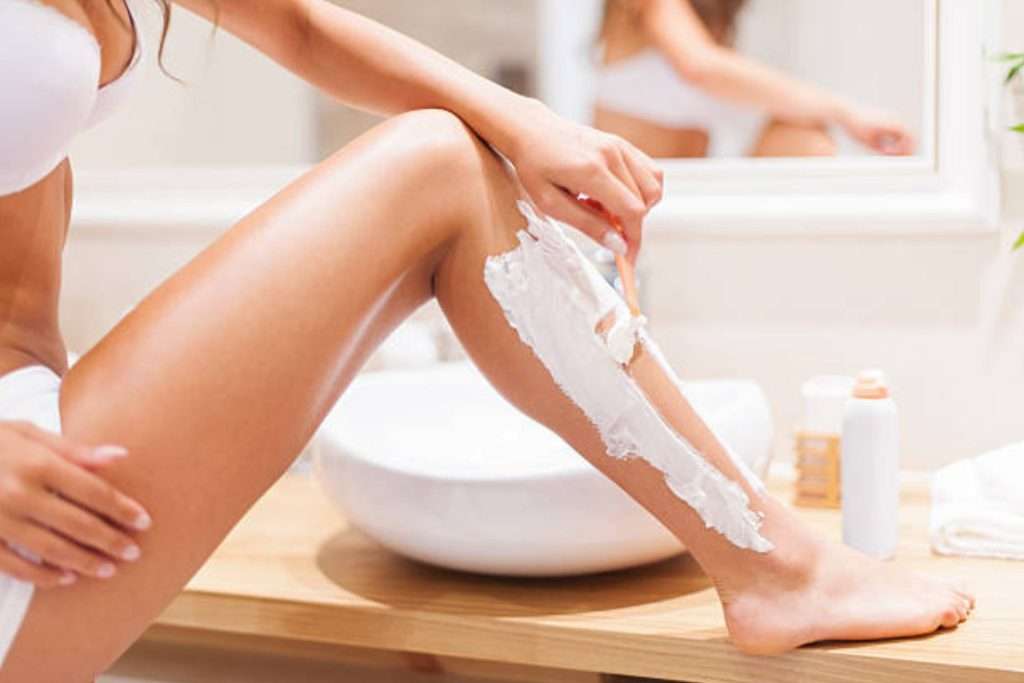
- Should You Shave Before Or After You Fake Tan
- What’s The Best Time To Tan Before or After My Workout?
Recommended Sunless Tanners And Applicator Mitts
For achieving that desired golden glow from the comfort of your own home, consider these exceptional sunless tanners and their perfect companions.
- L’Oreal Paris Sublime Bronze Self-Tanning Water Mousse: Ideal for those with pale or sensitive skin.
- Eight Saints Island Time Body Spray Lotion: A fantastic option for those with dry skin.
- Australian Gold Moisture Lock Tan Extender Lotion: Perfect for extending the longevity of your tan, this lotion works wonders for oily, dry, or combination skin types.
- Bronze Tan Self Tanning Mitt for Self Tan: Ensure an even application without the unpleasant odor or risk of sun damage. Its soft texture is suitable for every skin type.
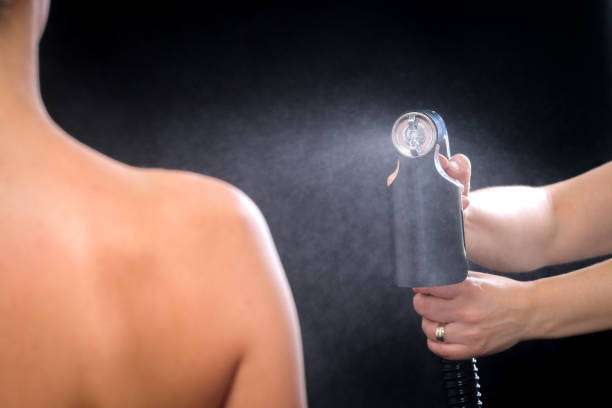
What Is Sunless Spray Tanning

Professional spray tanning is nothing new to the beauty world, it offers a safer option compared to the hazardous UV rays of the sun or tanning bed.
Here, a tan artist wields a spray gun or guides you into a tan booth, where a mist covers your entire body, creating a flawless, sun-kissed glow.
It’s the best option for a special occasion or a uniform tan without sun exposure.
The process is quick, the results stunning, making it a great option for those with little time but high expectations for their faux glow.
What Are The Pros of Professional Spray Tans
Professional spray tans promise a golden glow you might have thought only the sun could provide.
They allow for an even, full-body tan, ideal for special occasions or when you desire a flawless sun-kissed glow.
The expertise of a tan artist ensures you avoid the common pitfalls of self-application, such as streaks or uneven color.
For many, it’s a great option, combining the ease of a salon visit with the safety of UV-free tanning.
What Are The Cons of Professional Spray Tans
Professional spray tans often come with a steep price and require making appointments that might not fit into a busy schedule.
The process, involving a tan booth or a spray gun wielded by a tan artist, can feel less personal and somewhat clinical.
For those with sensitive skin, the broad-spectrum formulations used might cause reactions or just simply not agree with their skin type, making this a risky option for achieving that sun-kissed glow.
How To Get The Best Results From Your Salon Spray Tan
For the golden glow of your dreams, booking a session at a beauty salon is only the start. A great outcome will depend on a few smart moves.
First, exfoliate your skin to shed dead cells; this ensures an even coverage.
Moisturize, especially on dry areas like elbows and knees, since these spots absorb more tan solution.
Wear loose clothing post-session to avoid tan lines.
With these steps, a perfect, sun-kissed look isn’t just possible; it’s guaranteed.
Ease of Application: Self-Tanning Lotion vs. Spray
Applying a self-tanning mousse at home is super convenient.
You’ll find the control you have hard to give up if you choose to switch to spray tans. It beats the hassle of arranging a tan session at a beauty salon every time.
On the flip side, professional spray tans require special equipment you can’t use on your own.
These spray guns and tan booths need a skilled tan artist to ensure a faux glow free of tan lines or uneven patches.
Cost and Accessibility: Self-Tanning Lotion vs. Spray
Diving into the expense of achieving that perfect glow, you’ll find self-tanning lotions and mousses to be your wallet’s best friend.
While enticing for their even and full-body tan, professional spray tan sessions demand a heftier price tag and commitment.
The appeal of self-tanning options lies in their convenience and cost-effectiveness, a single bottle offers multiple uses.
For those seeking a sun-kissed glow without burning through their savings, self-tanners and applicator mitts emerge as the superior choice.
Skin Health and Safety: Self-Tanning Lotion vs. Spray
Choosing between sunless tanners and spray tanning should always involve considering your skin health.
Products approved by the Skin Cancer Foundation present safer alternatives to UV radiation exposure. Be mindful of skin type, as dry or sensitive skin might react differently.
A common misconception revolves around a quick fix without consequences. It is pivotal to conduct a patch test, ensuring the chosen method doesn’t aggravate skin sensitivities or pose a risk of skin cancer.
Both options have their benefits, yet caution and care are still important.
- Will Spray Tanning Protect You From a Sunburn?
- Self Tanning Aftercare: Best Moisturizer to Use After a Spray Tan
Aftercare: Self Tanning Lotion vs Spray Tanning
Once you’ve achieved that sun-kissed glow, what comes next is just as important. The longevity of your tan, be it from a salon spray tan or self-tanner lotions, heavily depends on aftercare practices.
Moisturizing your skin is key; it will keep your skin hydrated and help maintain that golden glow.
Avoiding long baths and too much time in the water helps prevent your tan color from fading too fast.
For both spray tanning and self-tanning lotion applications, gentle patting instead of harsh drying post-shower can extend the life of your tan.
Remember, a broad-spectrum sunscreen is still necessary to protect your skin from sun damage, even with a self tan.